Domain SearchInstantly check and register your perfect .pk or international domain
 Web HostingGet a .pk domain for as low as PKR 467
 cPanel HostingUser-friendly hosting powered by cPanel
 Reseller HostingLaunch your own hosting business with minimal technical requirements
 Windows HostingOptimized for Windows-based applications and websites
 Affiliate ProgramEarn referral commissions by promoting our services
 WordPress HostingFast & Reliable WordPress Hosting
 Domain TransferMigrate your existing domain seamlessly with zero downtime.
 All DomainsAccess 324+ top-level domains (TLDs) worldwide from a single platform
 Whois LookupIdentify the owner of any domain using our whois and rdap lookup tool
 Managed VPS Hosting
 AI Website BuilderCreate beautiful websites effortlessly using intuitive drag-and-drop features
 Online ShopLaunch a professional online shop with no technical skills required
 BlogDiscover expert guides on hosting, websites, SEO, and digital growth strategies
 ContactGet instant assistance via live chat or email
 SupportAccess help articles, tutorials, and service documentation
 SSL CertificatesEncrypt data, build trust, and boost SEO.
Uploading a website to cPanel sounds technical until you’ve done it once, then it’s just ten short steps you’ll remember for good.
Once you’ve built a static HTML/CSS site, a custom PHP application, or a full WordPress install on your local machine, getting it live on your hosting account follows the same reliable path.
It’s still the same process you’ll follow when you backup a site and need to get it back online.
Before you start, make sure you have the right tools to save you from stopping mid-upload to go find something:
- A hosting account with cPanel access. If you don’t have one yet, Truehost’s cPanel Hosting plans come with it built in, along with free SSL and local support.
- Your website files in one folder on your computer: HTML, CSS, JS, images, PHP, whatever your site is built from.
- For WordPress or any CMS: an exported database file, usually in
.sqlformat, and your configuration details. - Configuration files ready: things like
.htaccessorwp-config.php, if you’re migrating an existing site. - A stable internet connection. Larger sites take time to upload, and you don’t want the connection dropping halfway.
If your site has more than a handful of files, zip the whole folder before you upload it. It’s faster, and it avoids the partial-upload errors that come with transferring hundreds of small files one by one.
One more thing worth doing now: test your site locally and make sure everything works. It’s much easier to catch a broken link or a missing image before it’s live than after.
With that sorted, here’s how to upload a website to cPanel, step by step.
Steps to Upload a Website to cPanel
Step 1: Log In to cPanel
Start by opening your cPanel login page. Your hosting provider normally gives you the login details when your hosting account is created.
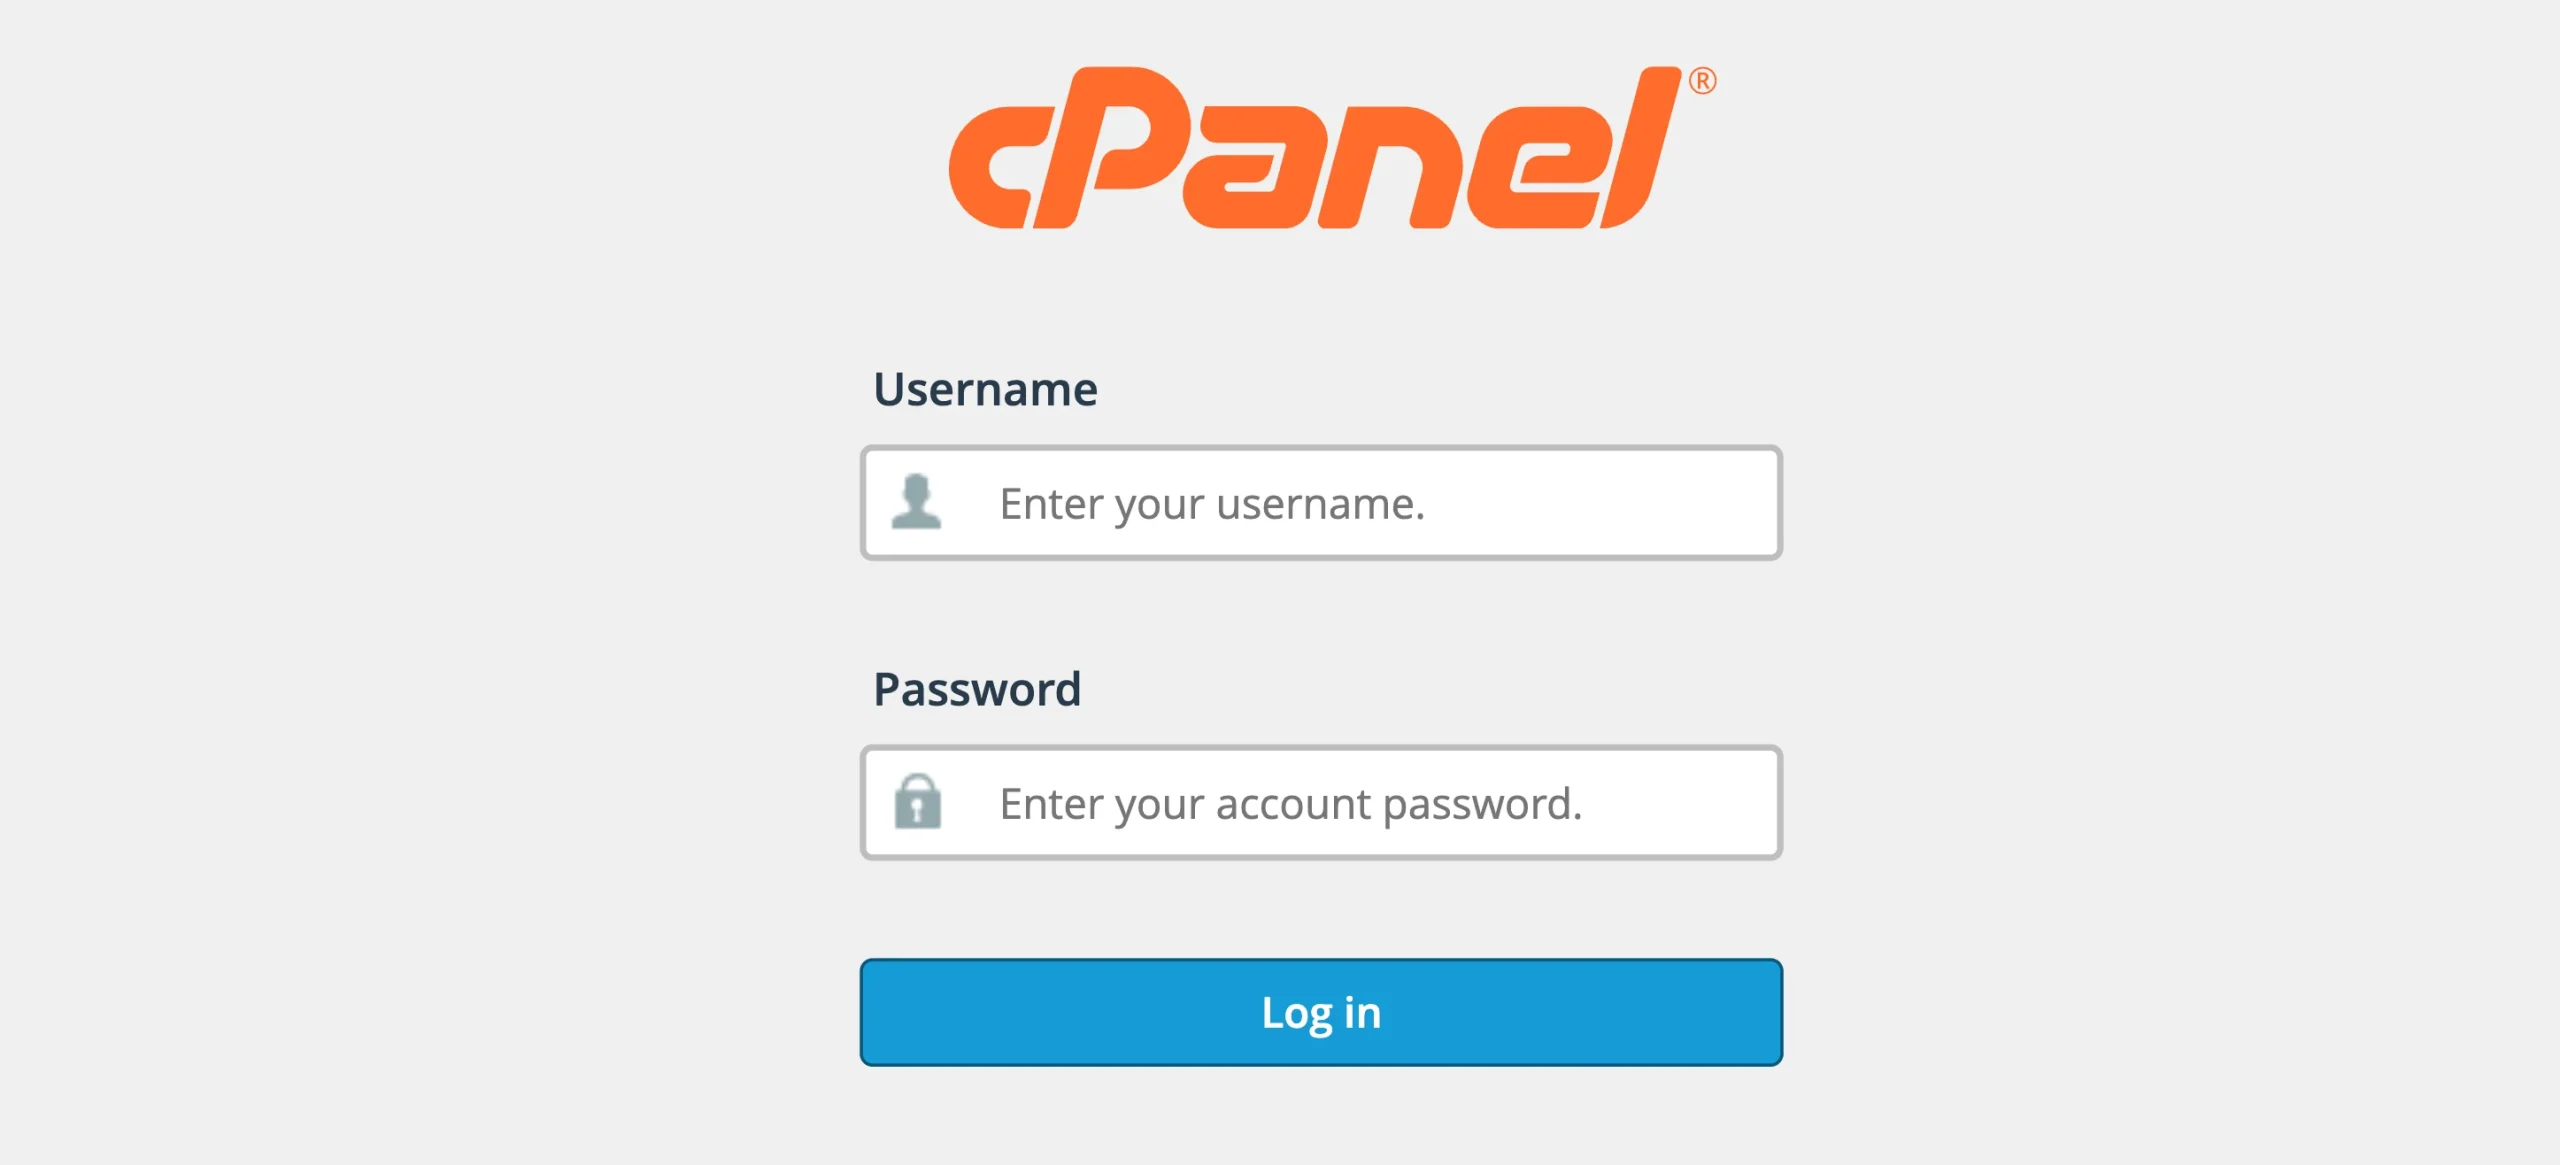
Two common cPanel login formats are:
https://yourdomain.com/cpanelhttps://yourdomain.com:2083
You can also reach cPanel directly through your Truehost client area, so no need to memorize the URL separately.
Enter your cPanel username and password, then log in.
Step 2: Open File Manager
Once cPanel opens, look for the Files section and select File Manager.
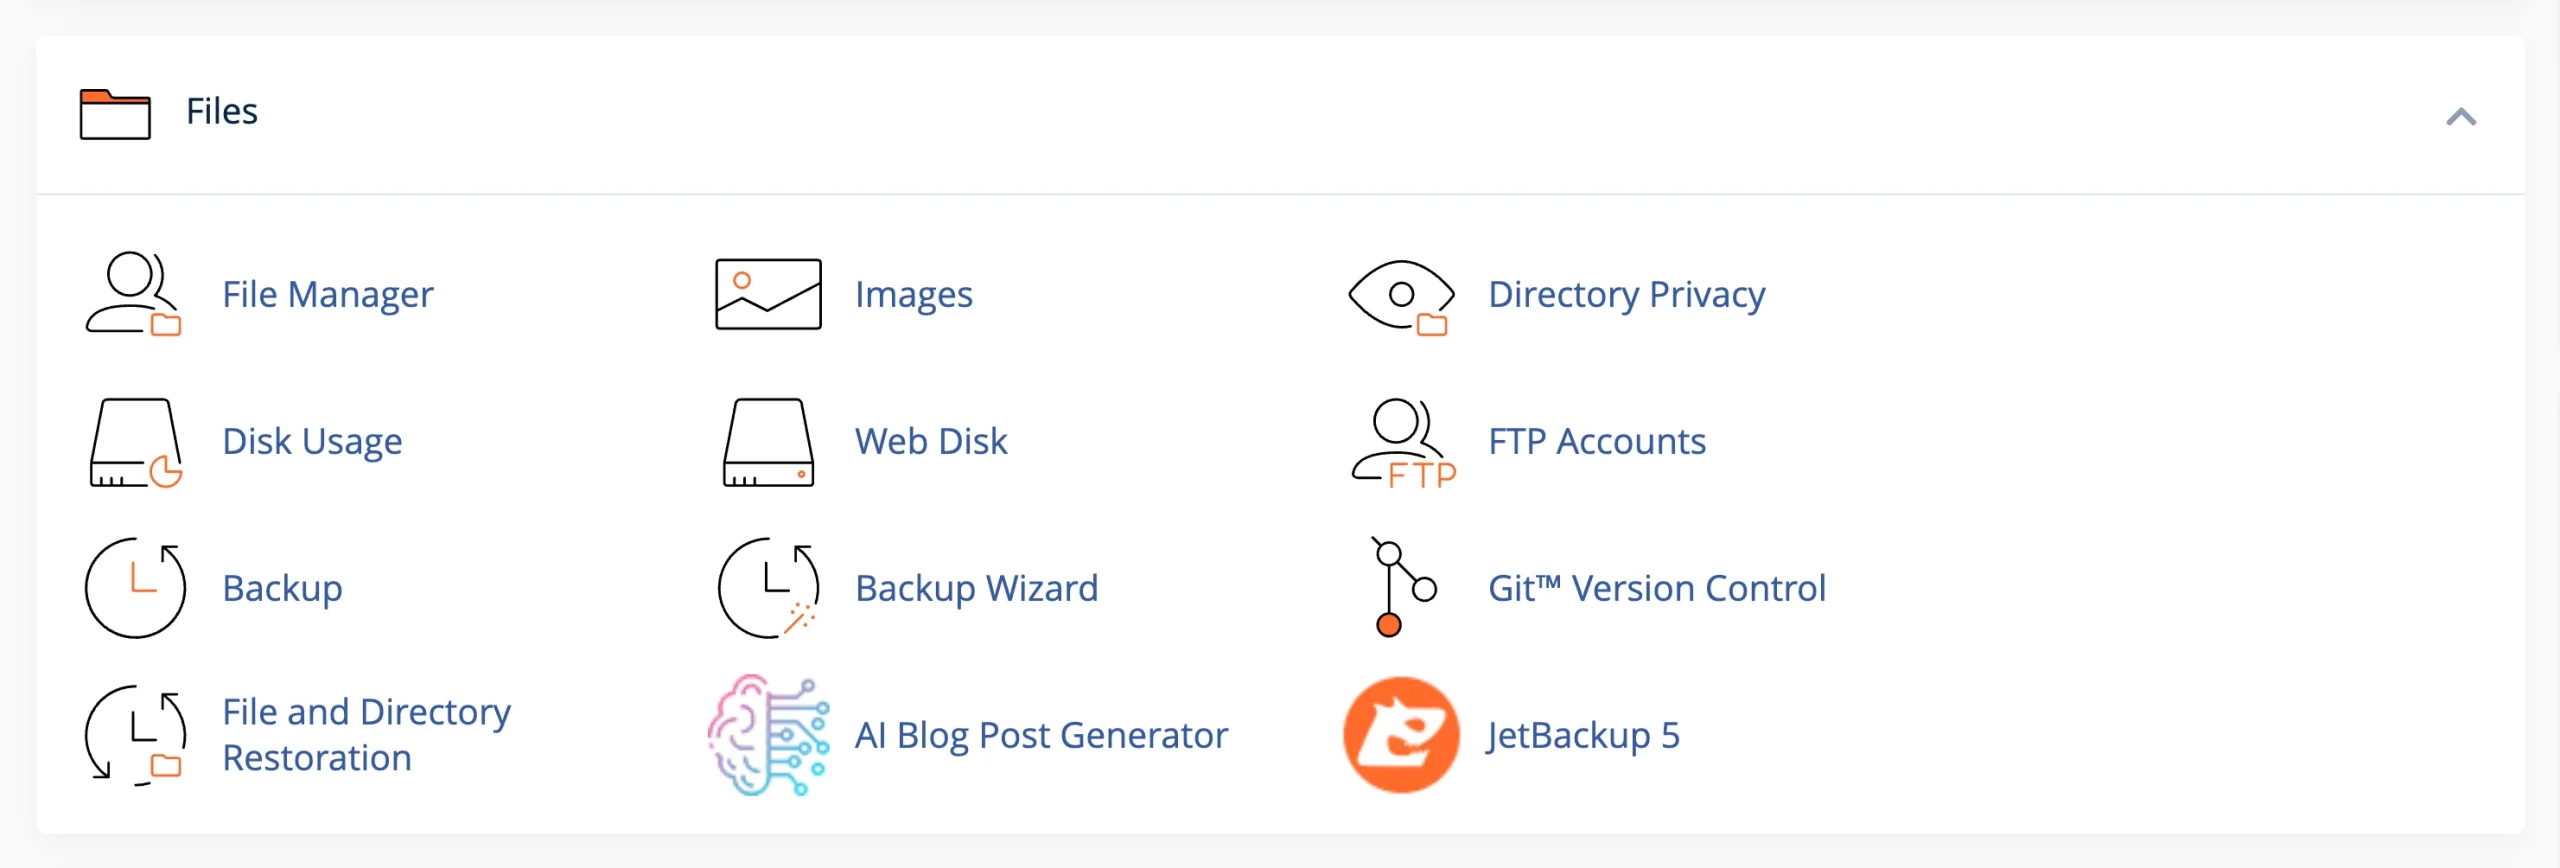
File Manager gives you a browser-based view of the files and folders stored on your hosting account. You can upload, download, move, rename, edit, extract, and delete files from here.
That means you don’t need separate FTP software just to upload a normal website.
Step 3: Navigate to public_html
Inside File Manager, you’ll see the folders belonging to your hosting account and a directory tree on the left.
For the primary domain, open public_html. This is your website’s root folder, meaning it’s where any file you want visitors to see needs to live.
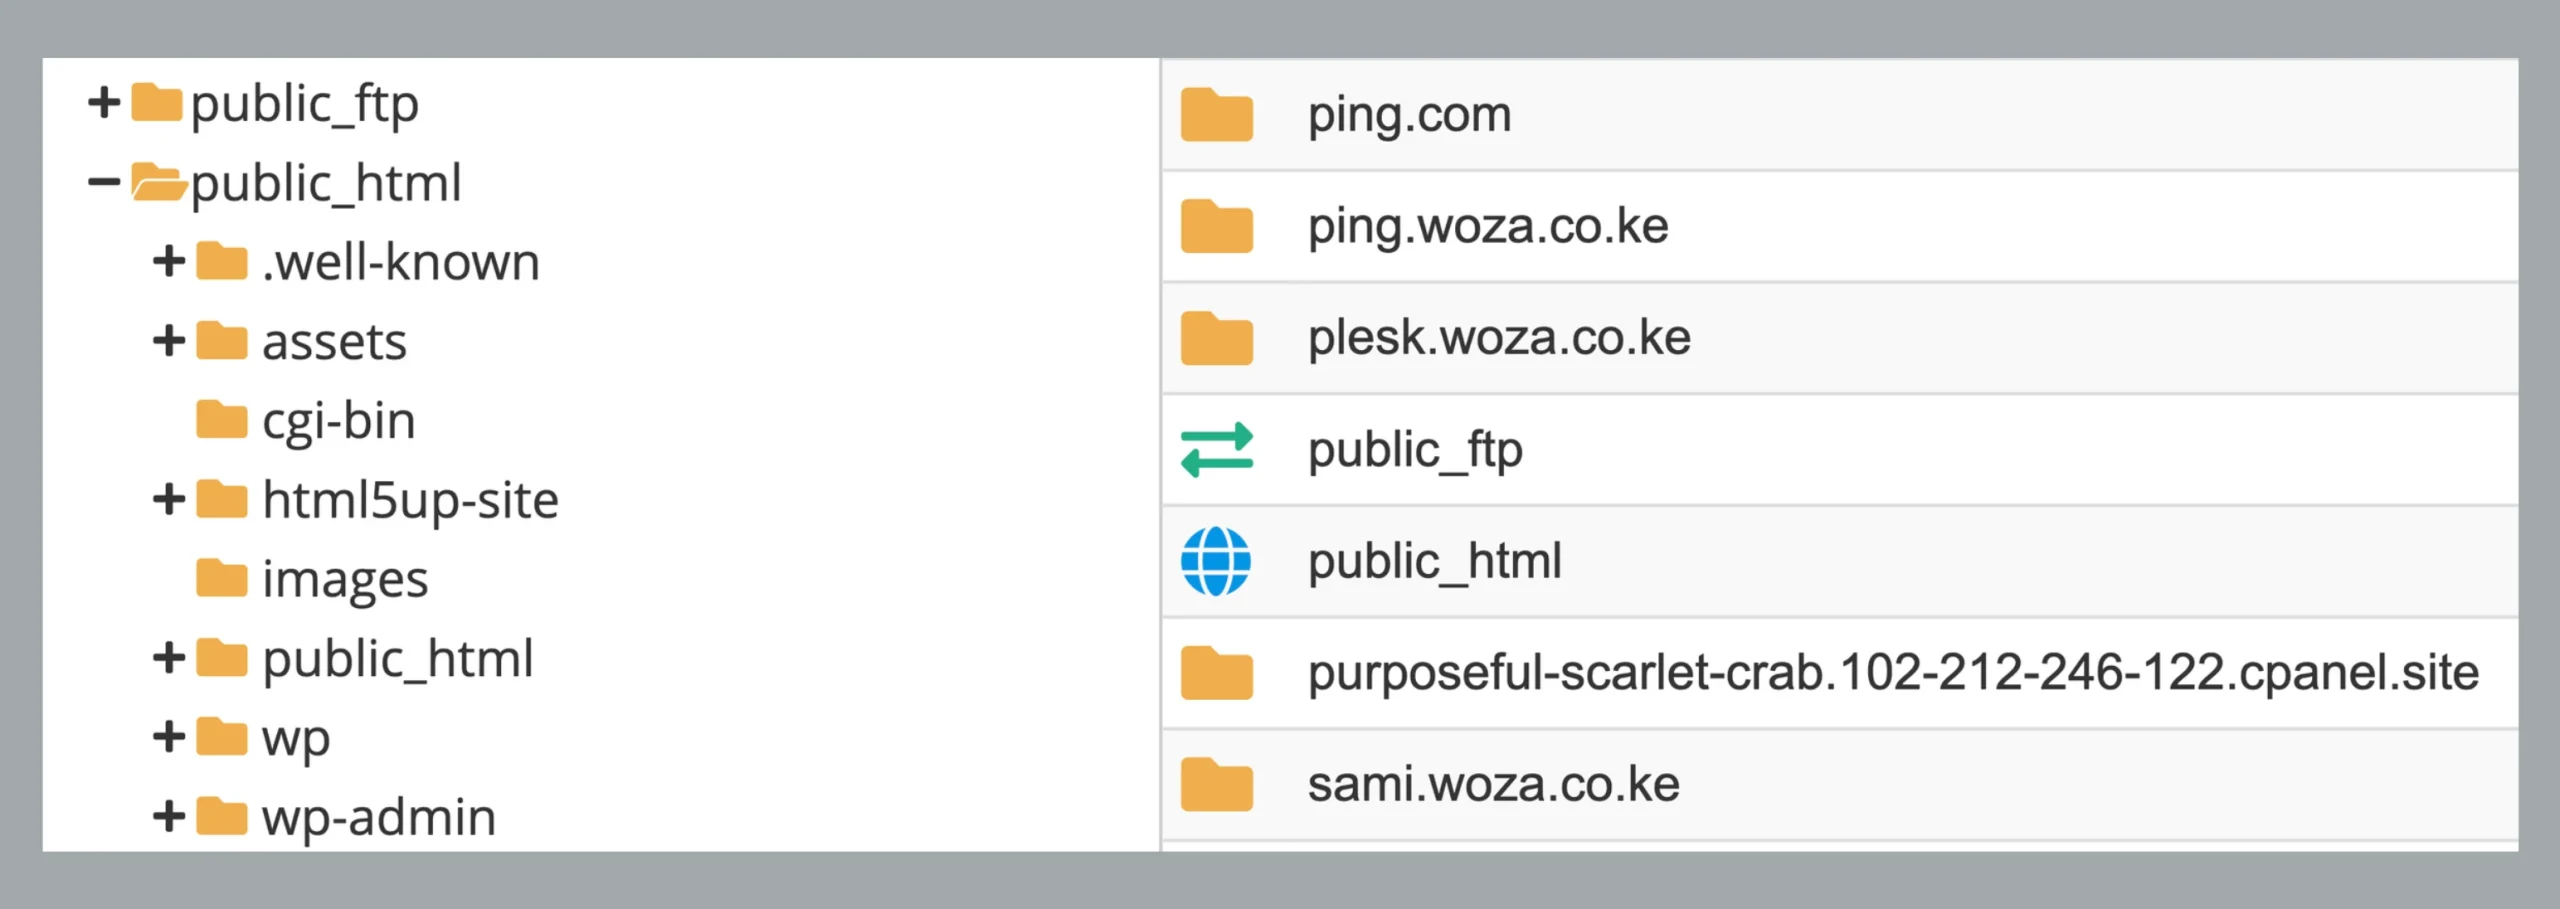
For example, if your homepage is called index.html, it would normally sit here:
public_html/index.html
If you’re uploading for your primary domain, work directly inside public_html. If it’s for an addon domain or subdomain, go to the specific folder cPanel created for that domain instead.
Before uploading anything, check the folder you’re in. Putting website files in the wrong directory is one of the easiest ways to end up with a blank page or the wrong website showing when you visit the domain.
Step 4: Upload Your Website Files
Now you’re ready to move the website from your computer to the server. The easiest method for a website with many files is to upload a ZIP archive.
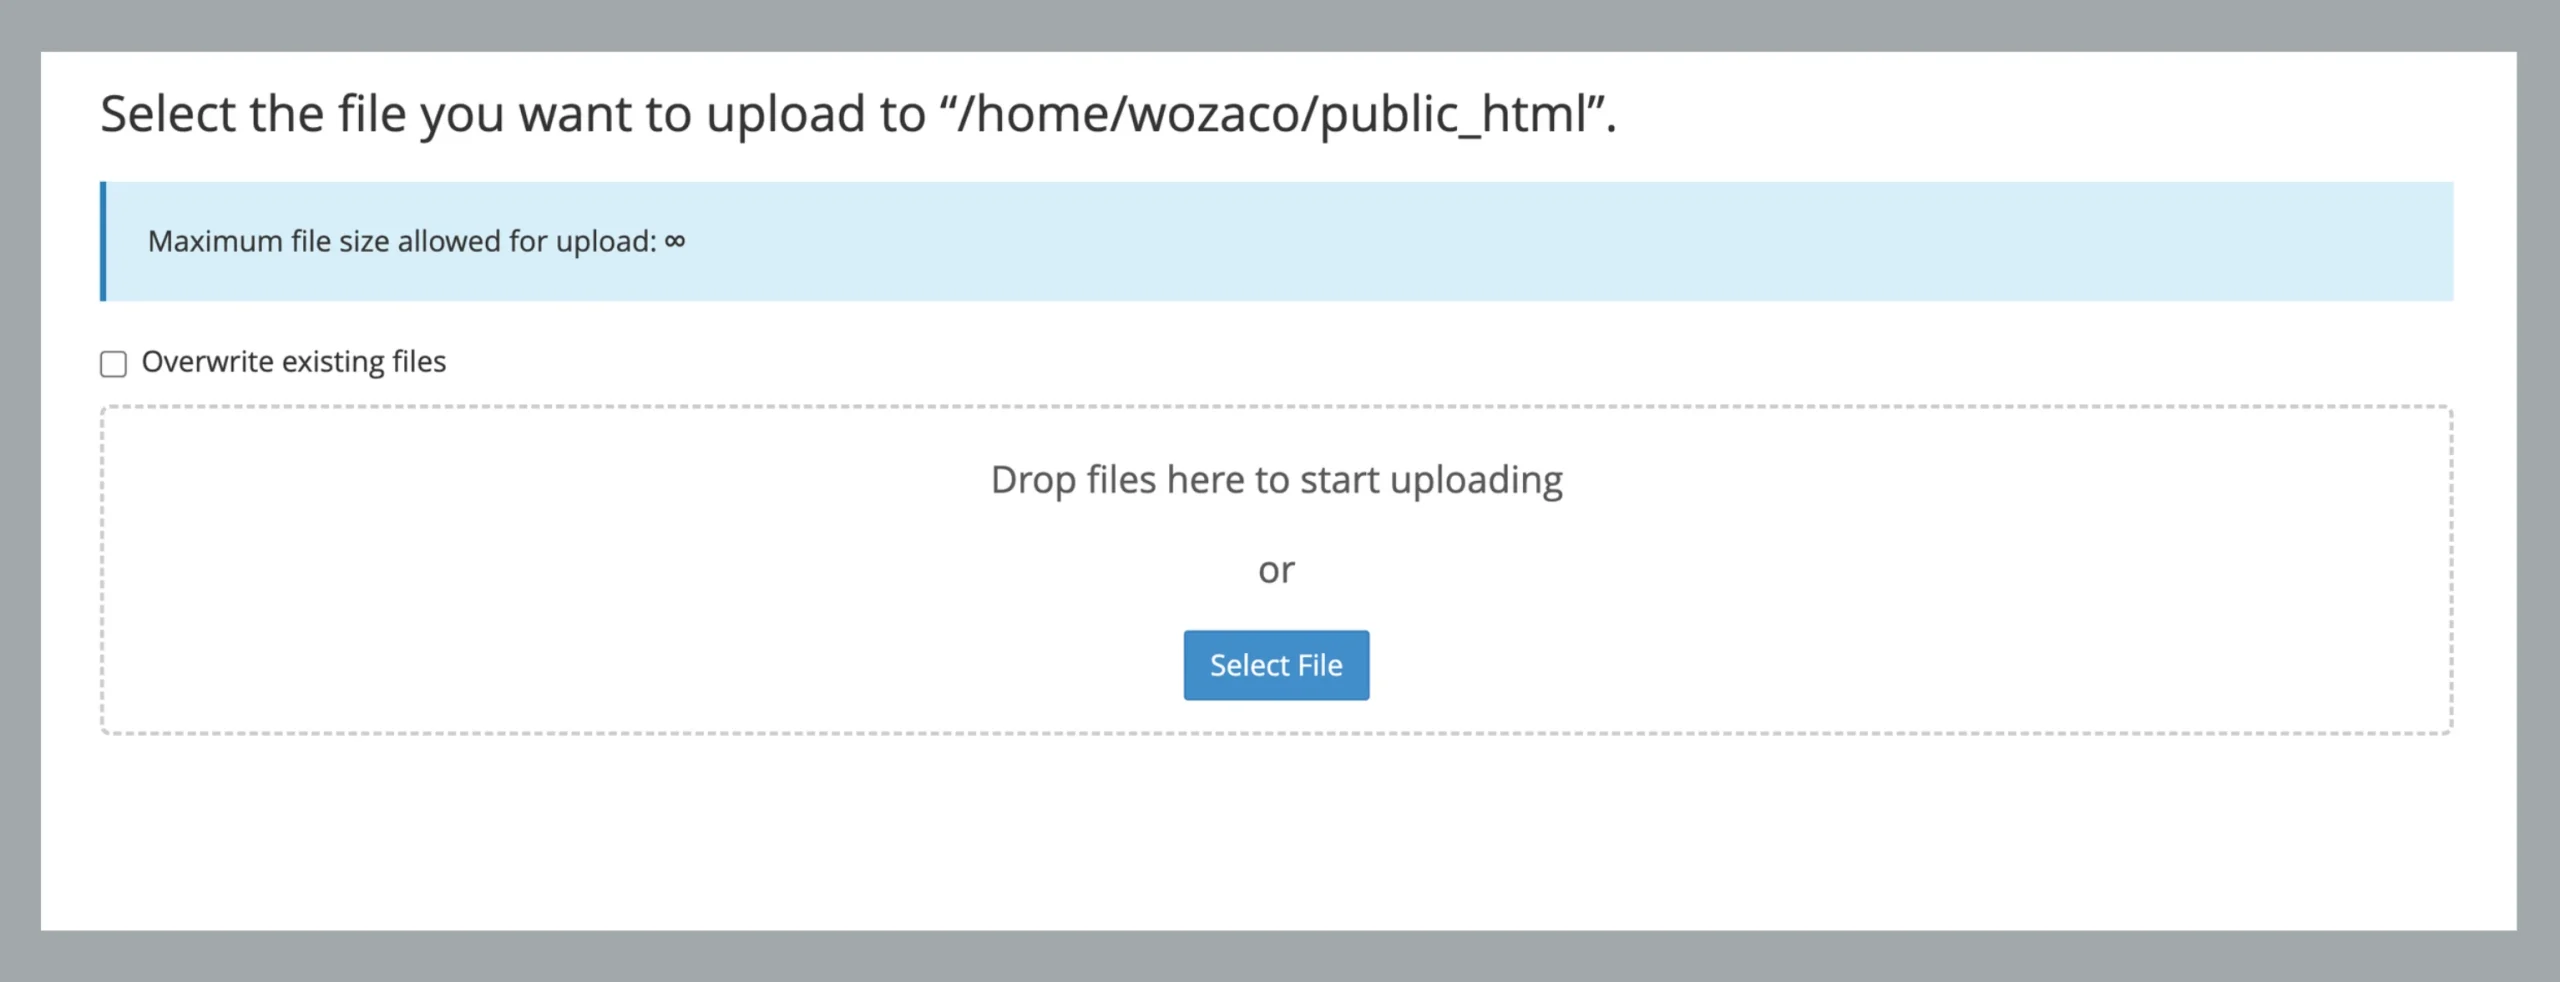
Zip-first method (recommended for most sites):
- Stay inside the correct website folder in File Manager.
- Click Upload in the toolbar.
- Drag your
.zipfile into the upload window, or click Select File and choose it from your computer. - Wait for the upload to reach 100%.
- Return to File Manager.
- Right-click the ZIP file and select Extract.
- Check that the files have been extracted into the correct website directory.
- Open the extracted folder and make sure your main website files are where they should be.
- Delete the ZIP file after confirming the extraction was successful.
Pay particular attention to nested folders. For example, if you need this:
public_html/index.html
but extraction creates this:
public_html/mywebsite/index.html
your domain won’t load the site from the expected location. Move the website files into the correct directory if that happens.
For smaller sites (individual files):
For a small website, you can also upload individual files through File Manager, just click Upload, select your files, and upload them directly.
Note that File Manager uploads files, not folders. If your website contains several folders for images, CSS, JavaScript, or other assets, compressing the website into a ZIP file first is usually much easier.
Step 5: Create a Database (CMS Sites Only)
If you’ve uploaded a static HTML/CSS website, you can skip this step and move to Step 8.
WordPress, Joomla, and many custom PHP applications use a MySQL database to store content and other information. If you’re moving one of these sites, you’ll need to create a database on the new hosting account.
From the cPanel home page, find the Databases section and open MySQL Database Wizard or Manage My Databases.
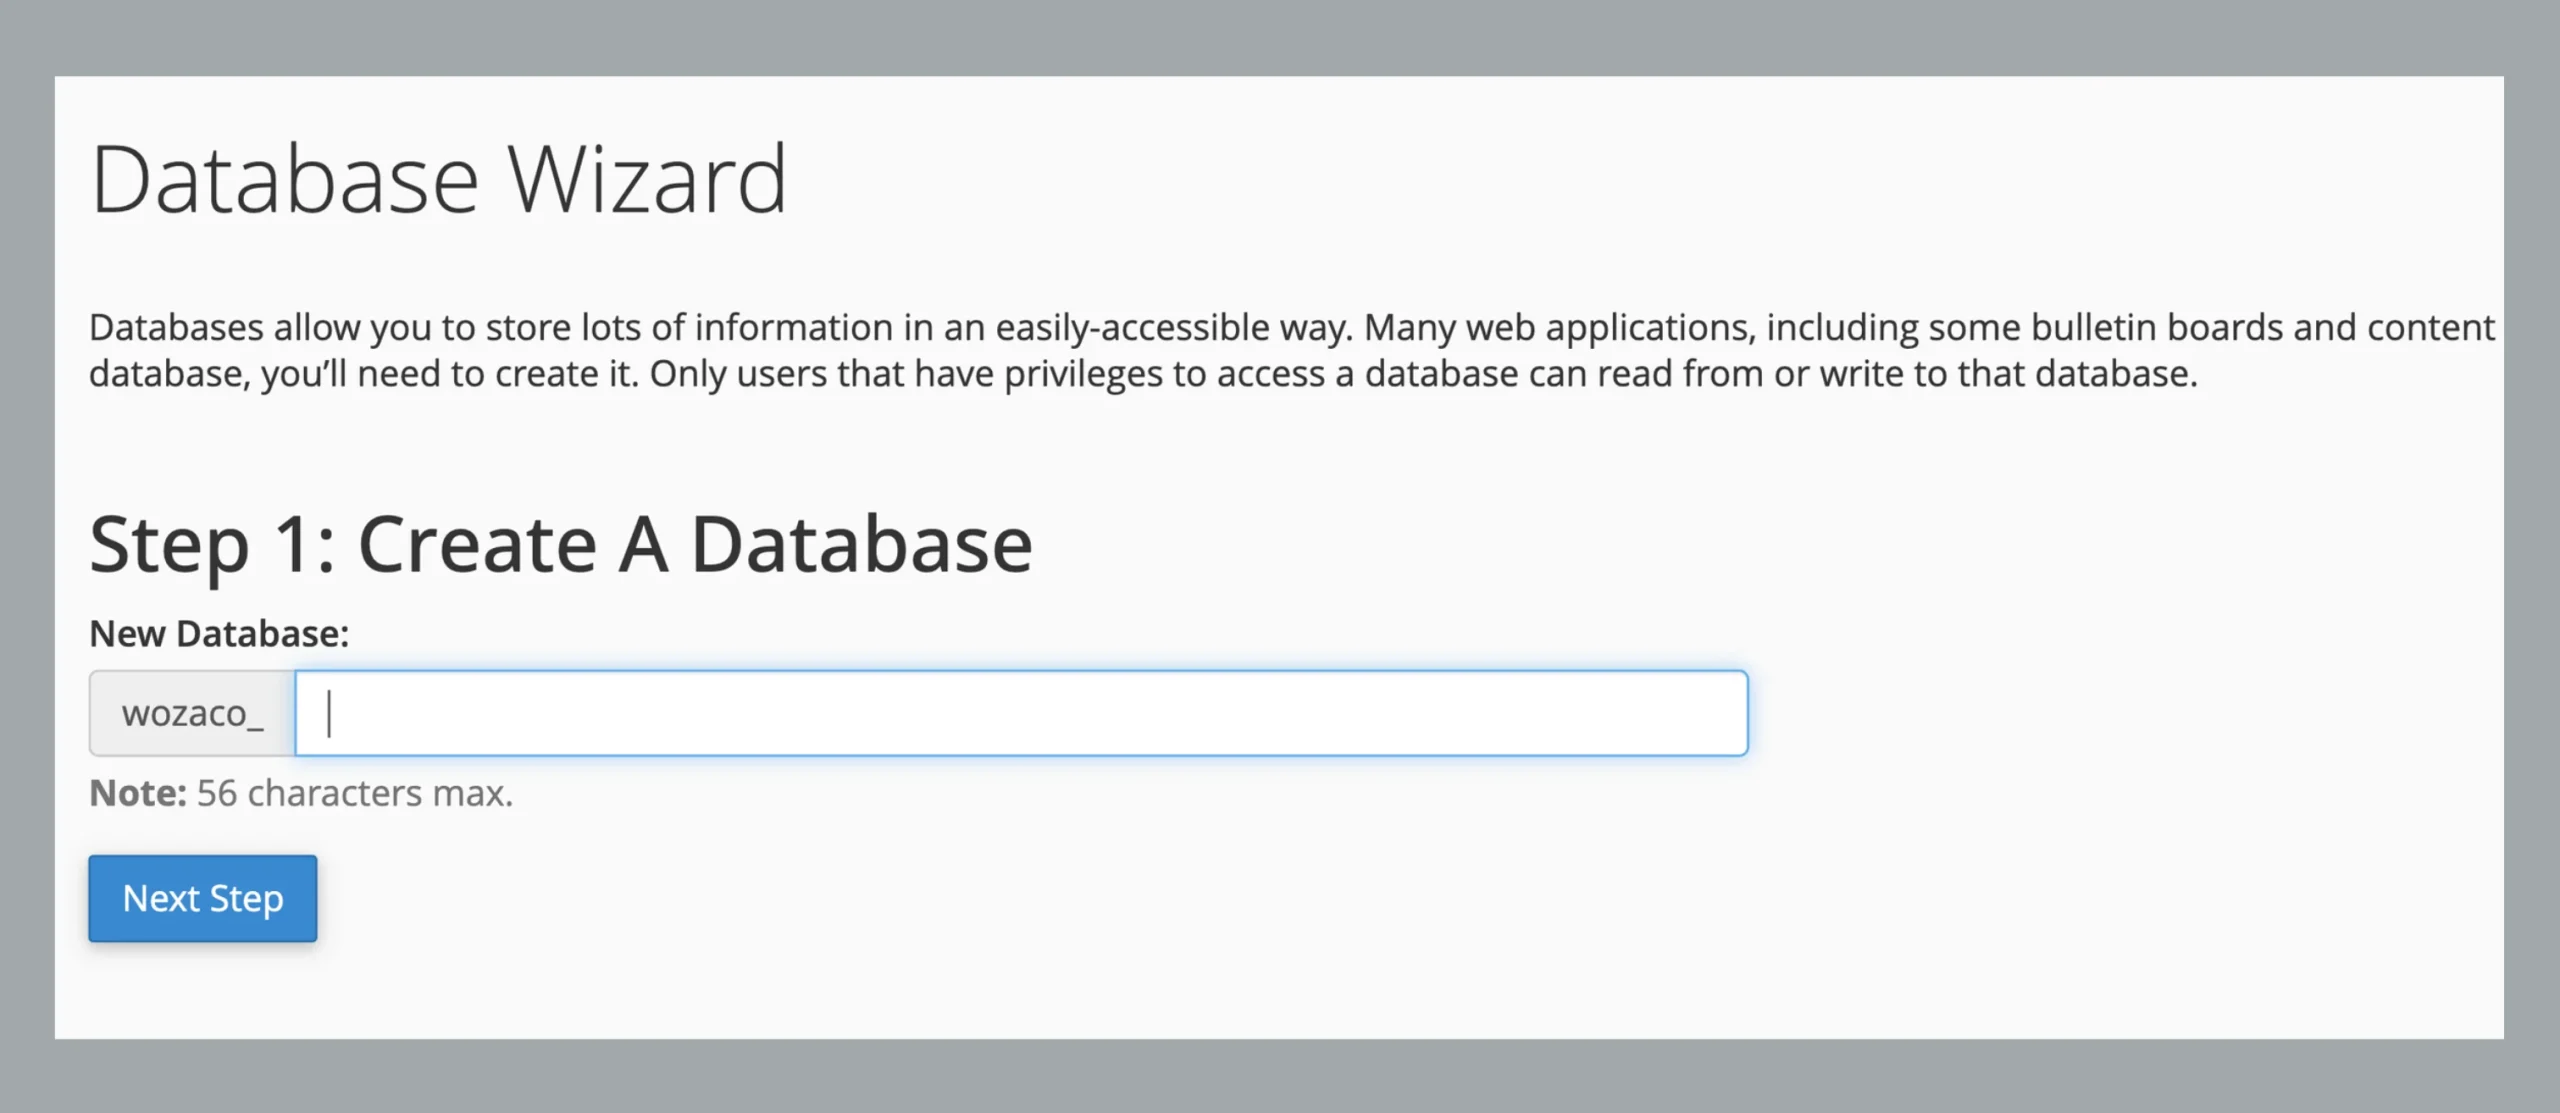
From there, you’ll go through the database creation process:
- Enter a name for the database and click Next Step.
- Create a database user.
- Set a strong password for the user.
- Click Create User.
- On the permissions screen, select All Privileges.
- Click Next Step.
cPanel usually adds your hosting account username as a prefix to the database name and username.
For example, if you enter website cPanel will create username_website.
Write down the complete database details before moving on:
- Database name
- Database username
- Database password
You’ll need these when you update the website’s configuration file.
Step 6: Import Your Database (CMS Sites Only)
Creating the database gives your website an empty place to store its information. If you’re migrating an existing site, you now need to import the database backup into it.
In cPanel, open phpMyAdmin under the Databases section.
From the left-hand panel, select the database you created in Step 5.
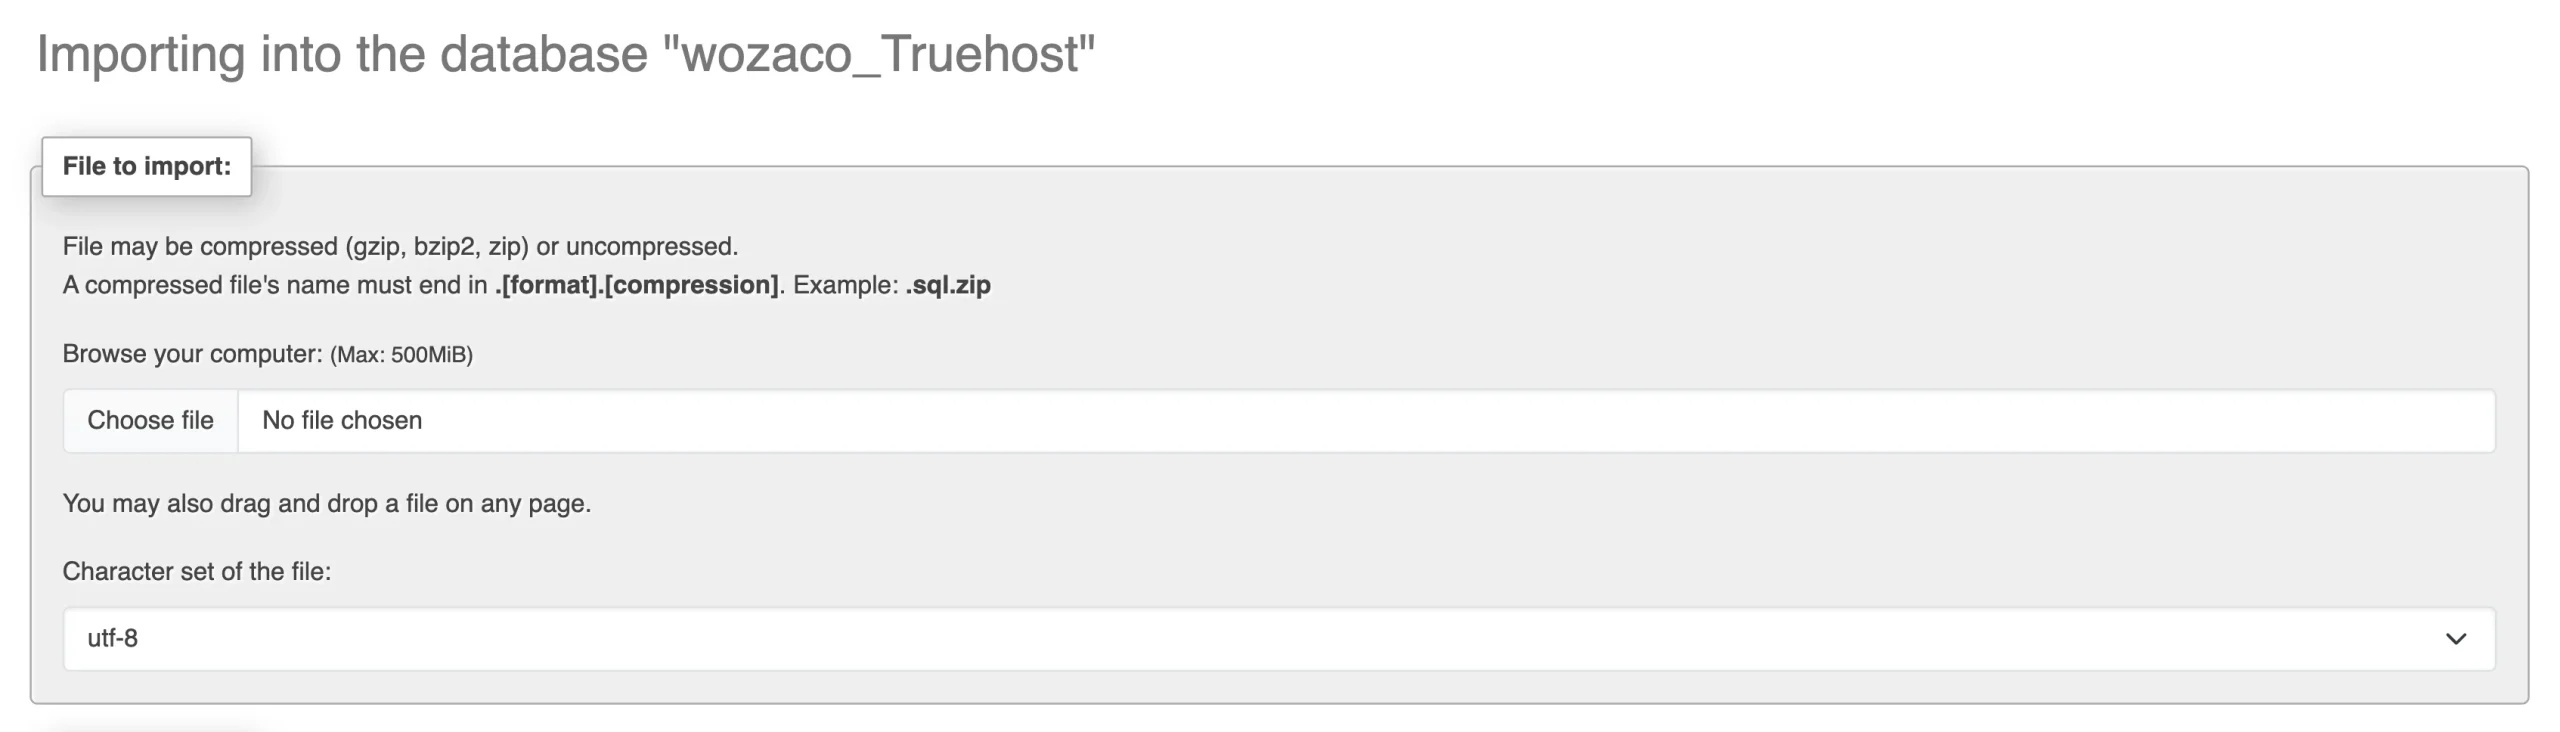
Next:
- Click the Import tab.
- Click Choose File.
- Select your database backup, usually a
.sqlfile. - If your hosting setup accepts the compressed version, you can also use a
.sql.zipfile. - Click Go to start the import.
Wait for phpMyAdmin to finish. Once the process is successful, you should see the database tables listed.
If the database is large, the import may take some time. Don’t move on until you can confirm that the tables have been imported.
Step 7: Update Your Configuration File
Your website files and database are now on the server, but the two still need to know how to communicate with each other.
For WordPress, that connection is handled by wp-config.php.
Open File Manager, go to the folder containing your WordPress installation, and find:
wp-config.php
Right-click the file and select Edit.

Look for these four database settings:
define('DB_NAME', 'your_new_database_name');
define('DB_USER', 'your_new_username');
define('DB_PASSWORD', 'your_new_strong_password');
define('DB_HOST', 'localhost');
Replace the first three values with the database details you created earlier. On most shared hosting environments, DB_HOST is localhost. Save the file after making the changes.
For a custom PHP application, the configuration file may have a different name. Common examples include:
config.phpdatabase.phpconnect.php
Open the relevant file and update the database name, username, password, and host with the new hosting details.
If you’re moving the website to a different domain, check the configuration files for any old domain URLs that have been entered directly into the code. Those URLs may also need to be changed to the new domain.
Step 8: Update WordPress Permalinks
This step is only for WordPress websites. If you’re uploading a static HTML site or another application that doesn’t use WordPress permalinks, you can skip it.
After moving a WordPress site, the homepage may work while individual posts or pages return a 404 error. Refreshing the permalink settings can rebuild the .htaccess rules WordPress uses for its URLs.
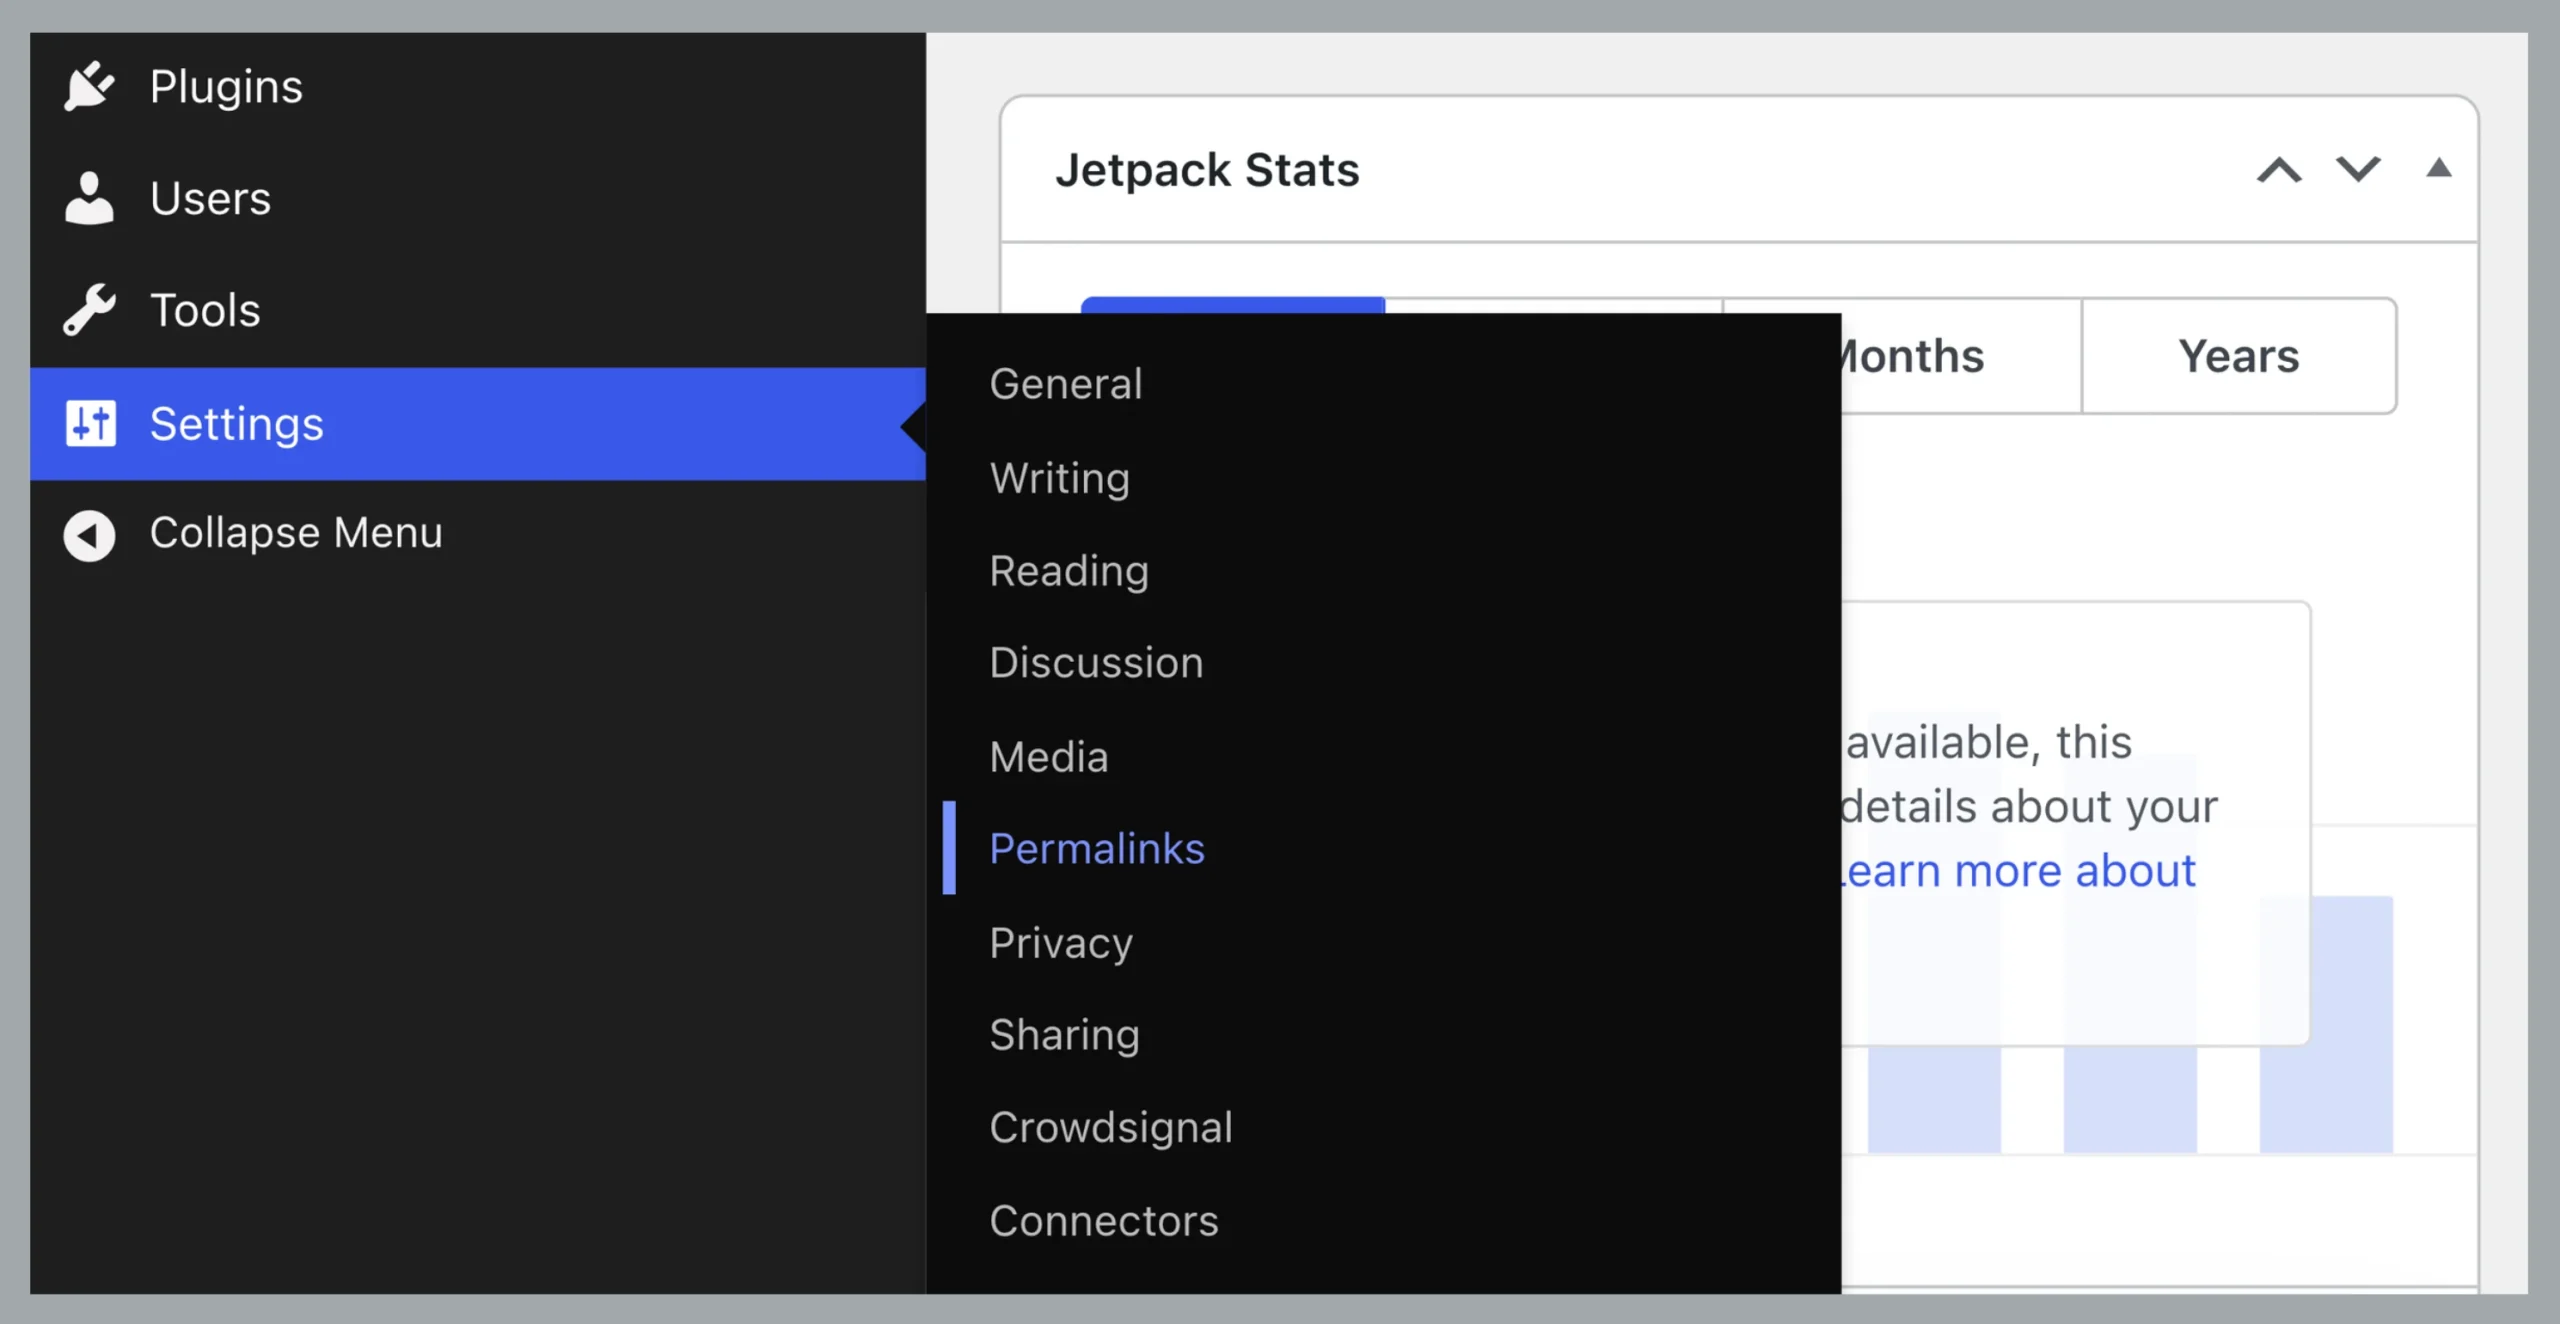
Log in to your WordPress dashboard: yourdomain.com/wp-admin. Then go to Settings, then Permalinks.
You don’t need to change the selected permalink structure. Simply click Save Changes.
WordPress will regenerate the relevant .htaccess rules. Test a few pages afterward to confirm the URLs are working.
Step 9: Test Your Website
Now it’s time to check the site from a visitor’s point of view.
Open your domain in a browser and test the homepage first. Then open several internal pages, images, menus, forms, and other important parts of the website.
Pay attention to errors such as:
- A completely blank or white page
- A 500 Internal Server Error
- A database connection error
- Missing images or CSS
- Pages returning 404 errors
If you see a database connection error, go back to wp-config.php or your application’s database configuration and compare the credentials with the database details you created in Step 5.
File and folder permissions can also cause problems. The common permission setup is:
- Folders:
755 - Files:
644 - wp-config.php:
600
You can check permissions from the File Manager on the most right permissions column and edit by right-clicking a file or folder and selecting Change Permissions.
Finally, clear your browser cache if you’re seeing an older version of the site. If you’re using WordPress with a caching plugin, clear that cache too.
Step 10: Finalize and Go Live
Your site is nearly ready. There are two final tasks: activate HTTPS and create a fresh backup.
Start with SSL.
Your website should load using HTTPS: https://yourdomain.com
Truehost cPanel hosting includes free SSL through options such as Let’s Encrypt. Depending on the cPanel setup, you may find the SSL controls under SSL/TLS, Let’s Encrypt, or AutoSSL.
Activate SSL for your domain and then test the HTTPS version of the website.
For WordPress, go to Settings, then General. Check that both the WordPress Address (URL) and Site Address (URL) use:
https://
Save the changes, then return to Settings and Permalinks and click Save Changes again if needed to refresh the URL rules.
The final step is to create a backup.
In cPanel, open Backup Wizard under the Files section and create a backup of your website and database. Store a copy somewhere separate from your hosting account, such as your computer or cloud storage.
You now have a clean backup of the newly launched site that you can use as a restore point later.
Your website is live.
Troubleshooting: Why Can’t I See My Website After Uploading?
If something’s off, it’s almost always one of three things:
1. The database details are incorrect
Check the database name, username, password, and host in your configuration file. Even one missing character can stop a CMS from connecting to its database.
2. The files are in the wrong folder
Check File Manager and confirm that the website’s main files are inside the correct web root. For the primary domain, this is normally public_html.
Also check for an extra folder created during ZIP extraction. Your files may have ended up in public_html/website/index.html when they should be in public_html/index.html.
3. The database wasn’t imported successfully
Open phpMyAdmin and select your database. If the expected tables aren’t there, the import may have failed or may not have been completed.
Go back through the steps in order and check these three areas first. In most cases, the problem becomes clear once you trace the website files, database, and configuration file from start to finish.
Ready to Upload Your Website?
That’s the complete process from raw files on your computer to a fully working website on the internet. The process is simple once you know where each part belongs.
Everything above assumes one thing: reliable cPanel hosting underneath it.
If you’re setting up a new site or moving an existing one, our Truehost cPanel Hosting gives you full cPanel access, free SSL, and local support from day one.
To start, you only need to check out our plans and select one that works for you.