Domain SearchInstantly check and register your perfect .pk or international domain
 Web HostingGet a .pk domain for as low as PKR 467
 cPanel HostingUser-friendly hosting powered by cPanel
 Reseller HostingLaunch your own hosting business with minimal technical requirements
 Windows HostingOptimized for Windows-based applications and websites
 Affiliate ProgramEarn referral commissions by promoting our services
 WordPress HostingFast & Reliable WordPress Hosting
 Domain TransferMigrate your existing domain seamlessly with zero downtime.
 All DomainsAccess 324+ top-level domains (TLDs) worldwide from a single platform
 Whois LookupIdentify the owner of any domain using our whois and rdap lookup tool
 Managed VPS Hosting
 AI Website BuilderCreate beautiful websites effortlessly using intuitive drag-and-drop features
 Online ShopLaunch a professional online shop with no technical skills required
 BlogDiscover expert guides on hosting, websites, SEO, and digital growth strategies
 ContactGet instant assistance via live chat or email
 SupportAccess help articles, tutorials, and service documentation
 SSL CertificatesEncrypt data, build trust, and boost SEO.
Imagine an online store in Lahore that instantly shows a customer their recent orders the moment they log in.
Or a news portal in Karachi that remembers which categories each reader prefers and loads those stories first.
Or a community forum where your profile picture and saved posts stay as you left them. These sites do not rely on static files. They pull live information from a database every time someone visits.
A static website is simple. You upload HTML pages, CSS styles, and images. Every visitor sees the same content.
The big question is: how to host a database driven website. A database-driven website works differently. You must create a database on the server first.
Then you tell your website files the name, username, and password so they can find and talk to that database.
Skip these steps and you will see blank pages or the classic “error establishing a database connection” message.
Many budget hosts also limit how large your database can grow or how many queries it can handle at once.
Servers located far from Pakistan add extra delay for local visitors in Lahore, Karachi, or Islamabad. That is why starting with the right host makes a real difference.
This complete guide walks you through every practical step to host a database driven website on Truehost.pk.
You will choose the right plan, create the database, upload your files, connect everything correctly, import existing data if you have it, point your domain, and test the finished site.
Follow the steps in order and learn how to host a database driven website.
Step 1: Pick a One-Stop Hosting Company and Buy a Hosting Plan
The first decision is the most important. You need a host that gives you server space, easy database tools, and domain registration all in one place.
Look for full cPanel access with MySQL or MariaDB support. Free automated SSL certificates, unlimited email accounts, and modern language support such as Python and NodeJS are also important.
At Truehost.pk we built three clear tiers so you can start small and grow without moving hosts later:
- Starter: ₨282.65/month: ideal for new websites, personal portfolios, student projects, and simple brochure sites
- Pro: ₨845.12/month: built for small businesses, company sites, and growing blogs
- Unlimited: ₨7,967.90/month: designed for agencies, developers, and eCommerce stores that need more resources
Every plan includes high-speed SSD storage, free automated SSL, unlimited custom email accounts, free daily backups, one-click installers for WordPress and other apps, and support for Python and NodeJS. You also get an easy-to-use cPanel dashboard.
When your site needs more power, higher traffic, larger databases, or custom server settings — we offer VPS and dedicated servers.
For automation and AI projects you can add N8n Hosting, OpenClaw hosting, or AI Workers later without changing providers. Starting with a one-stop company means your database, files, emails, and domain stay under one roof.
Ready to begin? Get a Hosting Plan at https://truehost.pk/hosting/. Choose the tier that matches your current needs and you can upgrade any time.
Step 2: Log in to Your Control Panel
After you complete the purchase you receive a welcome email. This email contains your cPanel login details. The login URL is usually yourdomain.com/cpanel or a direct server address that we provide.
Open the link in your browser. Enter the username and the temporary password from the email. On first login you land on the main cPanel dashboard.
This screen is your control centre. From here you manage files, create databases, set up email accounts, install SSL, and monitor usage.
Change the temporary password to something strong and unique as soon as you log in. Store the new password in a password manager.
You will return to this dashboard many times while you set up and maintain your database-driven website.
If you ever lose the login details, you can reset them from the client area on Truehost.pk or contact our support team.
The dashboard is designed to be beginner-friendly, so you do not need advanced technical knowledge to complete the next steps.
Step 3: Create Your Database
A database-driven website cannot work without a proper database. In cPanel look for the Databases section and click Manage MySQL Databases (sometimes labelled MySQL Databases).
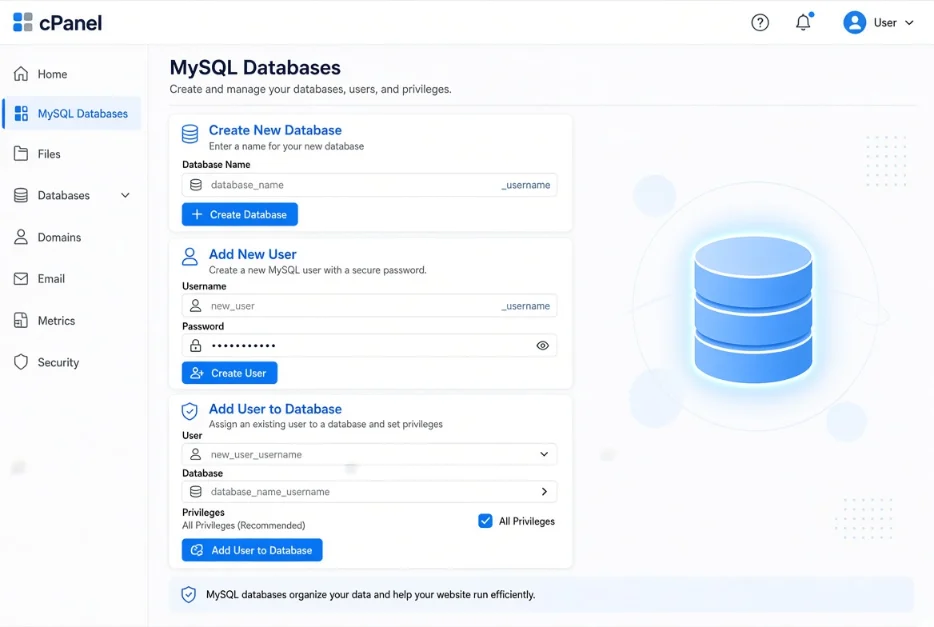
Under the Create New Database heading type a short, clear name for your database and click Create Database.
Truehost automatically prefixes the name with your account username. The full name that appears (for example username_mydb) is the name you must use later. Write it down.
Next, scroll down to the MySQL Users section. Create a new user. Keep the username reasonably short (seven characters or fewer works well on most systems).
Use the password generator to create a strong password that mixes letters, numbers, and symbols. Copy both the username and the password into a secure note before you continue.
Now scroll to Add User to Database. Select the new user and the new database from the drop-down menus. Click Add.
On the privileges screen, tick All Privileges and then click Make Changes. This gives the user full rights to read, write, and manage the database.
Your database is now ready. The combination of the full database name, the full username (with prefix), and the strong password is what your website configuration file will need in a later step.
Do not skip the All Privileges step; missing privileges are one of the most common causes of connection errors.
Step 4: Upload Your Website Files
Your website files – the PHP scripts, HTML pages, CSS stylesheets, JavaScript, and images – must live on the server.
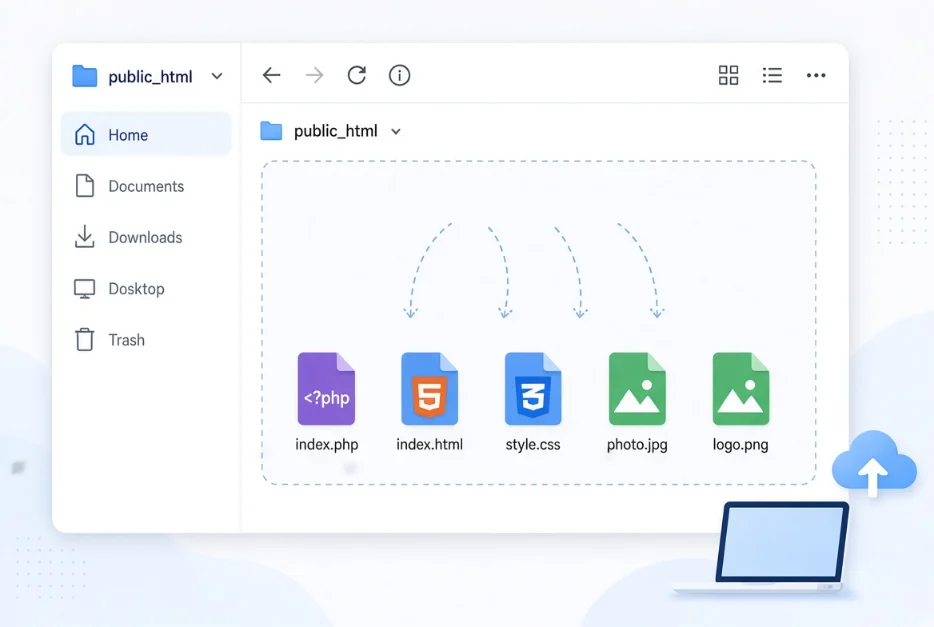
Open File Manager in cPanel and go to the public_html folder. This folder is the public root of your site. Anything placed here can be reached by visitors.
Upload your complete set of files. You can drag and drop them or use the Upload button.
Make sure the main index file and any configuration files sit directly inside public_html or in the correct sub-folders your application expects.
Developers have additional options. Truehost.pk supports SSH and SFTP access as well as Git integration.
If you prefer a desktop client such as FileZilla, you can connect with SFTP for a more secure transfer.
This is especially useful for larger projects or when you want version control. You can also use Git to push code directly once SSH keys are set up.
After the upload finishes, check that the folder structure looks correct. Missing folders or files uploaded to the wrong location are a frequent reason pages fail to load later.
Step 5: Tell Your Website How to Find the Database
Your website still does not know the database exists. Almost every database-driven application stores the connection details in a configuration file.
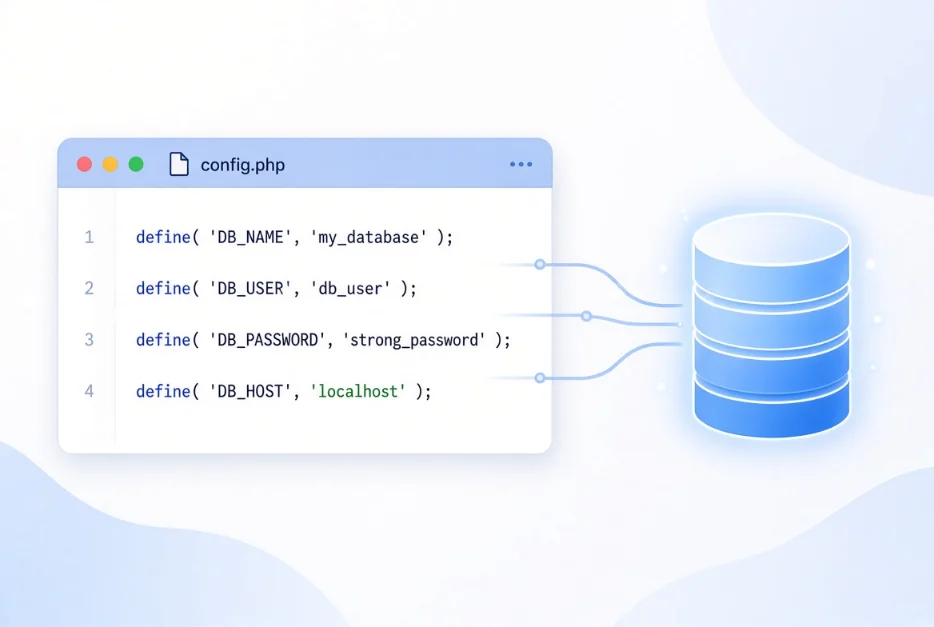
Common names are config.php, wp-config.php, or settings.php.
Open File Manager again, locate the configuration file, and click Edit.
Find the database connection block. It usually contains four lines similar to this:
define(‘DB_NAME’, ‘your_database_name’);
define(‘DB_USER’, ‘your_username’);
define(‘DB_PASSWORD’, ‘your_password’);
define(‘DB_HOST’, ‘localhost’);
Replace the placeholder values with the full database name, username, and password you created in Step 3. On shared hosting the host value is almost always localhost. Save the file carefully.
A single typing error, an extra space, a missing underscore, or a wrong character in the password will produce the “error establishing a database connection” message.
Double-check every character before you leave the editor. Once this file is correct, your website can talk to the database.
Step 6: Import Your Data (If You Have Existing Data)
If you are building a brand-new site you can skip this step. If you already have content, products, users, or posts from another host, you need to import them.
Open phpMyAdmin from the Databases section in cPanel. In the left sidebar select the database you created earlier. Click the Import tab at the top.
Choose your .sql file (or a .zip that contains an .sql file) and click Go. Wait for the process to finish. Large databases may take a few minutes.
When the import completes you should see a success message and a list of tables. You can also use phpMyAdmin later to browse, edit, or export data if needed.
Moving from another Pakistani host? We at Truehost provide a free migration service. Our team can transfer your website files, databases, email accounts, and DNS settings for you.
After you purchase a plan, simply contact support and request the free migration. This removes the risk of missing files or broken connections during a manual move.
Step 7: Connect Your Domain
Your files and database are ready, but visitors still cannot reach the site until the domain points to Truehost. Log in to the registrar where you currently manage the domain.
Locate the nameserver settings and replace the old nameservers with the ones shown in your Truehost welcome email or client area.
DNS changes usually take effect within a few hours, though full propagation can take up to 24–48 hours in rare cases. You can check progress with online DNS tools.
If you do not yet own a domain, you can register a .pk or .com.pk domain directly with us. Pakistani .pk registrations often require verification with a CNIC for individuals or an NTN for businesses.
Have those documents ready so the process is not delayed.
Once the nameservers update, your domain will load the files and database you just set up. Register a Domain through the domain search tool if you need a new one.
Step 8: Test Your Website
Never assume everything works just because the files are uploaded. Open your domain in an incognito or private browser window. This avoids cached pages from earlier tests.
Click through every important page. Submit a contact form or any other form on the site. If the site has user accounts or an admin area, try logging in.
Check that images load and that dynamic content (recent posts, product lists, user profiles) appears correctly.
If something is broken, the most common places to look are Step 5 (the database credentials in the config file) and Step 4 (missing or wrongly placed files).
Correct those first and test again. A clean test in an incognito window confirms that real visitors will see the working site.
What Could Go Wrong and How to Fix
Even careful setups can hit a few common problems. Here are the issues you are most likely to meet and the fixes:
| Issue | Fix |
|---|---|
| Error establishing a database connection | Open the config file again and recheck the full database name, username, and password. Confirm the user has All Privileges in cPanel. |
| White screen on some pages | Go to phpMyAdmin, select the database, drop all tables, and re-import the .sql file cleanly. |
| Login page doesn’t work | Compare the table prefix in your config file with the table names in phpMyAdmin (for example wp_users versus a custom prefix). |
| 500 internal server error | In File Manager set folder permissions to 755 and file permissions to 644. |
Most of these problems are fixed within a few minutes once you know where to look. Start with the database connection details, that single check solves the majority of issues.
If you keep running into problems or simply want a smoother experience from the start, choose a host that makes database setup easy and gives you reliable support.
Get a hosting plan built for database-driven websites: Start with Truehost Hosting
Hosting a Database Driven Website FAQs
What is a database-driven website?
A database-driven website stores its content, user data, and settings in a database instead of hard-coding everything into static HTML files. When a visitor requests a page, the server queries the database and builds the page on the fly. Online stores, membership sites, forums, news portals, and most modern WordPress sites work this way. The database makes it possible to show different information to different people and to update content without editing code files.
Can I host a database for free?
A few free hosting services include a very small database. The limits on size, number of tables, and queries per hour are usually strict, and performance can be unreliable. For any site that needs to stay online and grow, a paid plan with proper MySQL or MariaDB support is the practical choice. Our Starter plan already includes full database tools and is priced for Pakistani users who want reliability without high cost.
What is the cheapest way to host a database in Pakistan?
The most cost-effective approach is a shared hosting plan that includes MySQL/MariaDB, cPanel, free SSL, and local support. Our Starter plan at Truehost.pk gives you exactly that at a low monthly rate billed in PKR. You avoid foreign-currency conversion fees and gain servers that respond quickly for visitors inside Pakistan. As the site grows you can move to the Pro or Unlimited plan, or later to VPS, without starting the whole process again.
Can I host my own database?
Yes. If you need complete control over the database software, memory limits, or custom configurations, you can run MySQL or MariaDB on a VPS or dedicated server. Shared hosting is simpler for most people because we handle the server maintenance, security updates, and daily backups. When your traffic or data volume increases, our VPS and dedicated options let you keep the same company and simply move to more powerful hardware.
Can WordPress host a database?
WordPress itself does not host the database. It requires a MySQL or MariaDB database that your hosting plan provides. All Truehost.pk plans support WordPress with one-click installation through Softaculous. You can either let the installer create the database automatically or create it yourself in cPanel and then enter the details during the WordPress setup. Once connected, WordPress uses the database for posts, pages, users, comments, and settings.