Domain SearchInstantly check and register your perfect .pk or international domain
 Web HostingGet a .pk domain for as low as PKR 467
 cPanel HostingUser-friendly hosting powered by cPanel
 Reseller HostingLaunch your own hosting business with minimal technical requirements
 Windows HostingOptimized for Windows-based applications and websites
 Affiliate ProgramEarn referral commissions by promoting our services
 WordPress HostingFast & Reliable WordPress Hosting
 Domain TransferMigrate your existing domain seamlessly with zero downtime.
 All DomainsAccess 324+ top-level domains (TLDs) worldwide from a single platform
 Whois LookupIdentify the owner of any domain using our whois and rdap lookup tool
 Managed VPS Hosting
 AI Website BuilderCreate beautiful websites effortlessly using intuitive drag-and-drop features
 Online ShopLaunch a professional online shop with no technical skills required
 BlogDiscover expert guides on hosting, websites, SEO, and digital growth strategies
 ContactGet instant assistance via live chat or email
 SupportAccess help articles, tutorials, and service documentation
 SSL CertificatesEncrypt data, build trust, and boost SEO.
Docker gives developers a consistent way to build, deploy, and run web applications.
Instead of configuring every server to match your development environment, Docker packages an application with the dependencies it needs to run.
This is useful when an application works locally but fails after deployment because of different software versions, configurations, or dependencies.
Docker helps keep the environment consistent from development to production.
If you’re running custom applications, Docker can simplify deployment and make scaling easier. Simple websites may not need it, but applications requiring custom software or greater server control can benefit from a VPS.
Let’s see how to use Docker for web hosting and deployment, from creating your first container to deploying an application on a production server and choosing the right hosting environment.
Why Use Docker for Web Hosting?
Docker packages applications into containers. A container includes the application and the dependencies it needs while sharing the host system’s operating-system kernel.
A useful way to look at this is to compare it to preparing goods for transport in standardized packaging. Everything needed for the application travels together, reducing the chances of something being missing when it reaches another server.
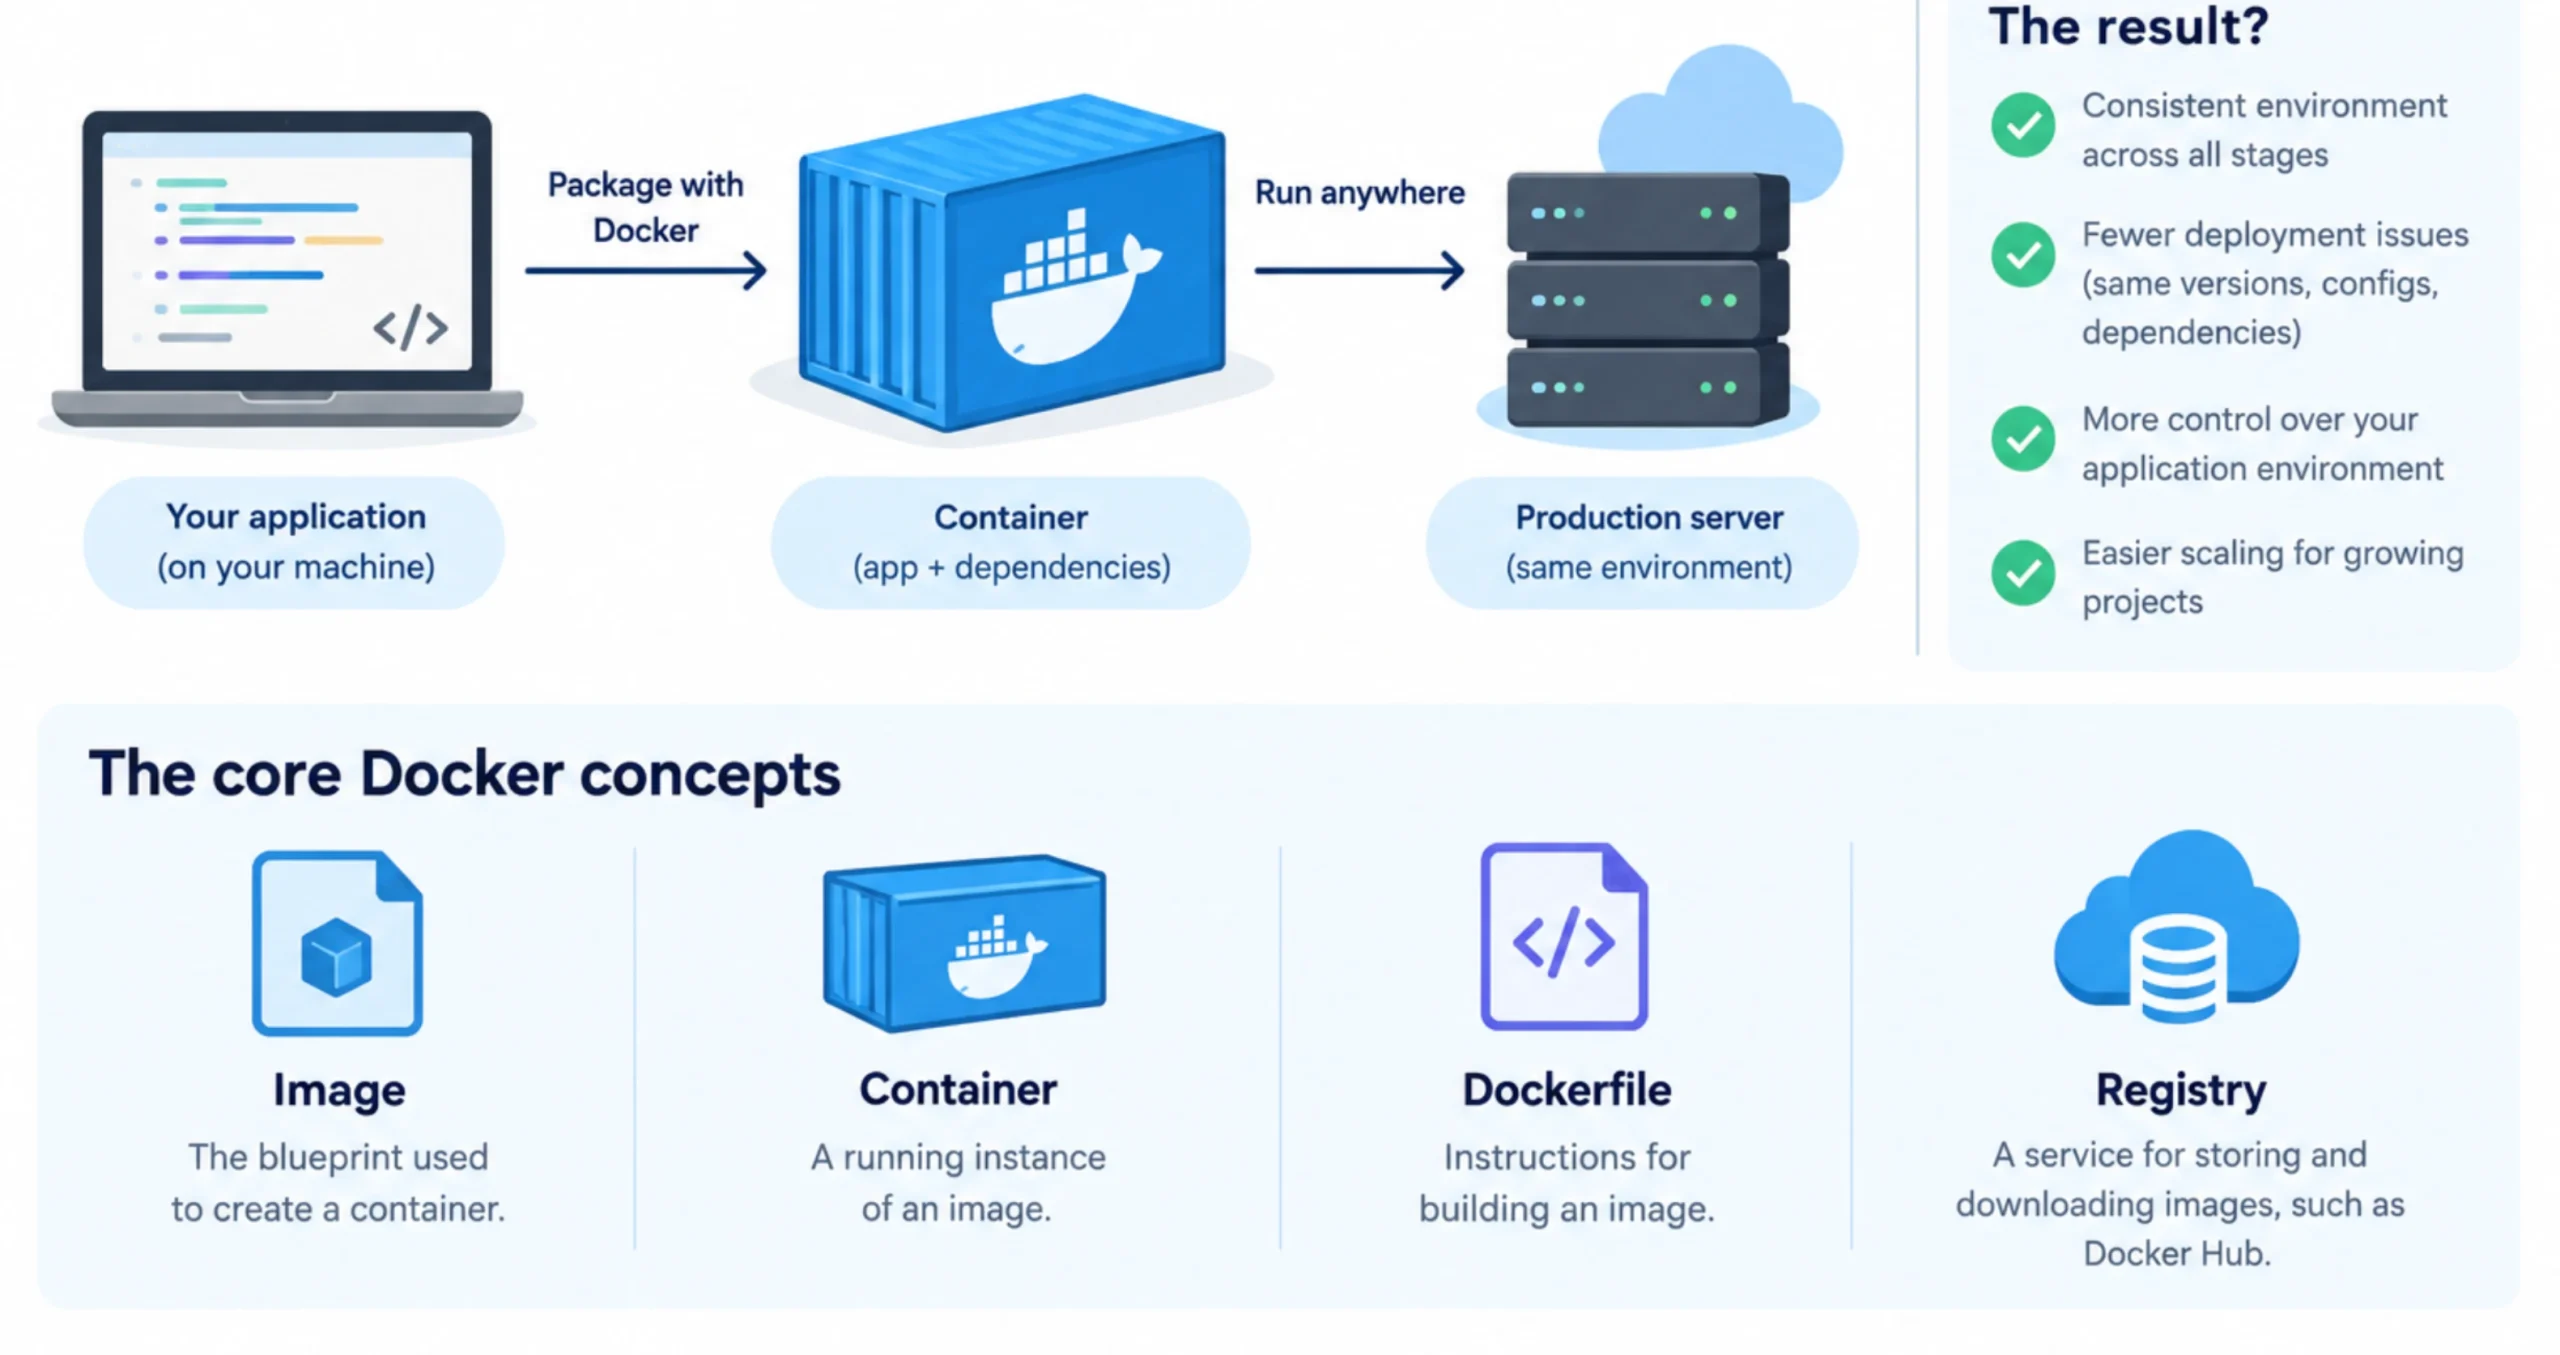
The main Docker concepts are simple:
- Image: The blueprint used to create a container.
- Container: A running instance of an image.
- Dockerfile: A set of instructions Docker follows to build an image.
- Registry: A service used to store and download images, such as Docker Hub.
Docker is useful for web hosting because it gives developers more control over the application environment, makes deployments more consistent, and makes it easier to run different applications on the same server.
Setting Up Docker for Web Hosting and Deployment
1) Set Up Your Environment
Before creating containers, you need a machine where Docker can run.
For development, you can use a laptop or desktop. For production, Docker commonly runs on a VPS where you have root or administrative access.
What You Need
- A laptop with at least 4GB RAM (8GB is better if you’re running Laravel with database containers)
- Ubuntu 22.04 LTS, or Windows with Docker Desktop
- A stable internet connection
Install Docker on Ubuntu
If you’re using Ubuntu, start by updating the system:
sudo apt update && sudo apt upgrade -yYou can then install Docker using Docker’s installation script:
curl -fsSL https://get.docker.com -o get-docker.sh
sudo sh get-docker.sh
Start the Docker service:
sudo systemctl start dockerTo allow your current user to run Docker commands without using sudo every time, add the user to the Docker group:
sudo usermod -aG docker $USERLog out and back in so the new group membership takes effect.
Now check that Docker is installed:
docker --versionYou should receive a response showing the installed Docker version.
Finally, run Docker’s test image:
docker run hello-worldIf Docker prints its welcome message, the installation is working.
Run Your First Web Server with Docker
You can start an Nginx web server with one command:
docker run -d -p 80:80 nginxTwo options in this command are worth noting.
The -d option runs the container in the background. The -p 80:80 option connects port 80 on your machine to port 80 inside the Nginx container.
Open http://localhost on your computer, or your server’s IP address if you’re working on a VPS. You should see the Nginx welcome page.
You’ve just deployed a web server without manually installing Nginx on the host.
2) Containerize Your Web Application
The next step is to package your own application.
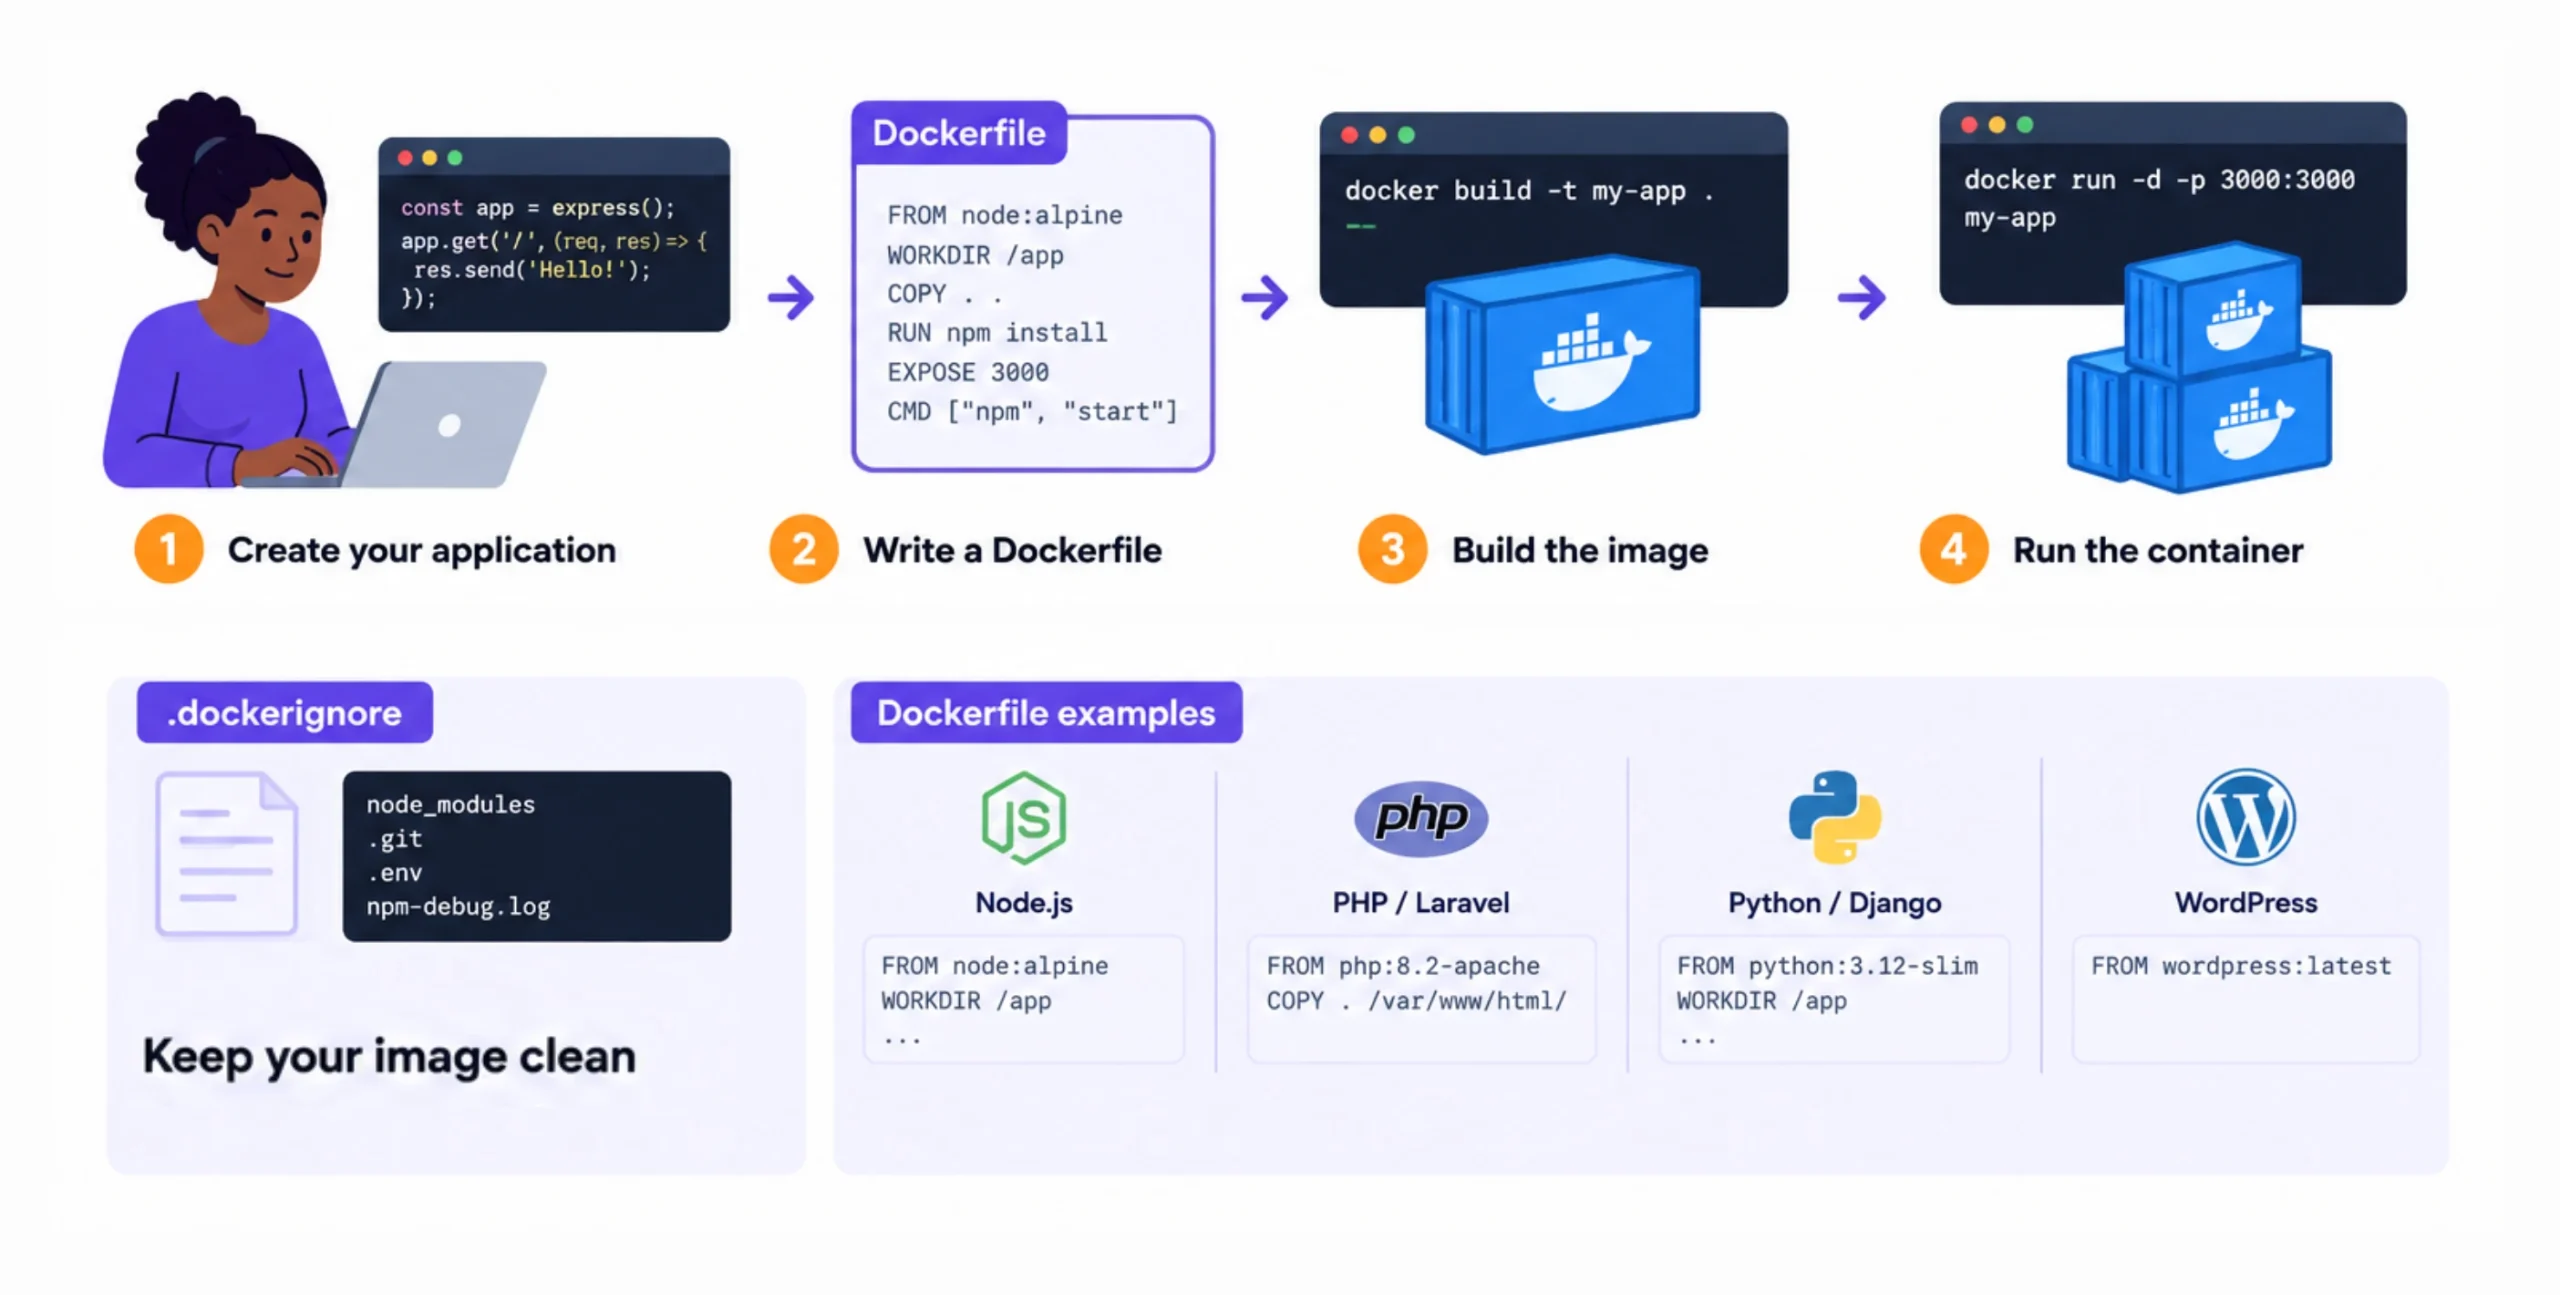
For example, suppose you have a Node.js application. Create a Dockerfile in the root directory of your project:
FROM node:alpine
WORKDIR /app
COPY package*.json ./
RUN npm install
COPY . .
EXPOSE 3000
CMD ["npm", "start"]
Each instruction has a job.
FROM selects the base image, WORKDIR sets the directory where the application will run, COPY moves project files into the image, RUN installs the application’s dependencies, EXPOSE documents the port used by the application, and CMD specifies the command Docker should run when the container starts.
Build the image with:
docker build -t my-web-app .Then run it:
docker run -d -p 3000:3000 my-web-appYour application is now running inside a Docker container.
a) Add a .dockerignore File
Your Docker image doesn’t need every file from your project.
Development dependencies, Git information, log files, and local configuration files can increase the build context and may expose information that shouldn’t be included in an image.
Create a .dockerignore file in the project directory:
node_modules
.git
.env
npm-debug.log
Docker will leave these files out when it sends the project directory to the Docker build process.
The .env entry is particularly useful because environment files often contain passwords, API keys, and database credentials. Those values should be supplied to the application at runtime instead.
b) Dockerfile Examples for PHP, Python and WordPress
Docker works with many web development stacks.
A simple Python application could use:
FROM python:alpine
WORKDIR /app
COPY requirements.txt .
RUN pip install --no-cache-dir -r requirements.txt
COPY . .
CMD ["python", "app.py"]
For PHP, you can start with an appropriate PHP image and add your application files.
A basic example is:
FROM php:8.2-apache
COPY . /var/www/html/
Laravel applications commonly use PHP-FPM together with Nginx, particularly in production environments.
WordPress can also run inside Docker:
FROM wordpress:latestA production WordPress deployment normally needs a database container as well, such as MySQL or MariaDB.
Because WordPress stores both database records and uploaded files, persistent storage should be configured so those files aren’t lost when containers are replaced.
c) Use Multi-Stage Builds to Reduce Image Size
Your production container doesn’t need every tool used while building the application.
Multi-stage builds let you create the application in one stage and copy only the files needed to run it into a second, smaller image.
For example:
FROM node:alpine AS build
WORKDIR /app
COPY package*.json ./
RUN npm install
COPY . .
RUN npm run build
FROM nginx:alpine
COPY --from=build /app/dist /usr/share/nginx/html
The first stage contains the tools and dependencies needed to build the application.
The second stage contains Nginx and the finished files required to serve it.
This can reduce image size and storage requirements. Smaller images can also take less time to transfer when you deploy them to a production server.
3) Deploy Docker Containers to a Production Server
Once the application works locally, you can move the Docker image to a production server. Moving from local development to production usually follows this process: Build, Tag, Push, Pull, then Run.
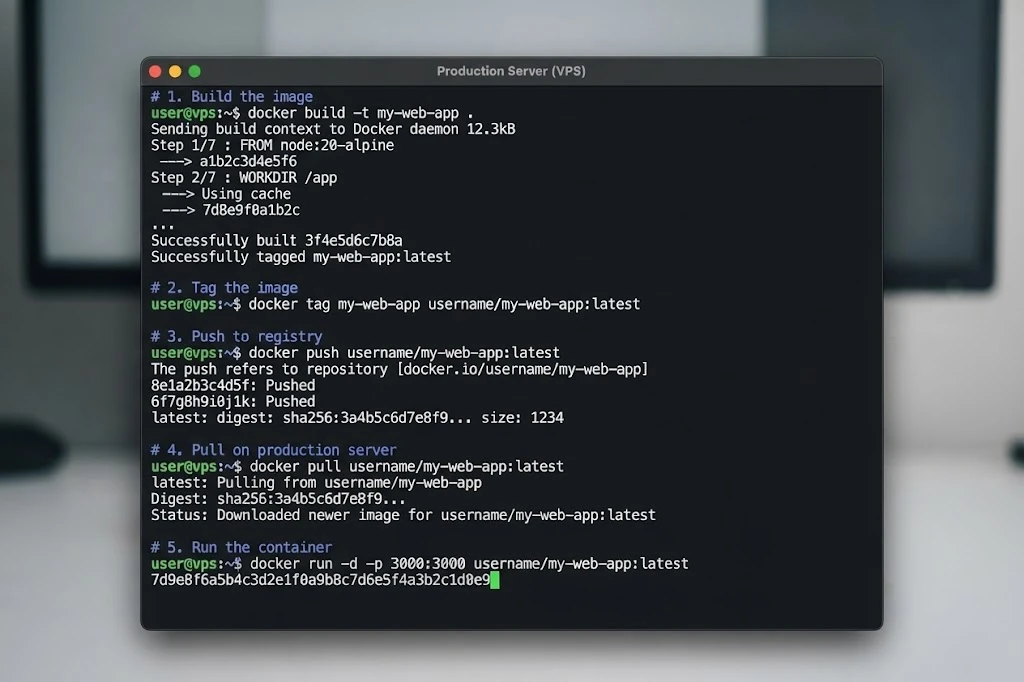
First, build the image:
docker build -t my-web-app .Tag it with the name of your container registry repository:
docker tag my-web-app username/my-web-app:latestPush the image to the registry:
docker push username/my-web-app:latestNow log in to your production VPS and download the image:
docker pull username/my-web-app:latestRun it:
docker run -d -p 3000:3000 username/my-web-app:latestYour application is now running on the production server.
For a single container, this approach can be enough. Applications with several services need a way to define and manage those services together.
a) Use Docker Compose for Multi-Service Applications
Most real applications need more than one service. For example, a Django application might need PostgreSQL, a Laravel application could need MySQL and Redis, while a WordPress installation needs a database.
Docker Compose allows you to define these services in one configuration file.
For example:
services:
  web:
    image: my-web-app:latest
    ports:
      - "3000:3000"
    environment:
      DATABASE_URL: postgres://user:password@db:5432/app
  db:
    image: postgres:alpine
    environment:
      POSTGRES_USER: user
      POSTGRES_PASSWORD: password
      POSTGRES_DB: app
    volumes:
      - postgres_data:/var/lib/postgresql/data

volumes:
  postgres_data:
Start the application with:
docker compose up -dDocker Compose creates the services and runs them in the background.
The database volume is important. Without persistent storage, data stored inside a container’s temporary filesystem can disappear when the container is removed.
With the postgres_data volume, PostgreSQL data remains available even when the database container itself is replaced.
For production, use strong credentials and keep them outside the Compose file where possible rather than leaving real passwords in a configuration committed to Git.
b) Put Nginx in Front of Your Docker Application
Instead of exposing your application directly on port 3000, you can use Nginx as a reverse proxy. The traffic flow becomes: visitor, Nginx, Docker container.
Nginx receives the request for your domain and forwards it to the application container.
A basic configuration could look like this:
server {
    listen 80;
    server_name example.com;
    location / {
        proxy_pass http://127.0.0.1:3000;
    }
}
Nginx can also handle HTTPS when configured with a certificate from Let’s Encrypt.
Certbot can help obtain and renew Let’s Encrypt certificates, giving your domain HTTPS without purchasing a separate SSL certificate.
With Nginx handling the public connection, your application can continue running on its internal port while Nginx manages incoming web traffic.
Manage and Scale Docker in Production
Getting the application online is only one part of running it. You also need to monitor the containers, check their logs, protect persistent data, and make sure the server has enough resources.
Useful Docker commands include:
| Command | What it does |
|---|---|
docker ps | Shows running containers |
docker logs <container-name> | Displays output from a container and can help identify application errors |
docker stats | Shows live resource usage per container |
docker inspect <container-name> | Returns detailed container configuration |
For databases, uploaded files, generated reports, and other information that must survive container replacement, use Docker volumes.
For example:
docker run -v /host/data:/container/data your-imageThe host directory remains available even if the container is removed and recreated.
As traffic grows, you can increase the CPU, RAM, and storage available to your VPS. You can also run multiple application containers when the workload requires it.
For larger environments, container orchestration tools can coordinate services across multiple servers. For many small and medium applications, however, one VPS running Docker Compose can be enough.
Troubleshooting Common Docker Hosting Problems
1. Port already in use
If Docker reports that a port is unavailable, another application may already be using it. Change the host-side port or stop the conflicting service.
2. Container keeps restarting
A container that repeatedly starts and stops may have an application error, missing environment variable, dependency problem, or configuration issue.
Check its logs:
docker logs <container-name>The error message will often point you toward the cause.
3. Application runs out of memory
A container can fail if the application needs more memory than the server has available.
Check current usage:
docker statsIf the application consistently needs more RAM than your VPS provides, you can increase the server resources or reduce the application’s resource requirements.
You can also place a memory limit on a container:
docker run --memory=512m your-image4. Data disappears after a restart
Containers are designed to be replaceable. Data stored only inside a container can disappear when that container is removed.
For databases and other persistent information, use Docker volumes.
For example:
docker run -v $(pwd)/data:/app/data your-imageBefore deploying, check that the volume is mounted at the location your application expects.
5. Images download slowly
Large images take longer to transfer. Alpine-based images and multi-stage builds can reduce image size and make deployments more efficient.
Secure Your Docker Deployment
Docker does not automatically secure the application or the server. You still need to protect credentials, update software, restrict network access, and back up important data.
Start with these basics:
- Don’t store passwords or API keys inside Docker images.
- Use environment variables or a suitable secrets-management system for sensitive values.
- Avoid running applications as root where possible.
- Keep Docker images and application dependencies updated.
- Scan images for known vulnerabilities before deploying them.
- Use a firewall and expose only the ports your application needs.
- Back up persistent data.
- Enable HTTPS with Nginx and Let’s Encrypt.
For production workloads, these measures should be part of the deployment process rather than something added after a security problem occurs.
Docker Deployment Checklist
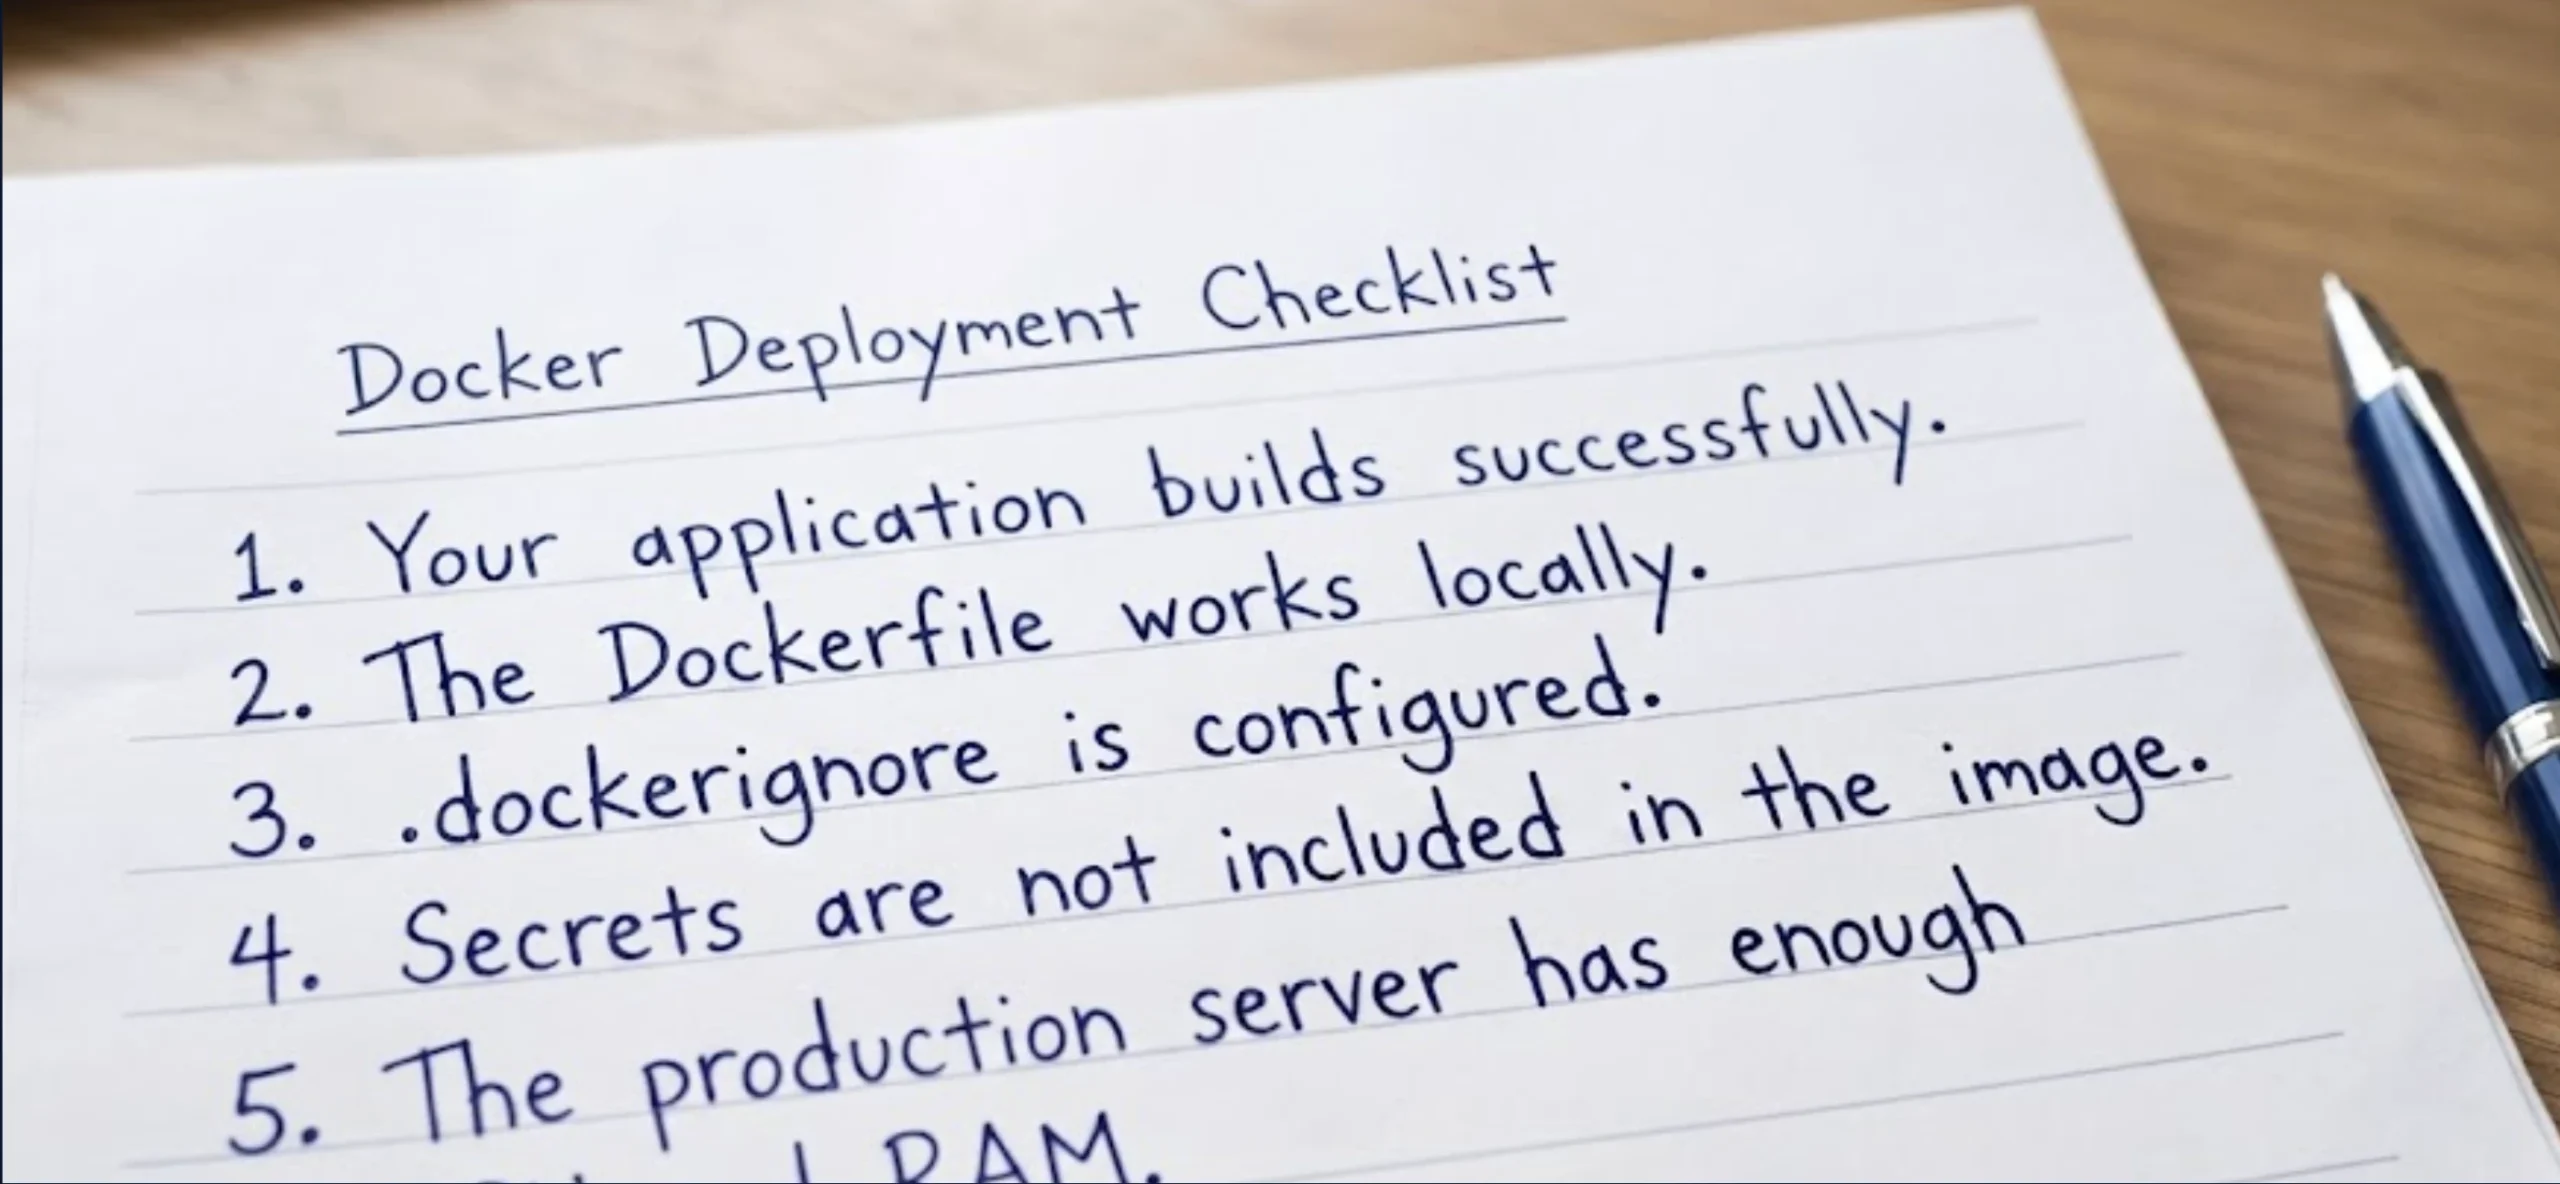
Before sending your Docker application live, check each of these items:
- Your application builds successfully.
- The Dockerfile works locally.
.dockerignoreis configured.- Secrets are not included in the image.
- The production server has enough CPU and RAM.
- Required ports are configured.
- Persistent volumes are set up for important data.
- Nginx is forwarding traffic correctly.
- HTTPS is enabled.
- Backups are configured.
- You can inspect container logs.
- The application continues working after a container restart.
A test restart is particularly useful before launch. It gives you a chance to confirm that your application, database, volumes, environment variables, and reverse proxy all come back correctly.
Host Your Docker Applications on Truehost
Docker gives developers a consistent way to package, deploy, and run web applications. Instead of rebuilding the application environment every time you move to another server, you deploy the same container image across environments.
Once your application is containerized, you need a server capable of running it, and that’s where the choice of hosting becomes important.
For a simple WordPress site or basic business website, shared hosting is the simpler and cheaper choice.
Our current shared hosting plans start at ₨282.65 per month billed annually, with higher tiers available for larger websites.
Docker applications need a hosting environment where you can install Docker, configure the operating system, manage containers, and open the ports your application requires. A VPS provides that level of access.
Our VPS plans start from ₨2,261.20 per month billed annually, with Linux support, root access, and scalable resources.
The choice comes down to what you’re running. If you only need WordPress or a basic company website, shared hosting keeps the setup simpler. If you need root access to deploy Node.js, Python, PHP, or another custom application, a VPS gives you the server control Docker requires.
If you’re running several containers, databases, or client applications, choose a VPS with enough RAM, CPU, and storage for the combined workload.