Domain SearchInstantly check and register your perfect .pk or international domain
 Web HostingGet a .pk domain for as low as PKR 467
 cPanel HostingUser-friendly hosting powered by cPanel
 Reseller HostingLaunch your own hosting business with minimal technical requirements
 Windows HostingOptimized for Windows-based applications and websites
 Affiliate ProgramEarn referral commissions by promoting our services
 WordPress HostingFast & Reliable WordPress Hosting
 Domain TransferMigrate your existing domain seamlessly with zero downtime.
 All DomainsAccess 324+ top-level domains (TLDs) worldwide from a single platform
 Whois LookupIdentify the owner of any domain using our whois and rdap lookup tool
 Managed VPS Hosting
 AI Website BuilderCreate beautiful websites effortlessly using intuitive drag-and-drop features
 Online ShopLaunch a professional online shop with no technical skills required
 BlogDiscover expert guides on hosting, websites, SEO, and digital growth strategies
 ContactGet instant assistance via live chat or email
 SupportAccess help articles, tutorials, and service documentation
 SSL CertificatesEncrypt data, build trust, and boost SEO.
You don’t need a VPS or a dedicated server to get a Laravel application online.
Shared hosting can handle it just fine, provided you understand a few key differences in how the server expects files to be organized.
Laravel is a powerful PHP framework, but its folder structure doesn’t match what most shared hosts expect. Your hosting account typically serves your website from a public_html folder.
Laravel, however, keeps its publicly accessible files inside a public folder and expects the rest of the application to sit safely outside the web root.
That mismatch is the challenge. If you simply upload your entire Laravel project into public_html your application files, .env file, and database credentials become exposed to anyone who knows the right URL.
That’s a security problem, and it’s also why many people struggle to get Laravel running on shared hosting in the first place.
This guide walks you through the exact steps to deploy Laravel on shared hosting correctly, with the application files safely outside the public directory and your site functioning as expected.
What You Need Before You Start
- An active hosting plan: You need a shared hosting account with cPanel or a similar control panel. Any standard Linux-based shared hosting should work.
- PHP 8.1 or higher with the required extensions: Laravel 10 and 11 require PHP 8.1 as a minimum. Your hosting account must have these PHP extensions enabled: BCMath, Ctype, Fileinfo, JSON, Mbstring, OpenSSL, PDO, Tokenizer, and XML. You can check these in cPanel under “Select PHP Version” or “MultiPHP Manager.”
- A MySQL database and phpMyAdmin access: You’ll create a database through cPanel and import your data using phpMyAdmin.
- mod_rewrite enabled: This Apache module handles URL rewriting, which Laravel depends on for clean URLs and routing. Most shared hosts have it enabled by default, but you can verify it in cPanel.
- cPanel with File Manager: You’ll use File Manager to upload files, create folders, and edit text files directly on the server.
- A working Laravel project on your local machine: Your application should run without errors locally before you attempt deployment.
- Composer installed locally: You’ll use Composer to prepare your project for production before uploading.
- An exported .sql database dump and your local .env values: Export your local database as a
.sqlfile. Copy your.envfile values, especially yourAPP_KEY. You’ll need that encryption key on the server.
Step 1: Prepare Your Laravel App Locally
Your project needs a bit of preparation before it goes to the server. Running development dependencies and debug settings in production causes performance problems and security risks.
Open your terminal in your local project directory. First, install production-only dependencies:
text
composer install --no-dev --optimize-autoloader
The --no-dev flag skips packages only needed for development. The --optimize-autoloader flag improves performance by generating a more efficient class map .
If your project uses frontend assets with Vite or Laravel Mix, build them now:
text
npm run build
Next, you can optionally cache your configuration, routes, and views locally. This speeds up your application because Laravel won’t need to parse these files on every request. Run these commands:
text
php artisan config:cache
php artisan route:cache
php artisan view:cache
If you’re not comfortable with caching yet, you can skip this for now and do it later on the server. Just remember to clear the cache with php artisan config:clear whenever you change your .env file.
Finally, zip your entire project folder. This makes uploading faster and reduces the chance of file corruption during transfer.
Step 2: Upload Your Project to the Server
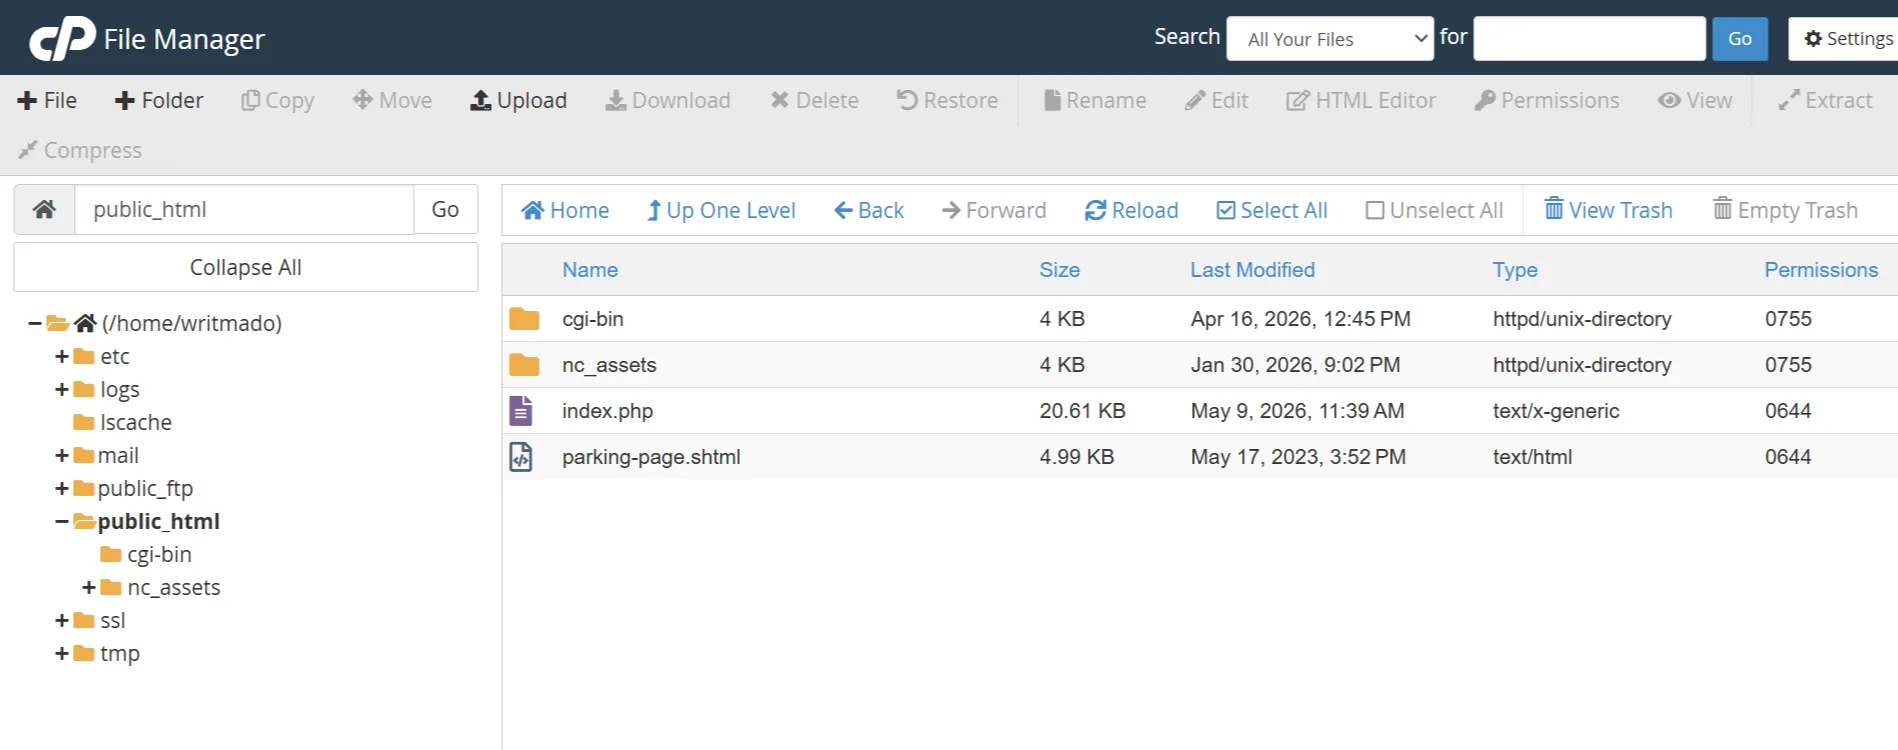
Log into your hosting cPanel. Open the File Manager. You’ll see a public_html folder, which is your website’s document root.
You need to place your Laravel application one level above public_html. In cPanel File Manager, navigate to your home directory, which is usually the parent folder of public_html.
Create a new folder here and name it something like laravel_app or your project name.
Upload the zip file of your Laravel project into this new folder. Then extract it. After extraction, you should have a structure that looks like this:
text
/home/yourusername/
├── laravel_app/
│   ├── app/
│   ├── bootstrap/
│   ├── config/
│   ├── database/
│   ├── public/
│   ├── resources/
│   ├── routes/
│   ├── storage/
│   ├── vendor/
│   ├── .env
│   └── other Laravel files
└── public_html/
Your Laravel application files are now safely outside the web root. The only thing left to handle is making the public folder’s contents accessible through your domain.
Step 3: Move the Public Folder Contents
Your domain points to public_html, but Laravel’s entry point is in laravel_app/public.
There are two ways to bridge this gap. The cleaner method is to point your domain’s document root directly to the public folder.
Shared hosts allow you to change the document root in cPanel under “Domains” or “Addon Domains.”
If your host supports this, simply set the document root for your domain to /home/yourusername/laravel_app/public.
However, some shared hosting plans don’t let you change the document root. In that case, you copy the contents of the public folder into public_html.
Open the laravel_app/public folder in File Manager. Select all files and folders inside it, including .htaccess and index.php. Copy them, then navigate to public_html and paste them there.
Now you need to edit the index.php file in public_html. Open it in the File Manager editor. Find these two lines:
text
require __DIR__.'/../vendor/autoload.php';
$app = require_once __DIR__.'/../bootstrap/app.php';
These paths assume the file is still inside the public folder. Since you moved it to public_html, the relative paths are now wrong. Change them to point to your Laravel application folder:
text
require __DIR__.'/../laravel_app/vendor/autoload.php';
$app = require_once __DIR__.'/../laravel_app/bootstrap/app.php';
Replace laravel_app with whatever you named your folder. Save the file.
The .htaccess file you copied from public already contains the rules needed for Laravel routing. It should work as-is in public_html.
Step 4: Create the Database
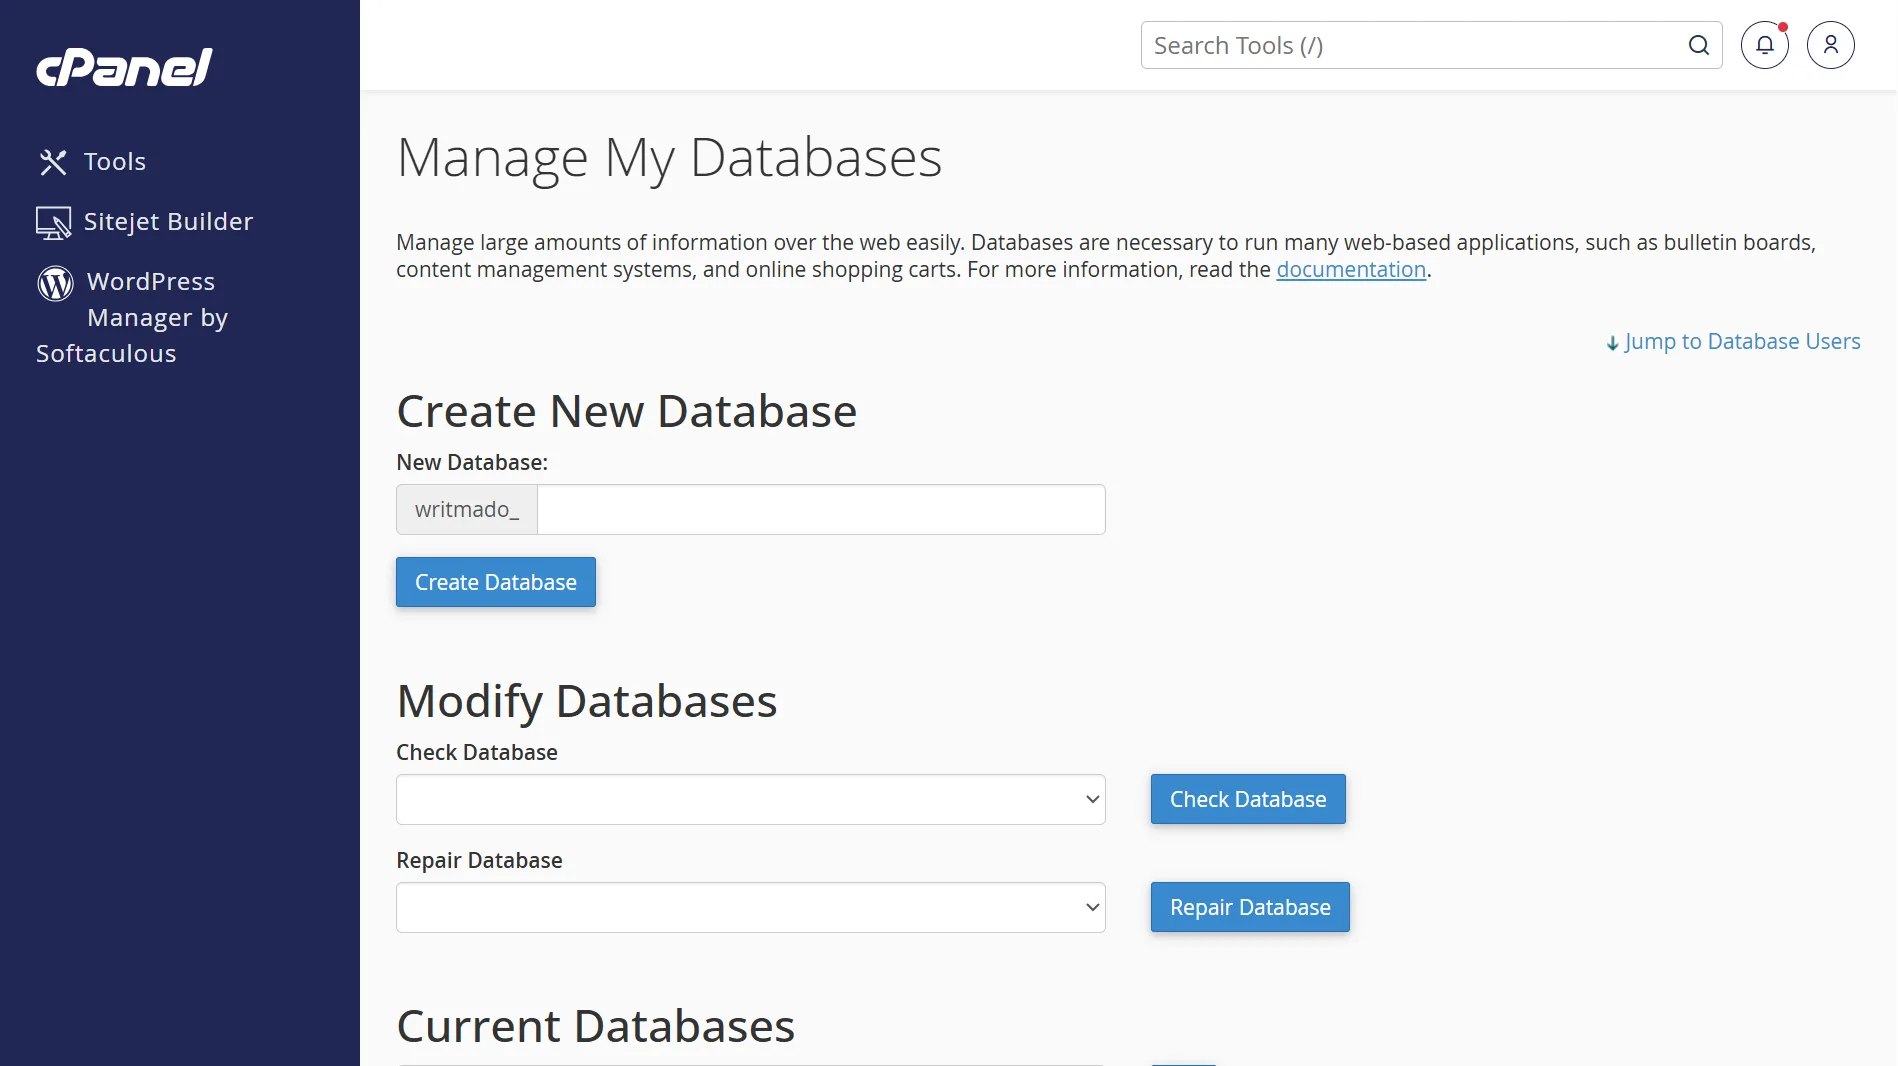
Back in cPanel, find the MySQL databases tool. This is where you create a database and a user for your Laravel application.
In the “Create New Database” field, type a name for your database. cPanel will automatically prefix it with your account username.
For example, if your username is myaccount and you type laravel, the full database name becomes myaccount_laravel. Write this full name down.
Scroll down to MySQL Users. Create a new user with a strong password. cPanel will prefix this username too. Write down the full username and password.
Finally, under Add User to Database, select the user and database you just created. Click Add. On the next screen, check “ALL PRIVILEGES” and click Make Changes.
Step 5: Import Your Local Database
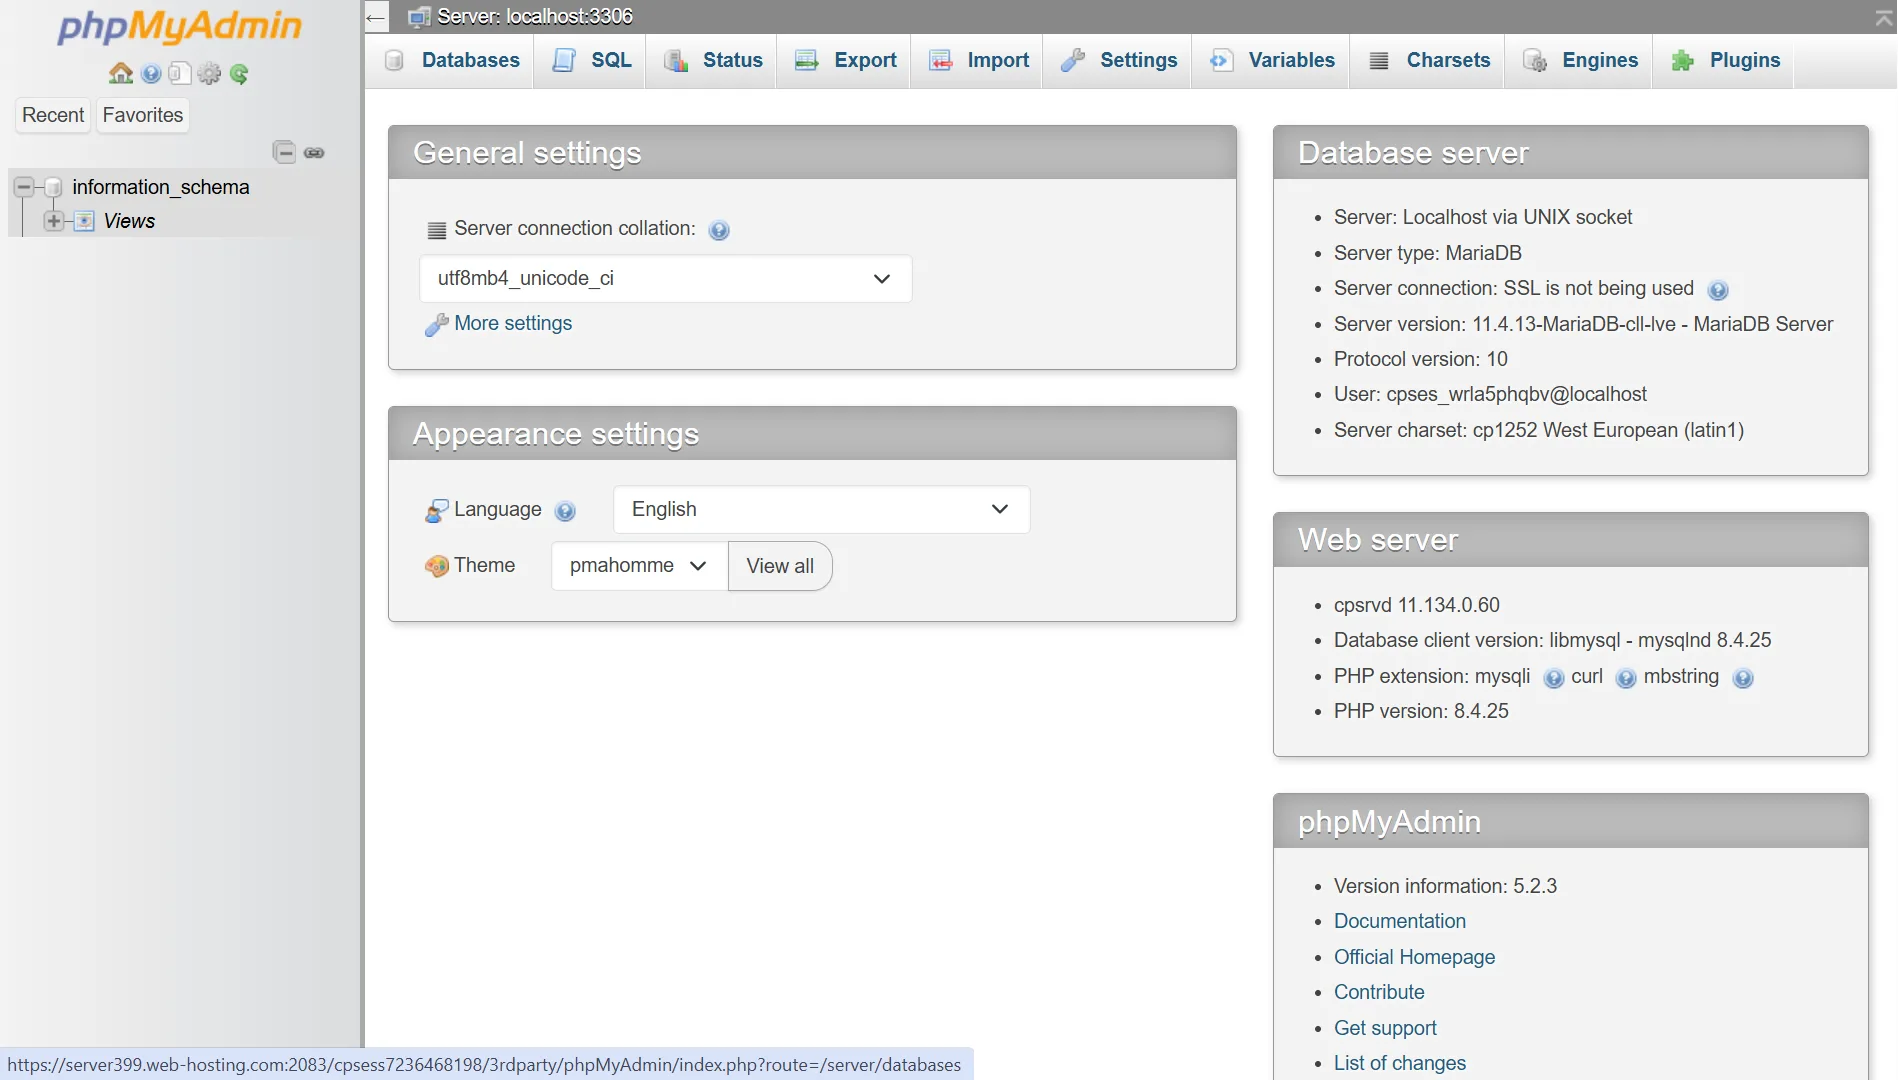
In cPanel, open phpMyAdmin. On the left sidebar, click the database you just created. Click the “Import” tab at the top.
Click Choose File and select your local .sql dump file. Make sure the format is set to SQL. Scroll down and click “Import” or “Go.”
If your database file is large, phpMyAdmin might time out or hit an upload limit.
In that case, you’ll need to either split the SQL file into smaller parts or use SSH to import it via command line. If your host provides SSH access, upload the .sql file to your home directory and run:
text
mysql --force -u yourusername_dbuser -p yourusername_dbname < yourfile.sql
You’ll be prompted for the database user’s password.
After import, verify in phpMyAdmin that your tables and data are present.
Step 6: Configure the .env File on the Server
Go back to File Manager and navigate to your laravel_app folder. You’ll see a .env file. If you don’t see it, enable “Show Hidden Files” in File Manager settings.
Open .env for editing. Update these values:
APP_ENV set to production
APP_DEBUG set to false
APP_URL set to your actual domain, like https://yourdomain.com
APP_KEY paste the key from your local .env file. This is critical. Without the correct APP_KEY, encrypted data and sessions will fail.
Update the database section:
text
DB_CONNECTION=mysql
DB_HOST=localhost
DB_PORT=3306
DB_DATABASE=yourusername_dbname
DB_USERNAME=yourusername_dbuser
DB_PASSWORD=your_password
Use the full prefixed names that cPanel created. Save the file.
Step 7: Set File Permissions
Laravel needs write access to certain folders. In File Manager, navigate to your laravel_app folder.
Right-click the storage folder and select “Change Permissions.” Set it to 775. Do the same for the bootstrap/cache folder.
If 775 doesn’t work, try 777 temporarily to test, but 775 is the safer setting for production.
Your hosting user and the web server user typically share a group, so 775 usually gives both the access they need.
Step 8: Clear Cached Files
If you cached your configuration, routes, or views locally before uploading, those caches now contain paths and settings from your local machine. They need to be cleared and rebuilt on the server.
If you have SSH access, navigate to your Laravel application folder and run:
text
php artisan config:clear
php artisan cache:clear
php artisan route:clear
php artisan view:clear
Then rebuild the caches for production:
text
php artisan config:cache
php artisan route:cache
php artisan view:cache
If you don’t have SSH access, you can create a temporary PHP file in your public_html directory that runs these Artisan commands when you visit it in your browser. Create a file called clear-cache.php with this content:
text
<?php
require __DIR__.'/../laravel_app/vendor/autoload.php';
$app = require_once __DIR__.'/../laravel_app/bootstrap/app.php';
$kernel = $app->make(Illuminate\Contracts\Console\Kernel::class);
$kernel->call('config:clear');
$kernel->call('cache:clear');
$kernel->call('route:clear');
$kernel->call('view:clear');
$kernel->call('config:cache');
$kernel->call('route:cache');
$kernel->call('view:cache');
echo "Cache rebuilt successfully.";
Visit https://yourdomain.com/clear-cache.php in your browser. Once you see the success message, delete this file immediately. Leaving it on the server is a security risk.
Step 9: Create the Storage Symlink (if using file uploads)
If your Laravel application handles file uploads, the files are stored in storage/app/public, but they need to be accessible from the web. Laravel uses a symbolic link from public/storage to storage/app/public to make this work.
If you have SSH access, run:
text
php artisan storage:link
Without SSH, create another temporary PHP file in public_html:
text
<?php
require __DIR__.'/../laravel_app/vendor/autoload.php';
$app = require_once __DIR__.'/../laravel_app/bootstrap/app.php';
$kernel = $app->make(Illuminate\Contracts\Console\Kernel::class);
$kernel->call('storage:link');
echo "Storage link created.";
Visit the file in your browser, then delete it.
Step 10: Test Your Site
Open your domain in a browser. Your Laravel application should load. Test a few different routes to make sure URL rewriting is working.
Try logging in if your app has authentication. Upload a file if your app supports it.
Check that static assets such as CSS and JavaScript files are loading. If they aren’t, your APP_URL in .env might be incorrect, or the asset paths might still be pointing to a subfolder that doesn’t exist anymore.
If something goes wrong, don’t panic. The troubleshooting section below covers the most common issues.
Troubleshooting Common Issues
| Issue | Fix |
|---|---|
| 500 error | Check file permissions on storage and bootstrap/cache. Look at storage/logs/laravel.log for the actual error. |
| Blank white page | Enable APP_DEBUG=true temporarily to see the error. Check storage/logs/laravel.log. |
| 404 on all routes | Make sure .htaccess exists in public_html and that mod_rewrite is enabled on the server. |
| Assets not loading | Fix APP_URL in .env. Run npm run build locally and re-upload the built assets if needed. |
| Encryption key error | Set APP_KEY in .env with the value from your local environment. |
| Database connection error | Verify database name, username, and password in .env. Remember cPanel prefixes them. |
/public appearing in URLs | Check that index.php paths are corrected and .htaccess is in the right place. |
| Vite manifest not found | Run npm run build locally and upload the public/build folder to the server |
Deploy Laravel on Shared Hosting FAQs
Which hosting is best for Laravel?
For development and small projects, shared hosting with PHP 8.1+, MySQL, and cPanel works well. For production applications with high traffic, a VPS gives you more control over PHP configuration, server resources, and security. Truehost shared hosting supports Laravel and gives you the cPanel tools you need to deploy it.
How can I deploy Laravel for free?
You can deploy Laravel for free on platforms like Railway, Render, or Fly.io, which offer free tiers for small applications. However, these platforms have limitations on resources and may sleep your app after inactivity.
Can I host Laravel on Truehost?
Yes. Truehost shared hosting supports PHP 8.1+ and includes the required extensions for Laravel. You get cPanel access, MySQL databases, phpMyAdmin, and File Manager. The steps in this guide apply directly to Truehost hosting accounts.
Is Laravel good for beginners?
Laravel is beginner-friendly compared to many PHP frameworks. It has extensive documentation, a large community, and tools like Artisan and Eloquent that make common tasks easier. The learning curve exists, especially around concepts like dependency injection and service containers, but most beginners can build a functional application within a few weeks of consistent practice.
Which hosting provider is best for Laravel development?
For Laravel development, look for a host that offers PHP 8.1 or higher, the required extensions (BCMath, Ctype, Fileinfo, JSON, Mbstring, OpenSSL, PDO, Tokenizer, XML), MySQL, Composer support, and SSH access if possible. Providers like Truehost, SiteGround, and A2 Hosting all meet these requirements for shared hosting. For larger projects, consider a VPS.
Ready to Deploy Laravel On Shared Hosting?
You’ve seen the steps. Your Laravel application can run on shared hosting without a VPS, and you don’t need to be a server administrator to make it work.
We at Truehost provide shared hosting built for exactly this kind of deployment.
Every plan includes PHP 8.1+ with Laravel’s required extensions, cPanel with File Manager, MySQL databases, and phpMyAdmin. You get the tools you need to follow this guide from start to finish.
Our Starter plan starts at ₨282.65 per month. It’s a solid choice for personal projects, portfolios, or student applications.
If you need to host multiple websites or handle more traffic, the Pro plan is ₨296.78 per month.
For agencies, developers managing client sites, or eCommerce applications, the Unlimited plan gives you unlimited SSD storage, unlimited domains, and unlimited databases for ₨4,149.77 per month.
Every plan includes free SSL certificates, daily backups, and a 30-minute setup so you can get your Laravel application online quickly.
We also provide free website migrations if you’re moving from another host.
Ready to get your Laravel application live?