Domain SearchInstantly check and register your perfect .pk or international domain
 Web HostingGet a .pk domain for as low as PKR 467
 cPanel HostingUser-friendly hosting powered by cPanel
 Reseller HostingLaunch your own hosting business with minimal technical requirements
 Windows HostingOptimized for Windows-based applications and websites
 Affiliate ProgramEarn referral commissions by promoting our services
 WordPress HostingFast & Reliable WordPress Hosting
 Domain TransferMigrate your existing domain seamlessly with zero downtime.
 All DomainsAccess 324+ top-level domains (TLDs) worldwide from a single platform
 Whois LookupIdentify the owner of any domain using our whois and rdap lookup tool
 Managed VPS Hosting
 AI Website BuilderCreate beautiful websites effortlessly using intuitive drag-and-drop features
 Online ShopLaunch a professional online shop with no technical skills required
 BlogDiscover expert guides on hosting, websites, SEO, and digital growth strategies
 ContactGet instant assistance via live chat or email
 SupportAccess help articles, tutorials, and service documentation
 SSL CertificatesEncrypt data, build trust, and boost SEO.
Running two or more websites on separate hosting accounts means paying for multiple plans and managing multiple dashboards.
A VPS gives you a better deal. It lets you run several websites from one server, provided each site is configured with its own domain, directory, web server configuration, and PHP environment.
But before we get to the “how to host multiple websites on a VPS”, make sure you have:
- A Linux VPS with root or SSH access
- A registered domain for each website
- Access to each domain’s DNS settings
- Website files and databases ready to deploy
You’ll also need basic terminal knowledge if you’re setting everything up without a control panel.
For planning purposes, 2 GB RAM can be a good starting point for a few low-traffic sites, while sites with higher traffic, WordPress, or heavier applications will need more CPU and RAM.
Now, with one server, properly configured, you can run all your sites for far less than paying for separate hosting plans.
Let’s see how we can do that.
Step 1: Point Your Domains to the VPS
Before configuring the websites themselves, get every domain pointing to the VPS. This tells visitors’ browsers where to find each site.
1) Add DNS records
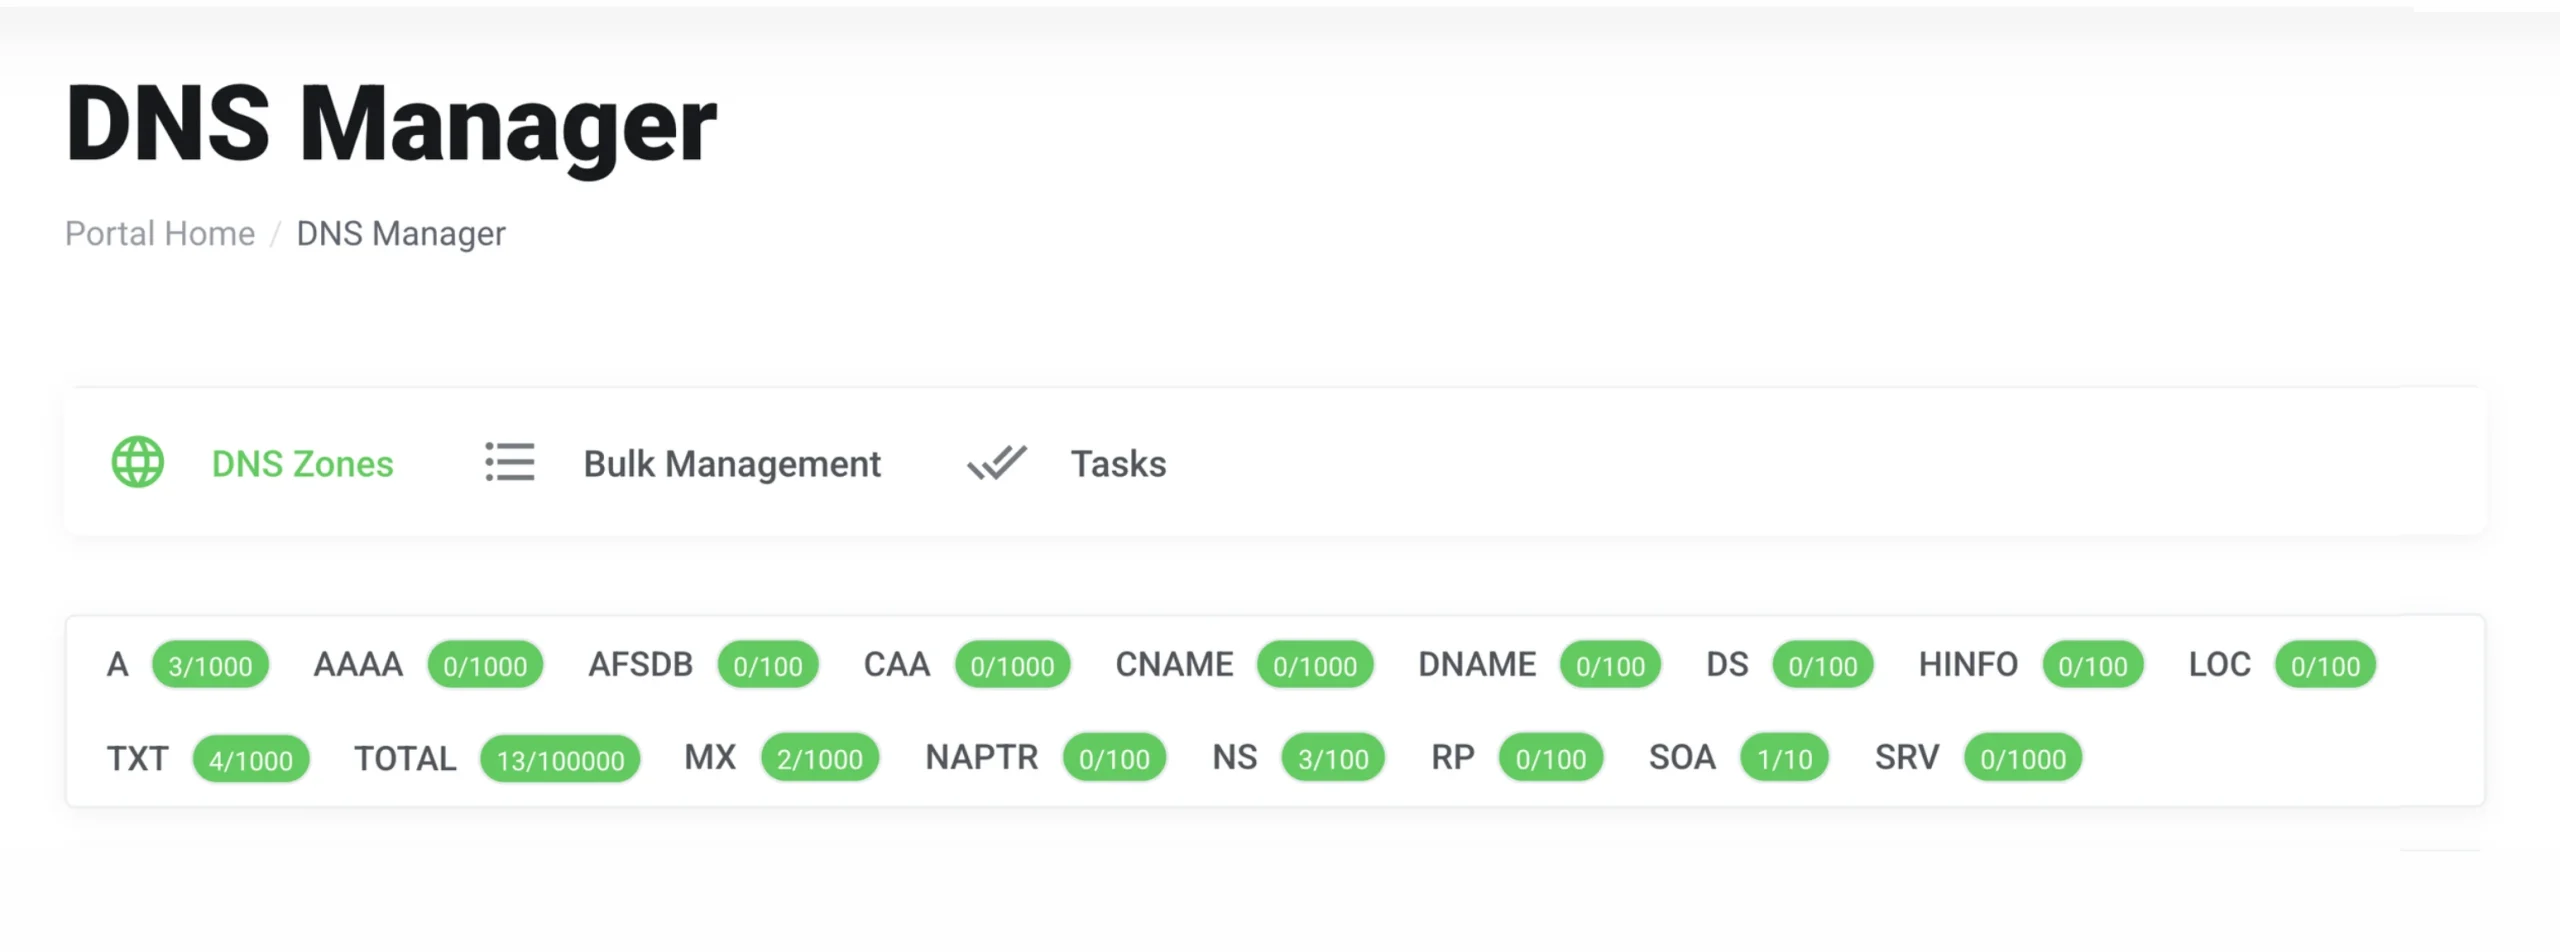
For each domain:
- Log into your registrar’s DNS management panel
- Create an A record for the root domain (e.g.,
yoursite.pk) pointing to your VPS IP address - Create an A record for
www, or configure it as a CNAME pointing to the root domain, whichever your registrar’s setup recommends
Repeat this for every website you plan to host on the VPS.
2) Verify DNS
Once you’ve added the records, verify them from your terminal:
dig sitename.pkDNS propagation can take anywhere from a few minutes to 24 hours.
A domain not loading immediately does not mean the VPS or web server is broken. It just means propagation isn’t complete yet. Verify the DNS before assuming something is wrong on the server side.
Step 2: Create a Separate Directory and User for Every Website
Before touching the web server, establish clean separation between your websites at the filesystem level. This keeps things organized and, more importantly, limits the damage if one site is ever compromised.
A simple structure could look like this:
/var/www/
├── site1.pk/
├── site2.pk/
└── site3.pk/
You can also place the public website files inside a public_html directory:
/var/www/
├── site1.pk/
│   └── public_html/
├── site2.pk/
│   └── public_html/
└── site3.pk/
    └── public_html/
For each site, run through these three steps:
Create the directory:
sudo mkdir -p /var/www/site1.pk/public_htmlNext, create a dedicated Linux user for each site:
sudo adduser --disabled-password site1userThen assign ownership of the website files to that user:
sudo chown -R site1user:www-data /var/www/site1.pk/public_htmlRepeat for every site, keeping each website’s files inside its own directory and owned by its own user.
This separation gives you a basic security boundary between sites. If Site A is compromised or misconfigured, its Linux user should not automatically have access to Site B’s files.
Without this separation, a single vulnerability in one WordPress install could expose every other site running on the same server.
It also keeps day-to-day administration cleaner. Each site’s files, permissions, logs, and PHP processing can be managed separately instead of placing everything in one shared directory.
Step 3: Configure the Web Server for Multiple Domains
Now the VPS needs to know which website to serve when someone visits each domain.
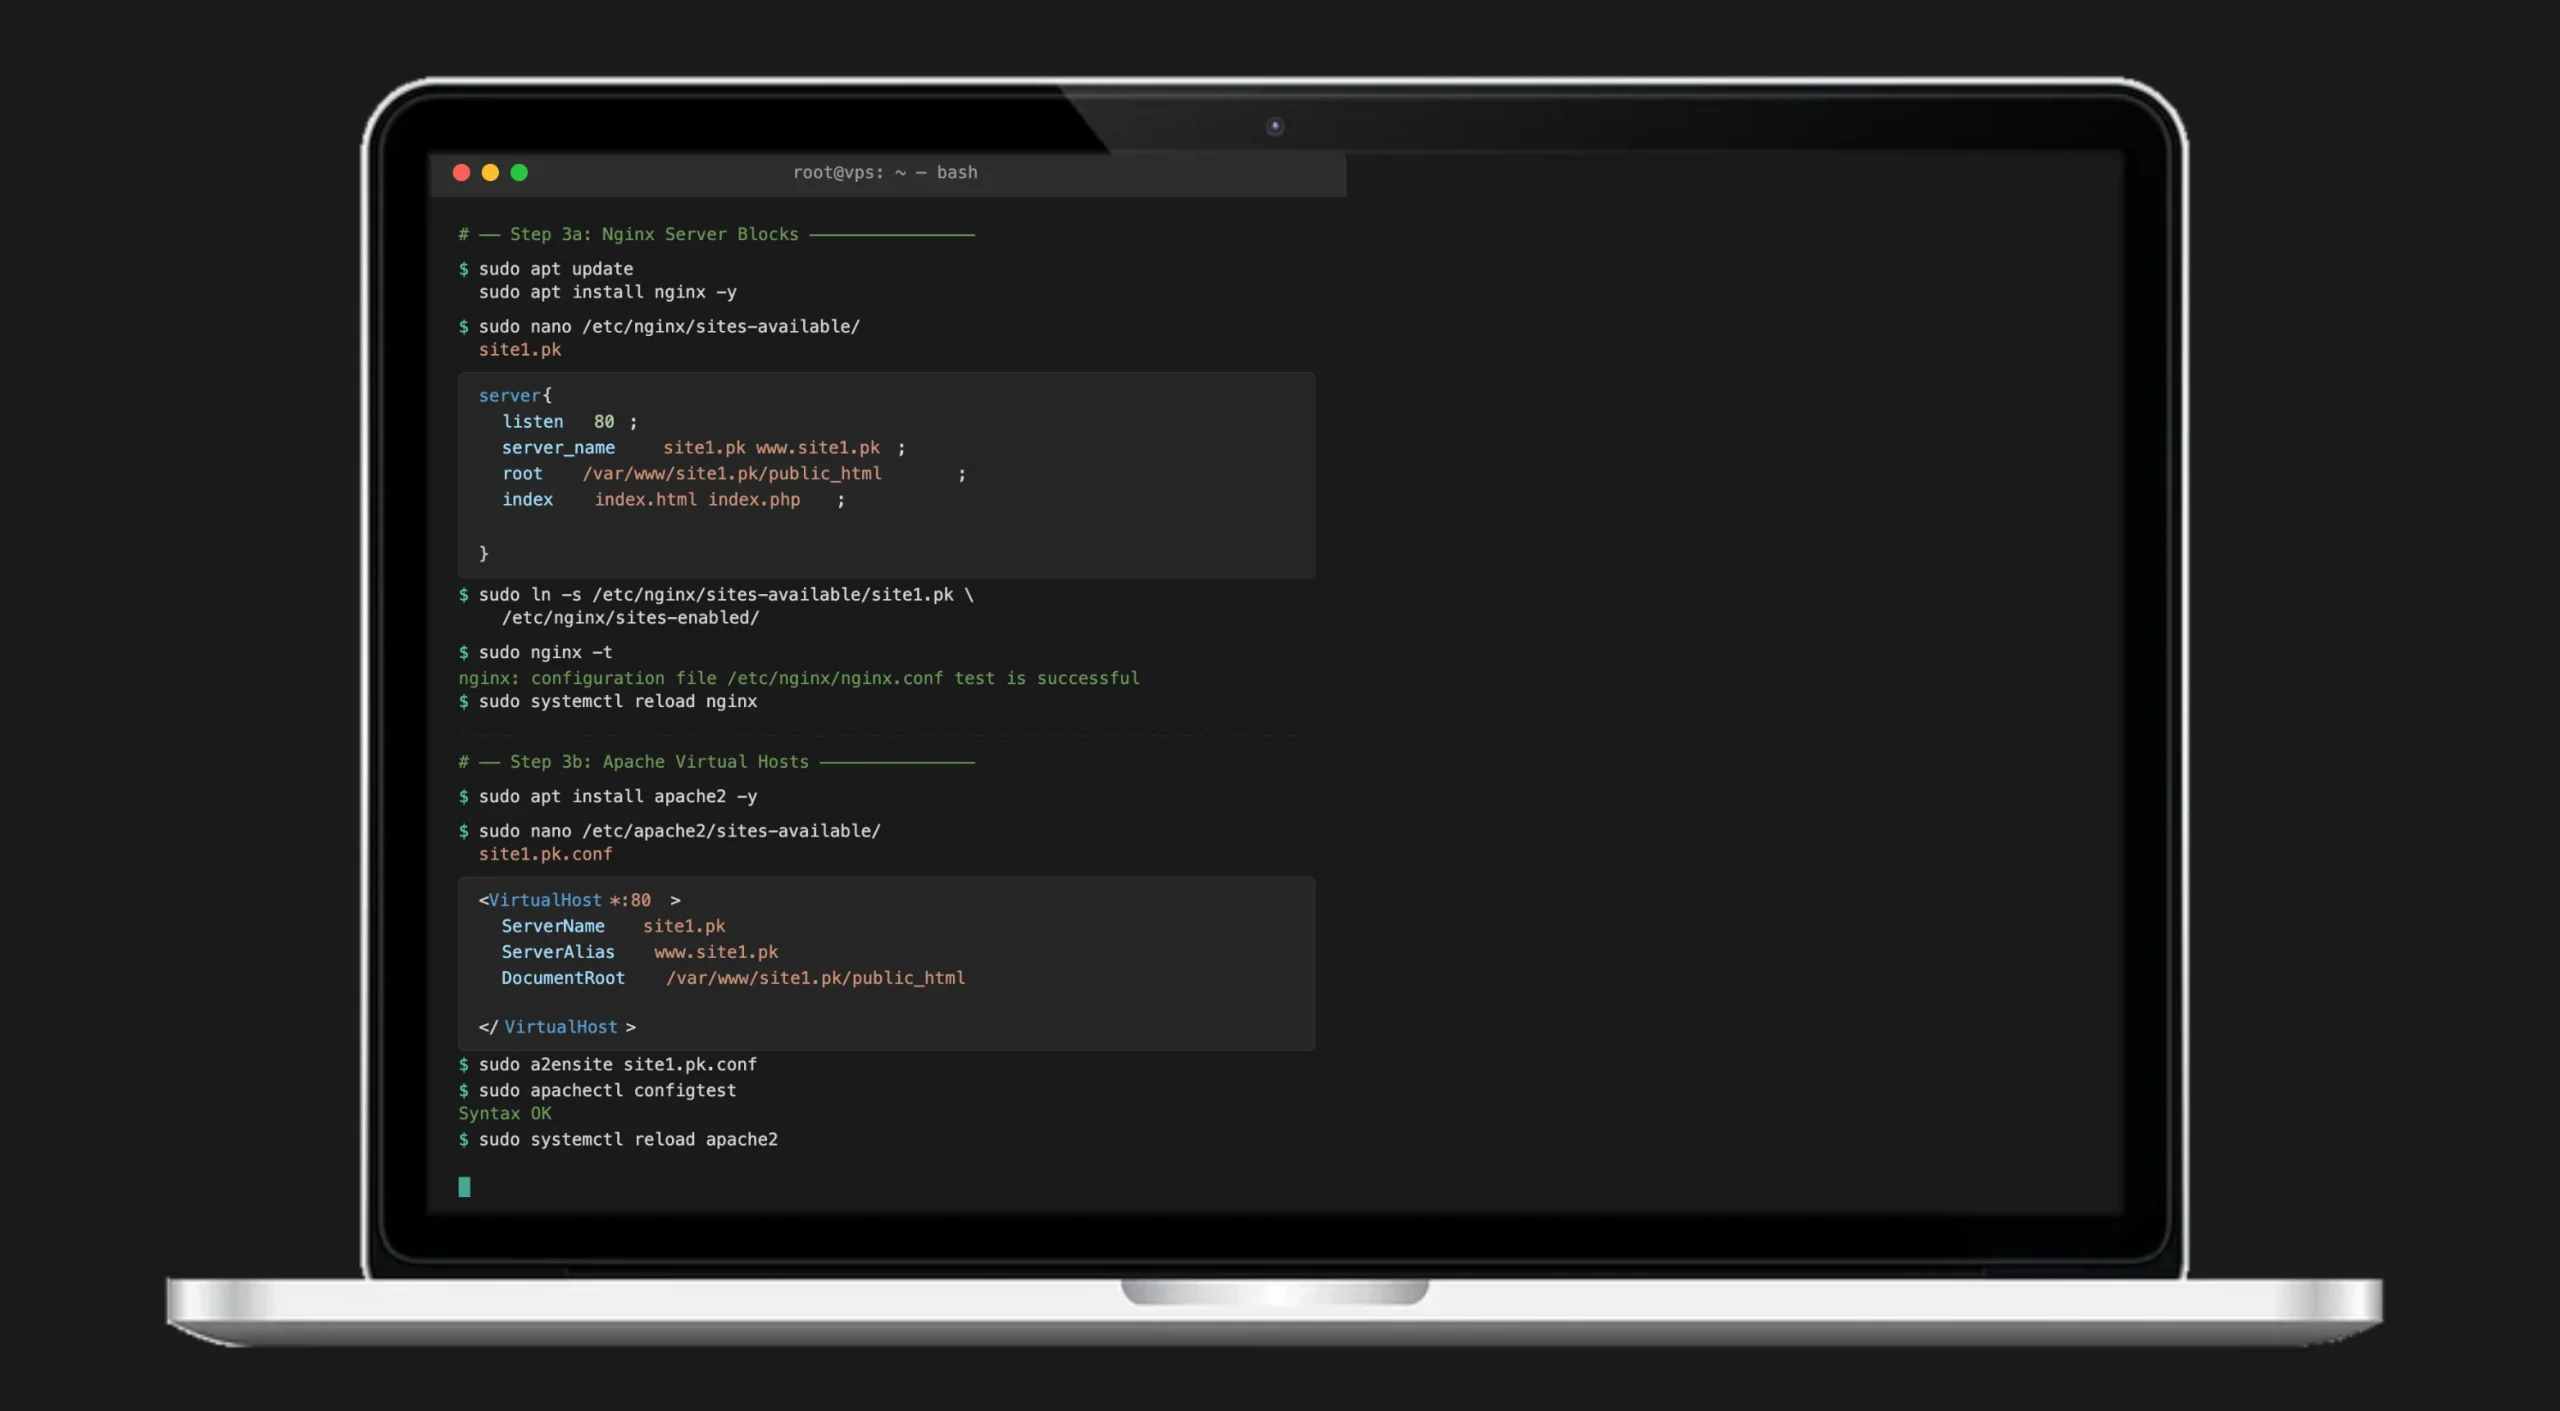
You have two common choices: Nginx and Apache.
a) Setting Up Nginx Server Blocks
Nginx uses less memory per site and handles concurrent connections more efficiently.
Start by installing Nginx:
sudo apt update
sudo apt install nginx
Create a configuration file for your first domain:
sudo nano /etc/nginx/sites-available/site1.pkAdd a server block similar to this:
server {
    listen 80;
    server_name site1.pk www.site1.pk;
    root /var/www/site1.pk/public_html;
    index index.html index.php;
}
The server_name tells Nginx which domain this configuration belongs to, while root points to that website’s files.
Enable the site by creating a symlink into sites-enabled:
sudo ln -s /etc/nginx/sites-available/site1.pk /etc/nginx/sites-enabled/Test the configuration before reloading:
sudo nginx -tIf the test passes, reload Nginx:
sudo systemctl reload nginxRepeat this for every domain.
Each website should have its own configuration and a unique server_name. Duplicate or incorrect server_name values across config files will cause the wrong site to appear when someone visits a domain.
b) Setting Up Apache Virtual Hosts
If Apache fits your applications better, install it with:
sudo apt update
sudo apt install apache2
Create a virtual host configuration file for your first domain:
sudo nano /etc/apache2/sites-available/site1.pk.confAdd the virtual host block:
<VirtualHost *:80>
    ServerName site1.pk
    ServerAlias www.site1.pk
    DocumentRoot /var/www/site1.pk/public_html
</VirtualHost>
Enable the site:
sudo a2ensite site1.pk.confThen test the Apache configuration:
sudo apachectl configtestIf everything passes, reload Apache:
sudo systemctl reload apache2Repeat this process for every website, using a unique ServerName for each domain.
Nginx is a good option for a lean multi-site VPS configuration, particularly if you don’t need .htaccess. Apache is useful for older applications and websites built around .htaccess or Apache-specific modules.
Step 4: Isolate PHP Processing Per Site with PHP-FPM
The web server can keep the websites separate, but PHP needs its own configuration too.
If several websites share the same PHP processing pool, a traffic spike or poorly performing application on Site A can consume all the available PHP workers, leaving Sites B and C unable to process requests until things calm down.
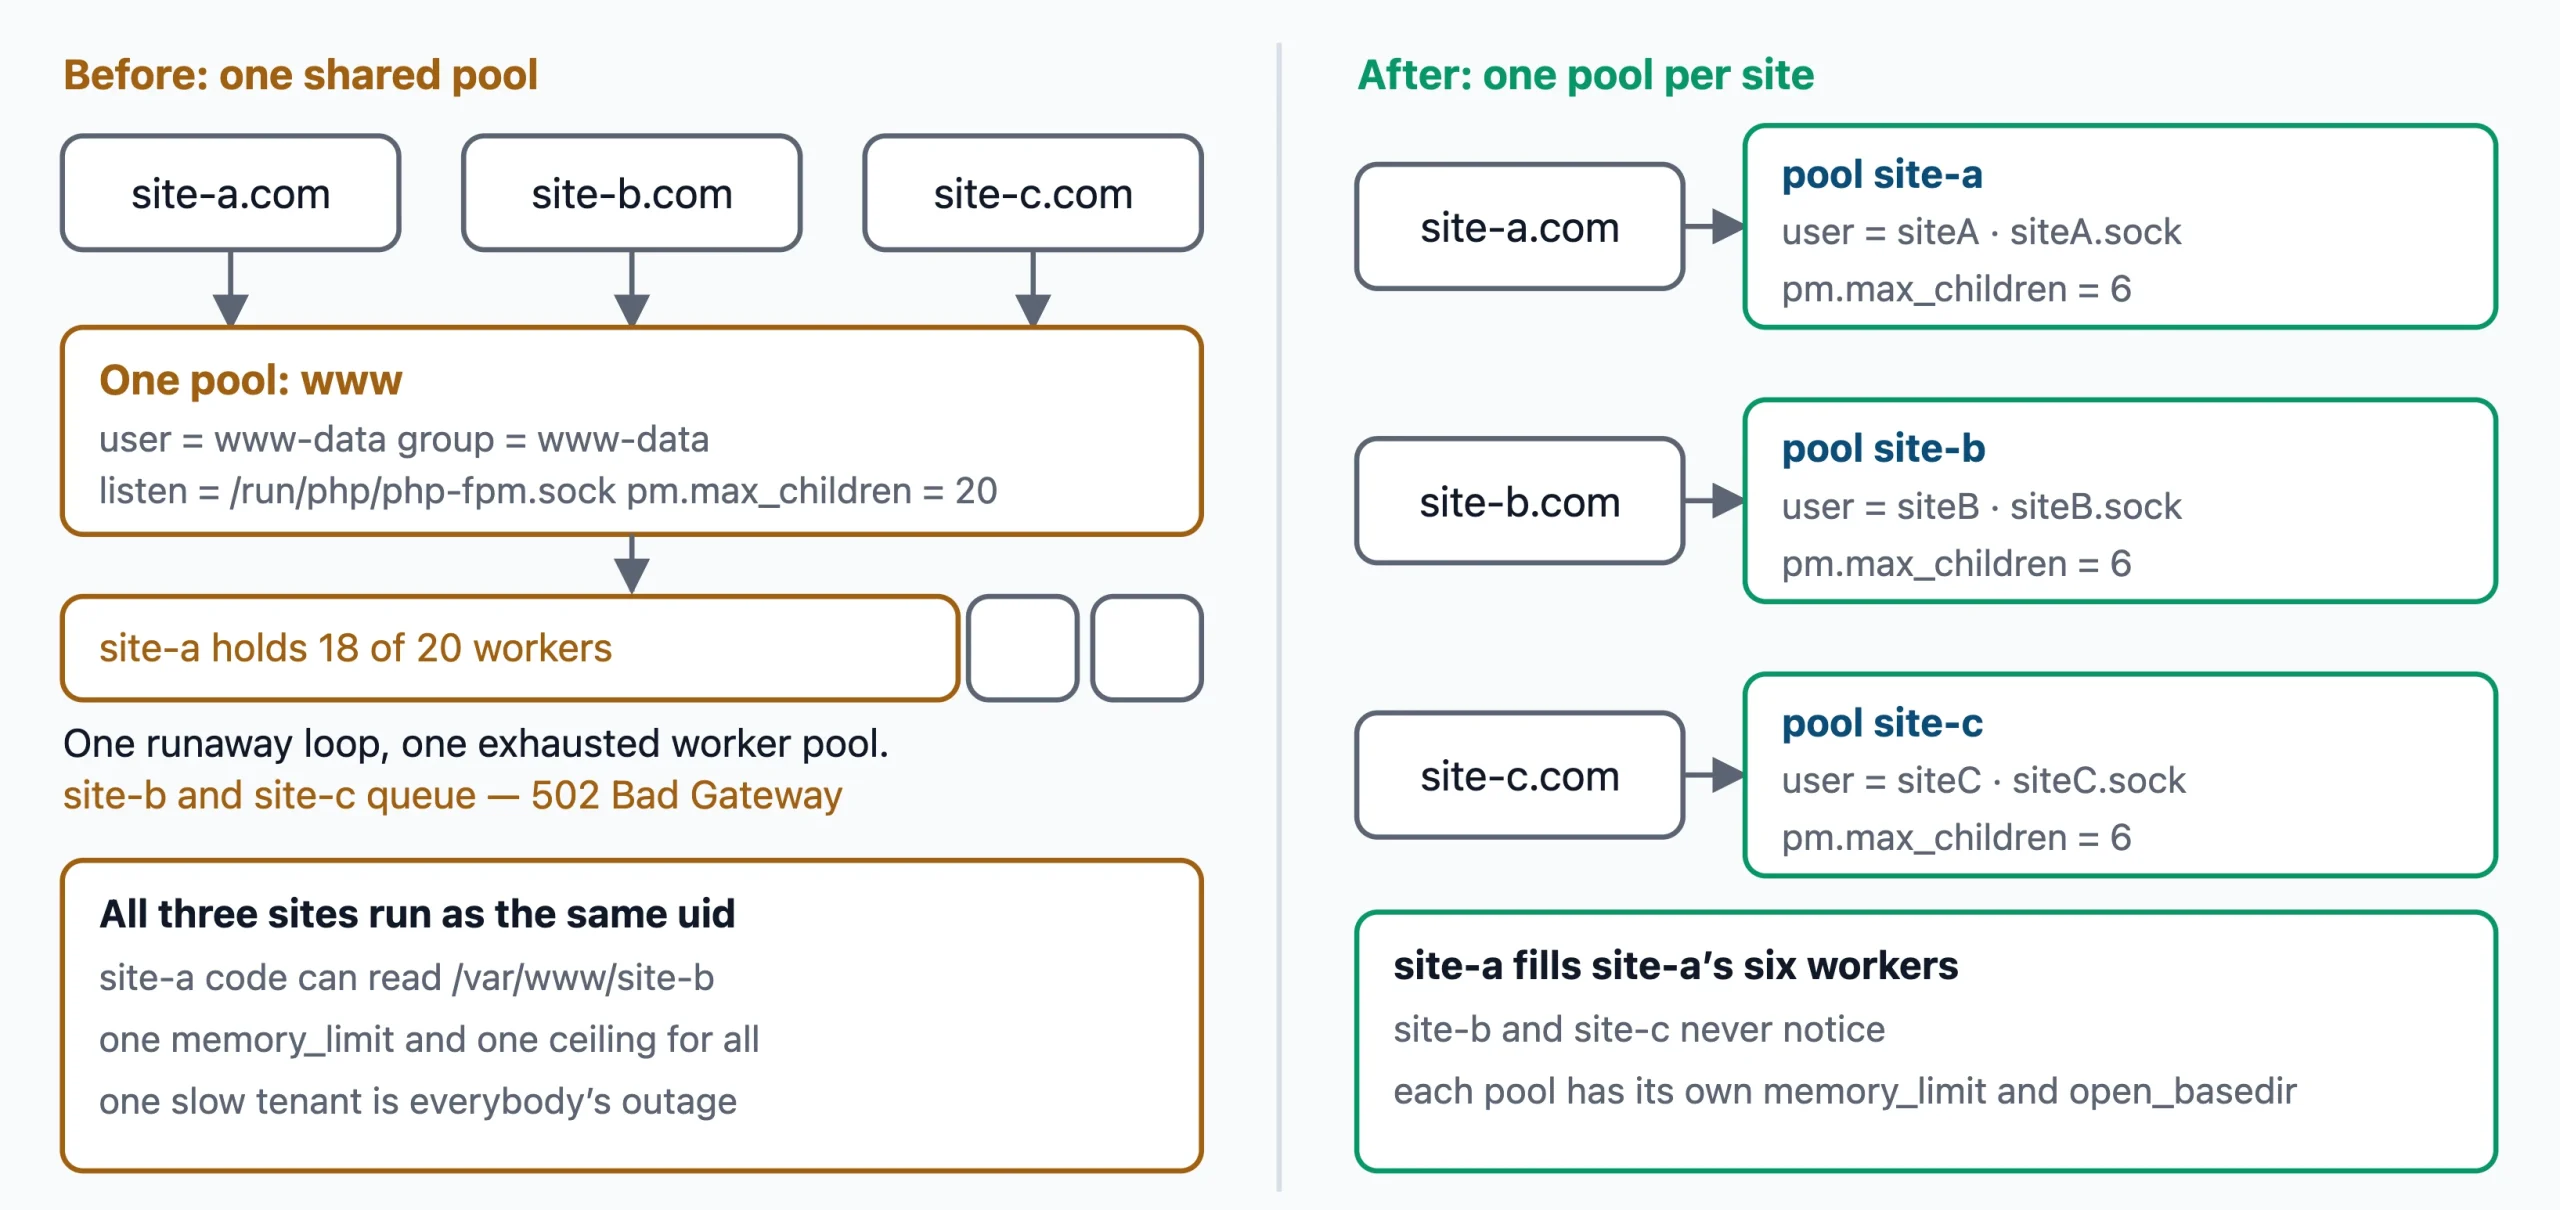
Separate PHP-FPM pools give each site its own PHP process configuration and socket, so problems stay contained.
1. Create one PHP-FPM pool per site
Create a pool configuration file for your first site:
sudo nano /etc/php/8.3/fpm/pool.d/site1.pk.confAdd the following, adjusting the values to match your site’s user and domain:
[site1.pk]
user = site1user
group = site1user
listen = /run/php/php8.3-fpm-site1.pk.sock

pm = dynamic
pm.max_children = 10
pm.start_servers = 2
pm.min_spare_servers = 1
pm.max_spare_servers = 3
The important part is that the pool has its own user, group, and socket.
You can then create another pool for site2.pk with its own values.
The pm.max_children setting controls how many PHP processes that pool can run at once.
How to size pm.max_children (Total number of PHP workers):
RAM available for PHP ÷ average PHP process size
= approximate total PHP workers
For example, if a 4 GB VPS has around 3 GB available for PHP and each WordPress PHP process uses roughly 30–50 MB, the theoretical range is around 60–100 workers across the server.
That’s an estimate, not a number to configure blindly. Leave RAM available for the operating system, your database, Nginx or Apache, and other services running alongside your sites.
2. Connect each website to its own socket
Your Nginx configuration needs to point each website to the correct PHP-FPM socket.
For example, update your Nginx server block for this site to point at its dedicated socket:
location ~ \.php$ {
    fastcgi_pass unix:/run/php/php8.3-fpm-site1.pk.sock;
    include fastcgi_params;
    fastcgi_param SCRIPT_FILENAME $document_root$fastcgi_script_name;
}
For Apache, add this inside the <VirtualHost> block:
<FilesMatch \.php$>
    SetHandler "proxy:unix:/run/php/php8.3-fpm-site1.pk.sock|fcgi://localhost"
</FilesMatch>
Repeat both the pool config and the web server connection for every site on the server.
This keeps PHP processing separated between the websites.
If a client’s site needs a completely different software stack or PHP version, run it inside a Docker container instead. That gives it a fully isolated environment without affecting anything else on the server.
Step 5: Secure Every Website with Free SSL
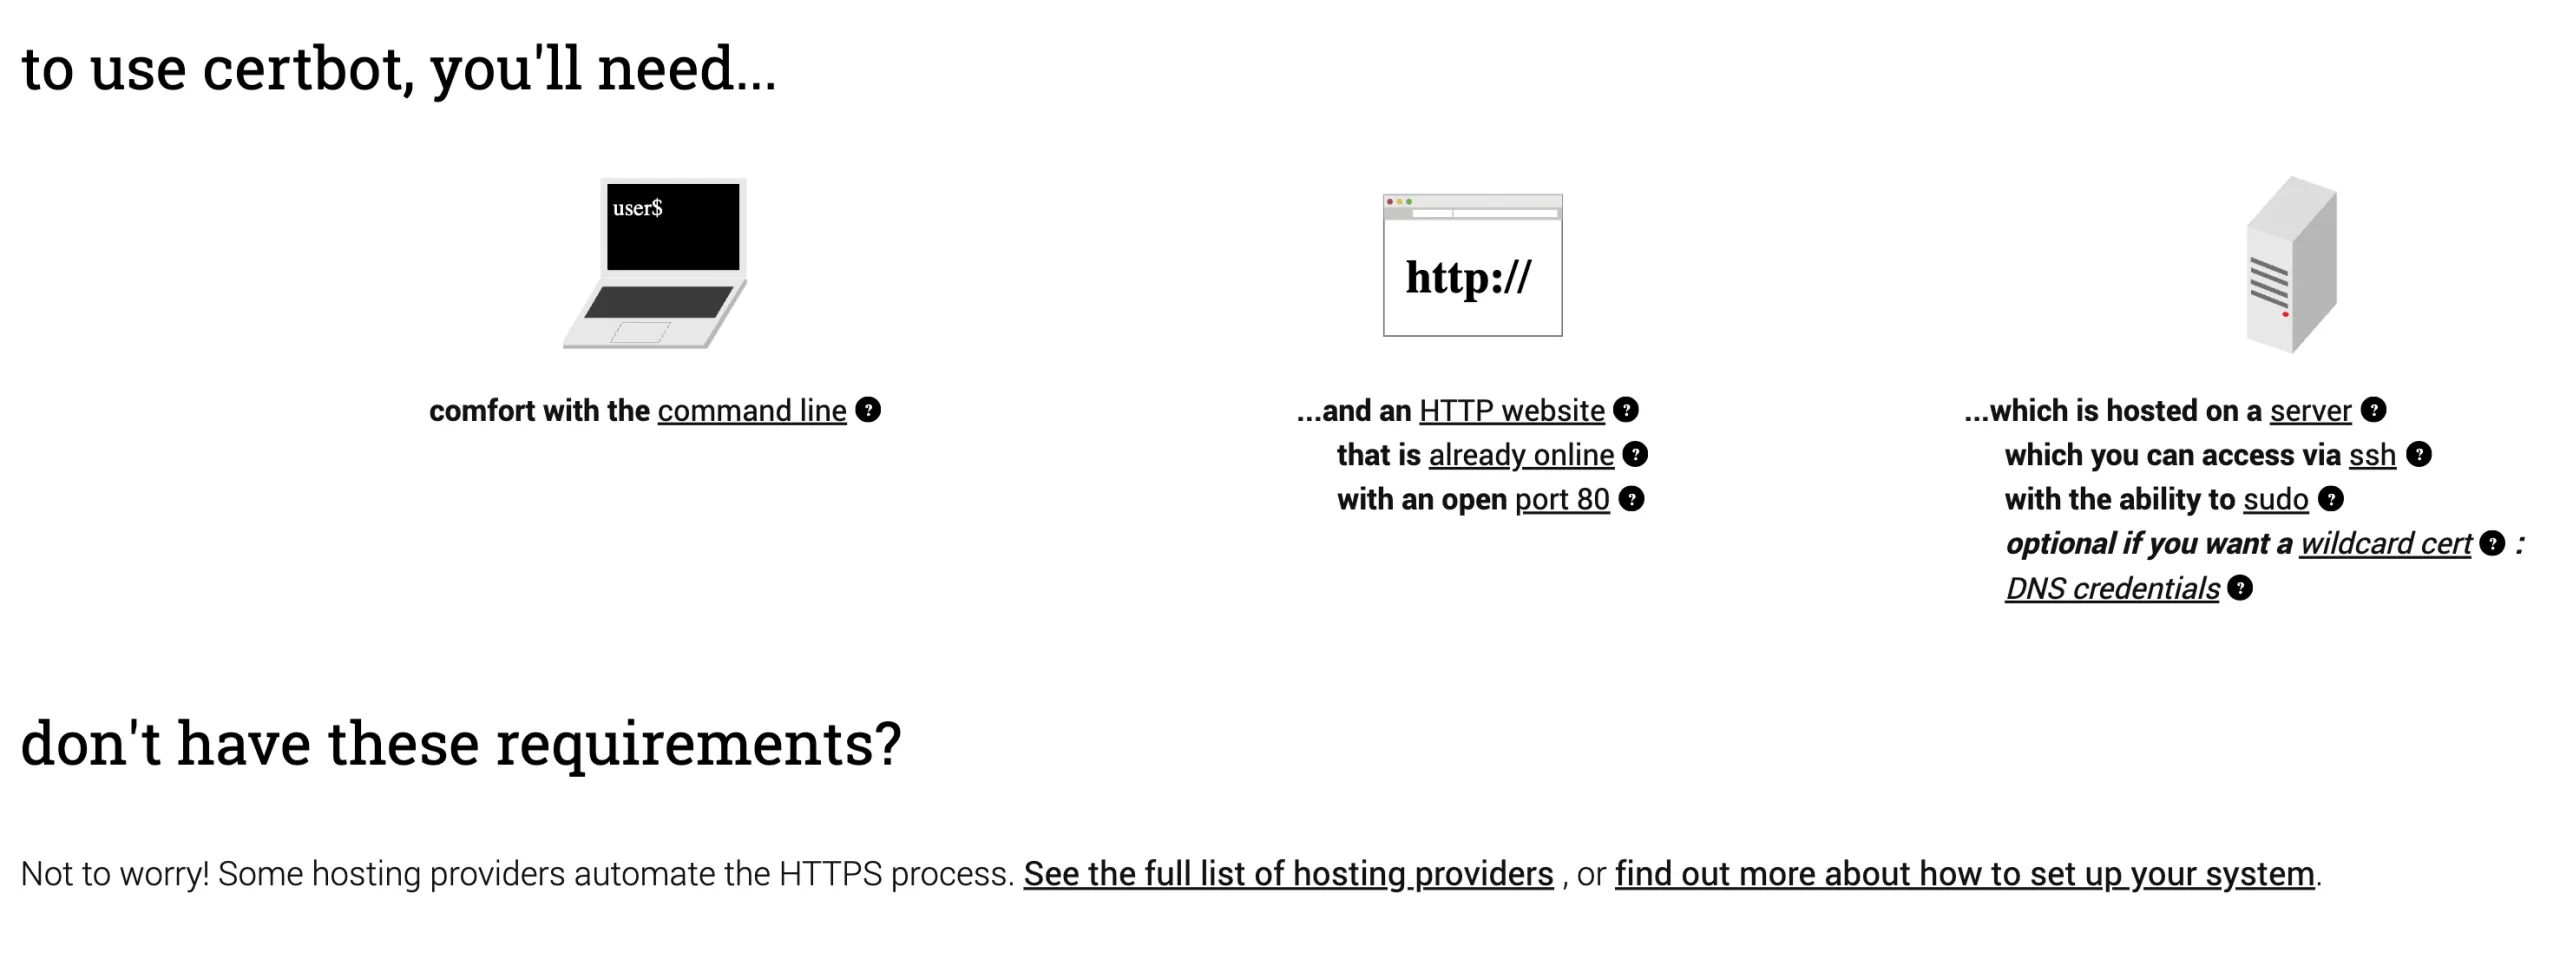
Every domain needs an SSL certificate before anything goes live. Let’s Encrypt provides free certificates, and Certbot handles both installation and automatic renewal.
1) Install Certbot
For Nginx, install Certbot and its Nginx plugin:
sudo apt install certbot python3-certbot-nginx -yFor Apache:
sudo apt install certbot python3-certbot-apache -y2) Issue certificates
For an Nginx site, you can request a certificate for both the root domain and its www version:
Nginx:
sudo certbot --nginx -d site1.pk -d www.site1.pkApache:
sudo certbot --apache -d site1.pk -d www.site1.pkComplete domain validation for each site, and configure HTTP to HTTPS redirection when Certbot prompts you to.
3) SSL renewal
Certbot renews certificates automatically, but renewal runs the same domain validation that the initial issue ran. Three things must remain true for renewals to keep working:
- Port 80 must stay open, even if you redirect all traffic to HTTPS
- The webroot path must not have moved since the certificate was issued
- The domain’s DNS must still point at this server
Miss any of these and renewal silently fails. You won’t find out until the certificate expires and browsers start throwing warnings. Check the troubleshooting section below if you hit renewal errors.
You can test the renewal process without replacing your live certificates:
sudo certbot renew --dry-runThat gives you an early warning if something needs fixing.
Step 6: Lock Down the VPS and Separate the Websites
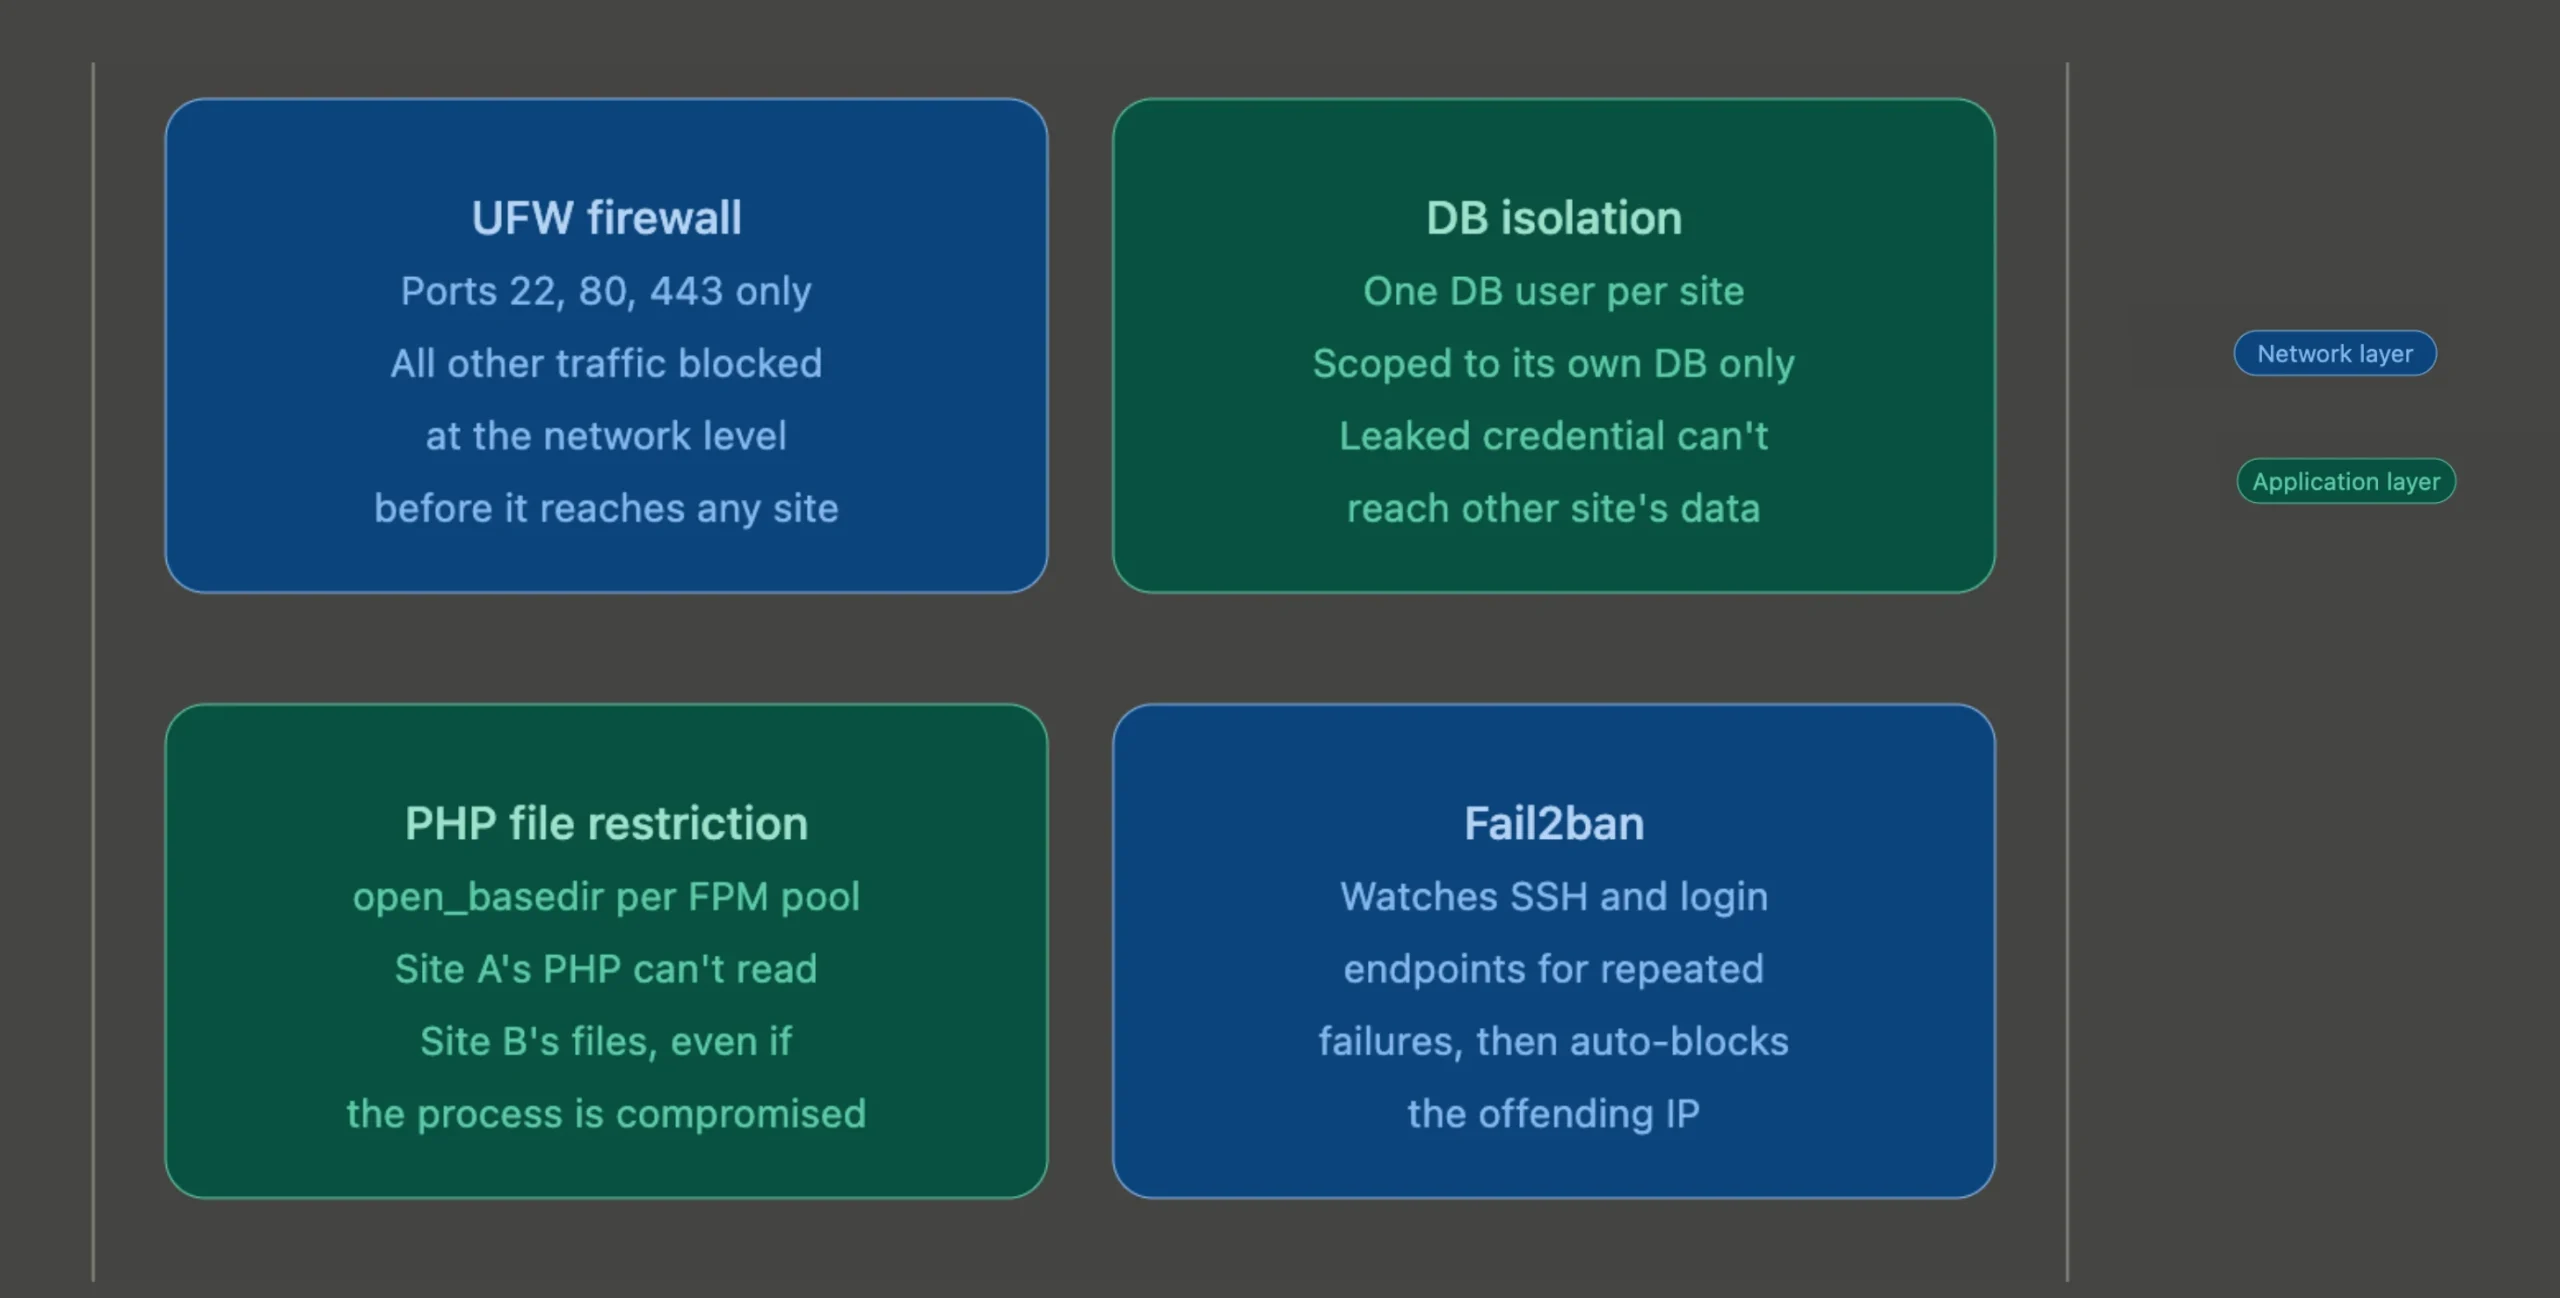
When multiple sites share a server, a security gap in one becomes a risk for all of them. These four controls close most of that gap without overcomplicating things.
a. Configure UFW
Only expose the ports the server needs.
For a typical web server, that includes SSH, HTTP, and HTTPS:
sudo ufw allow OpenSSH
sudo ufw allow 80/tcp
sudo ufw allow 443/tcp
sudo ufw enable
If you’re using Apache, use the appropriate Apache firewall profile instead.
Avoid opening additional ports unless a service running on the VPS needs them.
b. Give each site its own database user
For MySQL or MariaDB, create a separate user for each website and grant it access only to that site’s database:
CREATE USER 'site1user'@'localhost' IDENTIFIED BY 'strong_password';
GRANT ALL PRIVILEGES ON site1_db.* TO 'site1user'@'localhost';
FLUSH PRIVILEGES;
Do not reuse one database credential across all websites. If that credential is ever exposed, every database on the server is at risk.
c. Restrict PHP access
You can also restrict the directories that PHP is allowed to access.
Inside each PHP-FPM pool config, add an open_basedir directive:
php_admin_value[open_basedir] = /var/www/site1.pk:/tmpThis restricts PHP scripts for Site A from reading files outside Site A’s directory, so, even if the process is compromised, it can’t access Site B’s files.
Combined with separate Linux users and PHP-FPM pools, this creates another layer of separation between websites.
d. Add Fail2ban
Install Fail2ban to automatically block IPs that repeatedly fail SSH login attempts or hammer web login pages:
sudo apt install fail2ban -yConfigure it to watch SSH and any web login endpoints where repeated failures would indicate a brute-force attempt.
If you’d rather not manage any of this manually, our Managed VPS plans come with server-level security handled for you.
Step 7: Test Every Website Before Going Live
Before sending visitors or clients to the new websites, test each one individually.
For each domain, open a private/incognito browser window and check:
- The root domain loads the correct website
- The
wwwversion also loads correctly - HTTPS works with no certificate warning
- PHP executes correctly (a simple
phpinfo()test page works for this) - The database connection works
- Static files (images, CSS, JavaScript) load without errors
An incognito browser window helps prevent cached DNS or browser data from hiding a configuration problem.
Always run a configuration syntax check before reloading either web server:
# For Nginx
sudo nginx -t

# For Apache
sudo apachectl configtest
A single typo in one site’s configuration file will take down every site on the server when the service reloads. The syntax check catches it before it causes damage.
Troubleshooting: 6 Problems You May Encounter
Even with a careful setup, a multi-site VPS can produce a few familiar errors. These are the problems you’ll most often need to check.
a) Wrong Website Loads for a Domain
Almost always caused by:
- Duplicate or incorrect
server_namein Nginx - Incorrect
ServerNameorServerAliasin Apache - A default server block or VirtualHost catching requests meant for a specific site
Open each config file and verify that every domain appears in exactly one file with the correct value.
b) 502 Bad Gateway
Check if:
- PHP-FPM is really running (
sudo systemctl status php8.3-fpm) - The correct pool is active
- The socket path in the web server config matches the
listendirective in the pool config exactly - The socket file has the correct permissions
c) One Website Slows Down the Others
Possible causes:
- Sites sharing the same PHP-FPM pool instead of separate ones
pm.max_childrenset too high for the available RAM, causing memory pressure across the server- One site consuming excessive CPU, RAM, or database connections
Recalculate the process budget per pool and reduce pm.max_children if the combined total exceeds what your VPS can support.
d) SSL Renewal Fails
Check each of the following in order:
- Port 80 is open and reachable from outside
- DNS still points at this server for the affected domain
- The webroot path hasn’t moved
- No configuration changes have broken the domain validation path
e) Certificate Warning After Renewal
The web server hasn’t reloaded since the certificate was updated. Reload Nginx or Apache after every certificate renewal. Certbot’s deploy hooks can automate this so it never becomes a manual step you forget.
f) New Website Configuration Does Not Take Effect
Check:
- The configuration file is in the right location
- For Nginx: the file is symlinked into
sites-enabled, not just saved insites-available - For Apache: the site was enabled with
a2ensite - The configuration test passed before the reload was attempted
FAQs on How to Host Multiple Websites on a VPS
Which host is best for hosting multiple websites on a VPS?
Look for a VPS provider that gives you full root access, scalable RAM and CPU, and the option to upgrade as your site count grows. Our Truehost VPS plans are built for exactly this use case, starting with the Cloud VPS Elite and scaling up through plans with more CPU and RAM as your workload increases.
Is a VPS better than shared hosting?
Yes, for most cases. Shared hosting puts hard limits on what you can configure. PHP settings, process isolation, and server-level security are all managed by the host, not you. A VPS gives you root access and the ability to run each site with its own isolated environment. You also avoid the ‘noisy neighbor’ problem where another account’s traffic spike affects your sites.
Can two websites have the same IP address?
Yes. You don’t need a separate IP address for every website. Name-based virtual hosting allows one IP address to serve multiple domains. When a visitor opens a domain, the web server uses the request’s hostname to determine which server block or VirtualHost should handle it.
Start Hosting Multiple Websites From One Server Now
Hosting multiple websites on a VPS comes down to five consistent pieces: correct DNS, clean directory isolation, server blocks with unique domain names, separate PHP-FPM pools per site, and SSL plus a firewall covering everything.
Get those right, and one server handles as many sites as your resources allow, cleanly and without one site affecting another.
Our VPS Hosting plans in Pakistan start at ₨1,913.54/mo and can scale as you add websites or your traffic grows.
If you’d rather have the server configuration handled for you, our Managed VPS option covers setup, security, and ongoing maintenance.
Pick your plan and run every site you manage from one server.