Domain SearchInstantly check and register your perfect .pk or international domain
 Web HostingGet a .pk domain for as low as PKR 467
 cPanel HostingUser-friendly hosting powered by cPanel
 Reseller HostingLaunch your own hosting business with minimal technical requirements
 Windows HostingOptimized for Windows-based applications and websites
 Affiliate ProgramEarn referral commissions by promoting our services
 WordPress HostingFast & Reliable WordPress Hosting
 Domain TransferMigrate your existing domain seamlessly with zero downtime.
 All DomainsAccess 324+ top-level domains (TLDs) worldwide from a single platform
 Whois LookupIdentify the owner of any domain using our whois and rdap lookup tool
 Managed VPS Hosting
 AI Website BuilderCreate beautiful websites effortlessly using intuitive drag-and-drop features
 Online ShopLaunch a professional online shop with no technical skills required
 BlogDiscover expert guides on hosting, websites, SEO, and digital growth strategies
 ContactGet instant assistance via live chat or email
 SupportAccess help articles, tutorials, and service documentation
 SSL CertificatesEncrypt data, build trust, and boost SEO.
A website security problem rarely announces itself.
You may only notice it after a customer reports a strange redirect, your website suddenly goes offline, or your hosting account shows activity you don’t recognize.
That is why having a security checklist is important. You don’t need to be a cybersecurity expert to protect a website, but you do need to know which areas to check and what to fix first.
If you run a website in Pakistan, this checklist gives you a practical way to work through those areas, from the basic protections every site needs to the additional hardening steps you can add as your website grows.
Let’s start with why these checks deserve attention in 2026.
Why Website Security Can’t Wait in 2026
Cyber threats are no longer something a human sits down and plans against your site specifically.
Today, automated bots scan millions of websites per hour, hunting for weak passwords, outdated plugins, and missing SSL certificates.
That changes the security problem for a small business owner as well. Your website doesn’t need to be famous to attract unwanted traffic. An automated tool can find it without anyone specifically looking for your business.
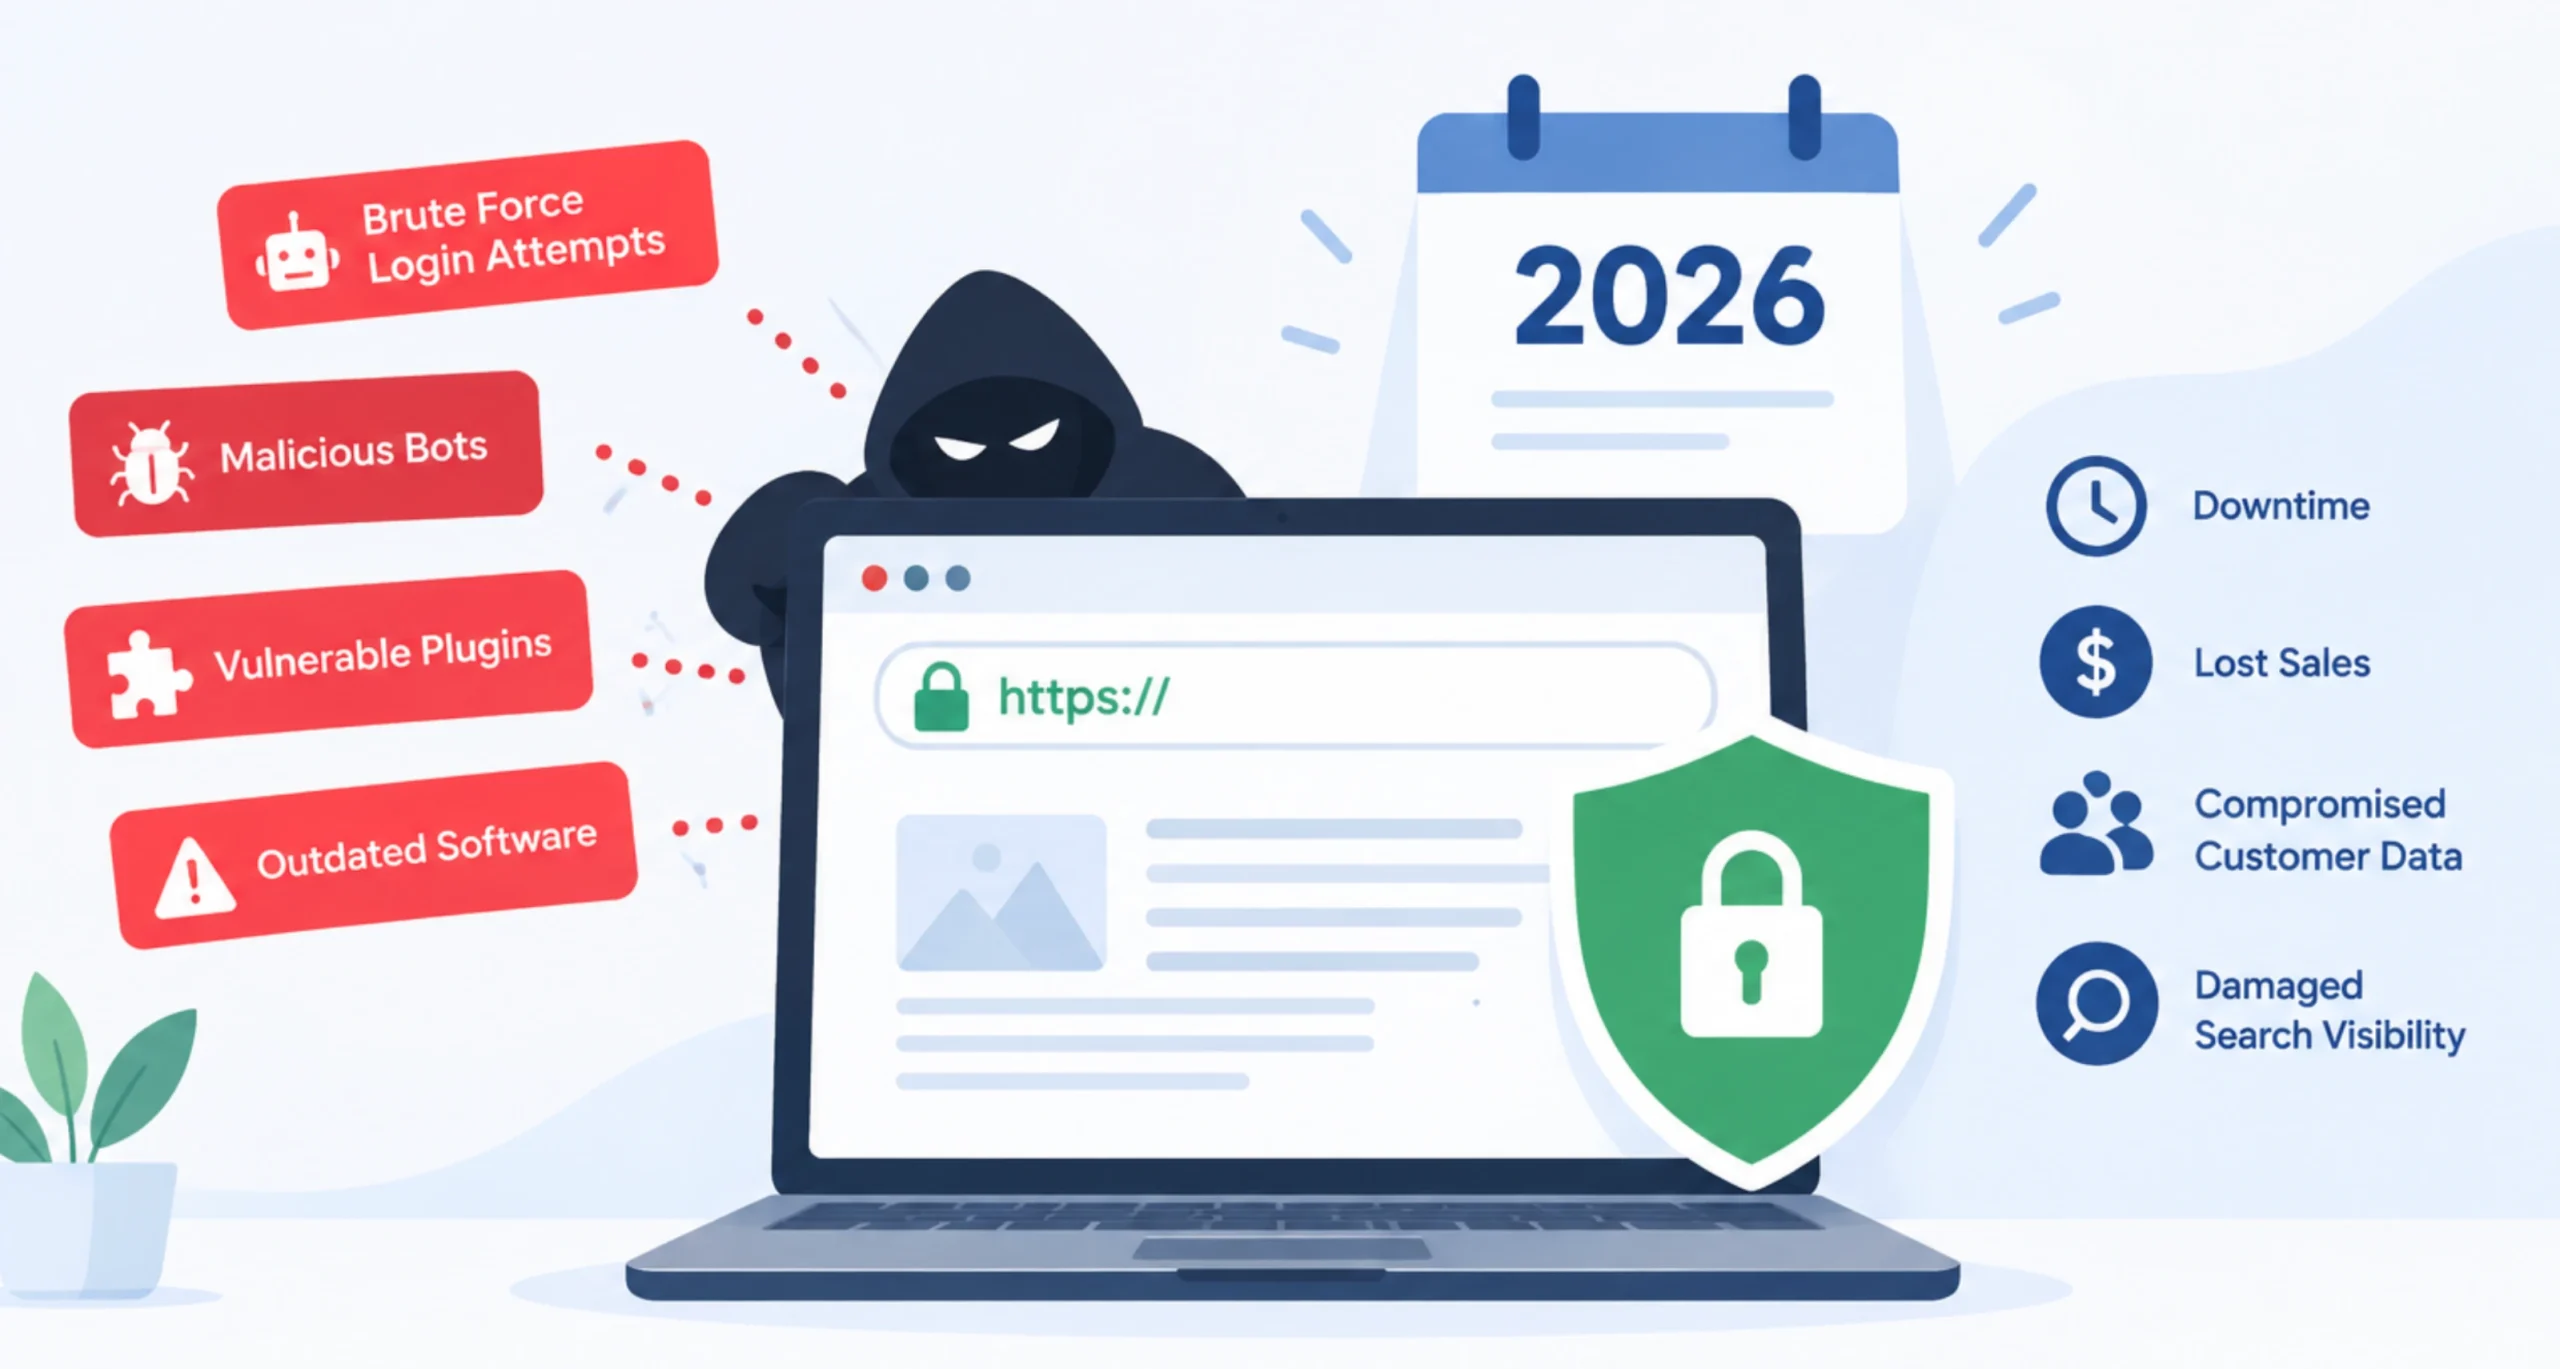
There is also the issue of HTTPS. Google actively removes “Not Secure” sites from the top of search results, which means a missing SSL certificate doesn’t just put your visitors at risk but also kills your organic traffic too.
Then there is the potential cost of an incident. A compromised website can mean downtime, lost sales, recovery work, compromised customer information, damaged search visibility, and hours spent figuring out what went wrong.
Compare that with the cost of basic protections such as SSL, strong authentication, software updates, backups, and a firewall. The difference can be great.
So what does a secure website really look like?
The Complete 2026 Website Security Checklist
Stage 1: The Foundational Basics
These are the steps that close the most common entry points. If your site doesn’t have these in place, nothing else on this list makes any difference.
1) Install an SSL Certificate
Every website security checklist starts here, because this is the one thing that protects every page, every form, and every transaction on your site.
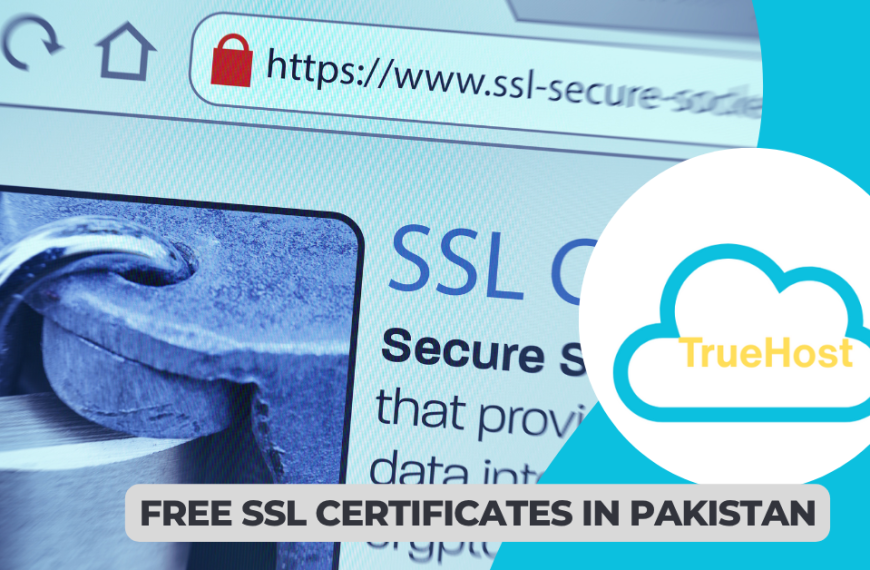
An SSL certificate encrypts information travelling between your website and a visitor’s browser. When someone fills in your contact form or enters their payment details, that data travels scrambled and unreadable to anyone trying to intercept it.
Without SSL, it travels in plain text.
Once SSL is installed correctly, your website uses HTTPS instead of HTTP.
For a basic website, a Domain Validation (DV) certificate may be enough. Organization Validation (OV) certificates provide additional organization verification, while Extended Validation (EV) certificates are designed for organizations that require a higher level of identity verification.
The certificate you choose should match the type of website you operate and the level of validation you need.
At Truehost, we offer SSL certificates starting from ₨2,826.50 per year, and they can be installed in minutes.
SSL is only the first layer, though. Once it’s active, make sure visitors cannot accidentally fall back to an unsecured connection.
2) Force HTTPS and Enable HSTS
Installing an SSL certificate does not automatically mean every request will use HTTPS.
By default, a visitor who types your domain without “https://” may still land on an unsecured connection. You can configure this with a redirect rule through your hosting environment or .htaccess, depending on your setup.
Then there is HSTS, or HTTP Strict Transport Security.
HSTS tells compatible browsers to use HTTPS when connecting to your website rather than attempting an unsecured HTTP connection. It also helps protect against SSL-stripping attacks, where an attacker attempts to downgrade a connection from HTTPS to HTTP.
If you’re unsure how to configure this, your hosting support team can help you check the setup.
3) Use Strong Passwords and Enable 2FA
Every account connected to your website, including your admin dashboard, your hosting panel, and your domain registrar, needs a strong, unique password.
A long passphrase or a randomly generated password of 16 characters or more gives you a much stronger starting point than short passwords built around names, locations, or dates.
A password manager can generate and store these passwords for you, so you don’t have to remember every one.
Then add two-factor authentication wherever it is available.
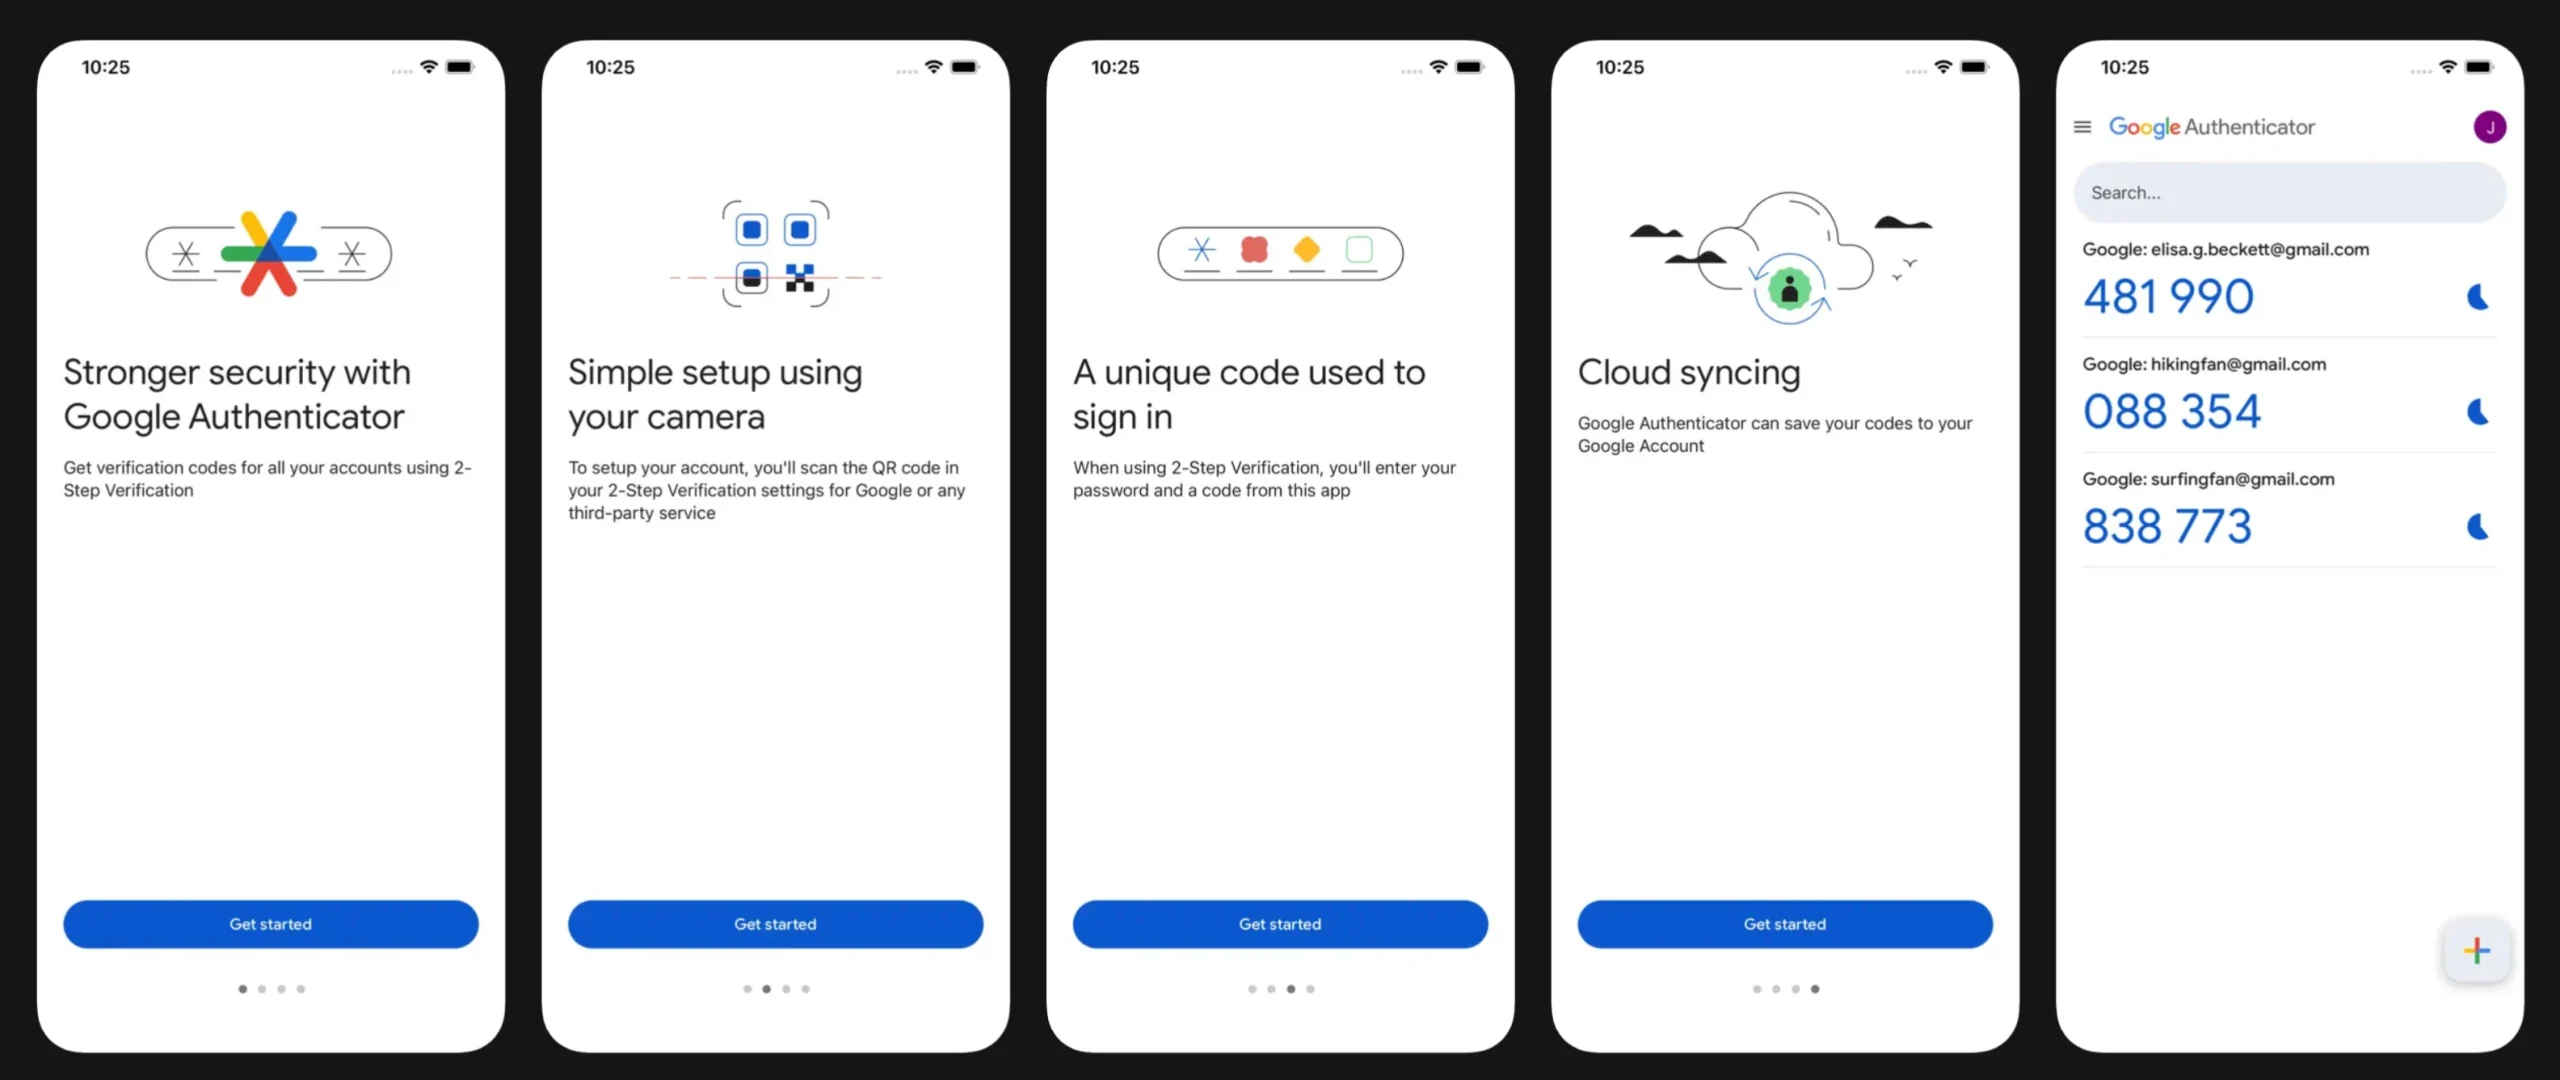
Authenticator apps such as Google Authenticator or Authy add another verification step after the password. Also, hardware security keys using standards such as FIDO2 or WebAuthn can provide an additional option for accounts that support them.
SMS codes alone are no longer considered safe in 2026, since SIM swapping attacks can intercept them.
4) Audit and Tighten User Access
Think about everyone who has ever been given a login to your site. The developer who built it. The freelancer who wrote a few posts. The agency you worked with last year.
Are those accounts still active?
Go through your user list and remove anyone who no longer needs access. For the people who do, make sure they only have the level of access their role actually requires. An editor doesn’t need admin rights. A content contributor doesn’t need to install plugins.
This is called “Least Privilege Access”. It limits the blast radius if any one account gets compromised. A breached editor account is far less dangerous than a breached admin account.
Stage 2: Guard the Entry Points
5) Install a Web Application Firewall (WAF)
A Web Application Firewall, or WAF, examines incoming web traffic and can block requests that match known malicious patterns before they reach your website.
It can help protect against attacks such as SQL injection, cross-site scripting, and certain forms of malicious automated traffic.
For many websites, Cloudflare provides an accessible starting point. Other options include Sucuri and Wordfence for WordPress websites.
A WAF does not replace secure passwords, updates, or backups. It adds another layer between your website and unwanted traffic.
6) Rename and Protect Your Login Page
If you run WordPress, attackers already know that /wp-admin is a common administration address. That makes it an obvious target for automated login attempts.
Changing the login URL can reduce the amount of automated traffic reaching the standard login endpoint. A WordPress plugin such as WPS Hide Login can handle this without requiring you to modify your site’s core files.
You should also limit the number of failed login attempts allowed within a given period.
If a bot keeps trying hundreds of passwords, your security system should not allow it unlimited attempts.
7) Validate and Sanitize All User Inputs
Every field that accepts information from a visitor is a potential entry point for malicious code. That includes contact forms, search boxes, registration forms, comment fields, and file uploads.
If your site processes whatever a visitor submits without checking it first, an attacker can slip database commands or executable scripts into those fields. This is called SQL injection, and it remains one of the most common attack types in 2026.
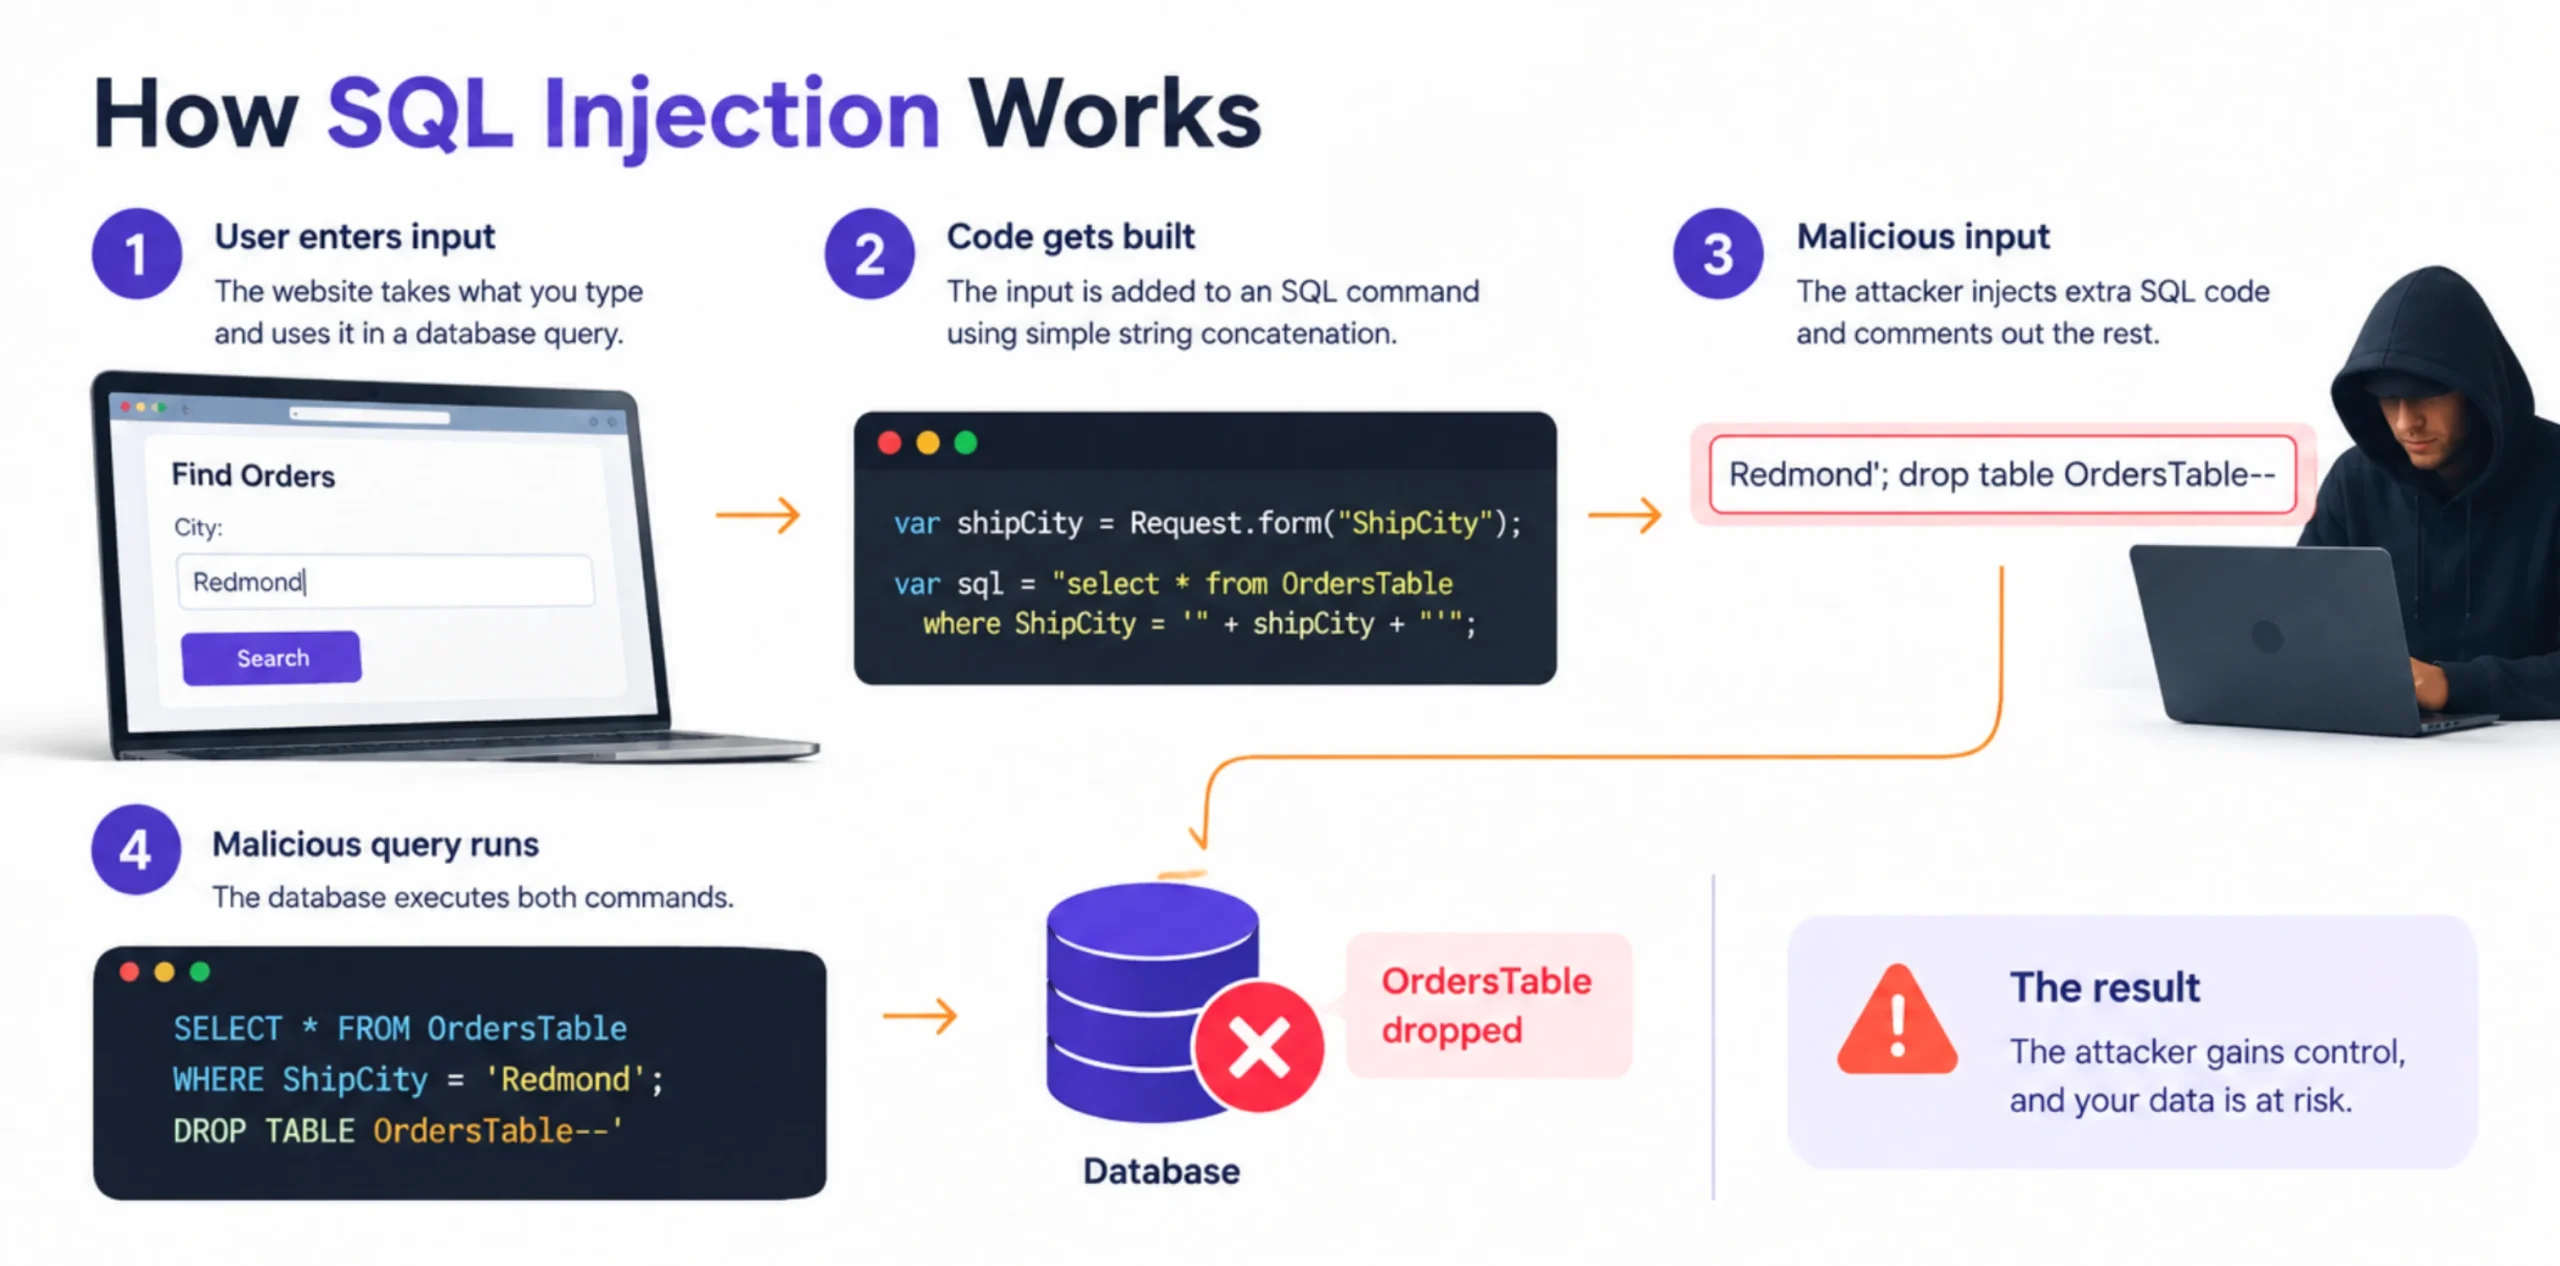
To fix, use parameterized queries and context-aware encoding, and never trust what visitors submit at face value.
Most modern CMS platforms and well-maintained form plugins handle this reasonably well. The risk lies in older plugins that haven’t been updated in years. So, if it hasn’t been maintained, replace it.
8) Mitigate Bot Traffic
A significant portion of the traffic hitting your website right now is not human. Bots crawl, scrape, probe, and test your site constantly, some legitimate (like Google’s crawler), many not.
The newer generation of bot mitigation tools uses behavioral analysis to tell the difference between a real visitor and an automated script, without making your actual users solve picture puzzles.
Cloudflare’s bot management handles this well even on free plans, while hCaptcha can help distinguish automated submissions from genuine visitors.
For an ecommerce website, this is particularly useful because automated credential-stuffing attacks can send large numbers of login attempts to customer accounts.
Stage 3: Keep It Clean (Ongoing Habits)
9) Update Everything Immediately
An outdated CMS, plugin, or theme can leave a known vulnerability sitting on your website long after a security patch has been released. That’s why updates should become part of your normal website routine.
Enable automatic updates for minor patches where your CMS supports them, and schedule regular checks for major releases.
Before major updates, make sure you have a recent backup and check that your important plugins and themes support the new version.
Also remove plugins and themes you no longer use. Leaving an inactive plugin on the server doesn’t make its vulnerable code disappear. If the files remain accessible, they can still become part of an attack.
10) Back Up Using the 3-2-1 Rule
A backup gives you an option when something goes wrong.
The 3-2-1 rule provides a simple structure:
- 3 copies of your important data
- 2 different storage types
- 1 copy stored offsite
For example, you could keep your live website, a separate backup, and another backup in a different location.
For stronger protection, the 3-2-1-1-0 approach adds one immutable copy and a verification step that confirms your backups have no errors.
An immutable backup is protected from being changed or deleted during a defined retention period, which can be particularly useful during a ransomware incident.
Many Truehost hosting plans include automated backup options, so check what your current plan provides before setting up another backup system.
11) Run Malware Scans Regularly
A compromised website may continue operating normally while malicious code sits inside its files.
Malware can be used to redirect visitors, create hidden administrator accounts, inject unwanted content, steal information, or load malicious scripts. Regular malware scans can help identify suspicious files before they become a larger problem.
Tools such as Wordfence, Sucuri, and MalCare provide scanning and monitoring features for websites.
Look for scanners that go beyond matching files against a fixed list of known malware. Heuristic and behavioral checks can help identify suspicious changes that don’t match an existing signature.
Set up alerts for unexpected file changes where your security tool supports them.
12) Review Security Logs Weekly
This sounds more technical than it is. You don’t need to read raw server logs. You just need to glance at one number: failed login attempts.
If your site normally sees 5-10 failed logins per day and that number suddenly spikes to 500, a bot is actively running a brute-force attack against your login page.
Also look for unexpected file changes, unfamiliar administrator accounts, unusual access times, and repeated requests to URLs that don’t exist on your website.
Knowing this gives you time to tighten your lockout rules, block that IP range, or add extra protection before the bot gets lucky.
Your hosting control panel may provide access to relevant logs, while larger organizations can use a SIEM platform to bring security information from multiple systems into one place.
Most security plugins display this data in a clean dashboard. Five minutes a week is enough.
13) Practice Database Hygiene
Your database can accumulate a lot of information over time. Expired sessions, old records, unused tables, outdated logs, and leftover data from removed plugins can remain long after they stop serving a useful purpose.
Review what your website stores and remove information that you no longer need, provided doing so does not conflict with your legal, accounting, or business record requirements.
Where personal information is no longer required, consider anonymizing or deleting it according to your data-retention policy.
Keeping unnecessary data out of the database also reduces the amount of information available if an attacker gains unauthorized access.
Stage 4: Advanced Hardening (Go the Extra Mile)
14) Use a CDN
A Content Delivery Network like Cloudflare distributes your site across servers in multiple global locations. Visitors get served from the nearest one, which makes your site faster, a real benefit for Pakistani users on mobile connections.
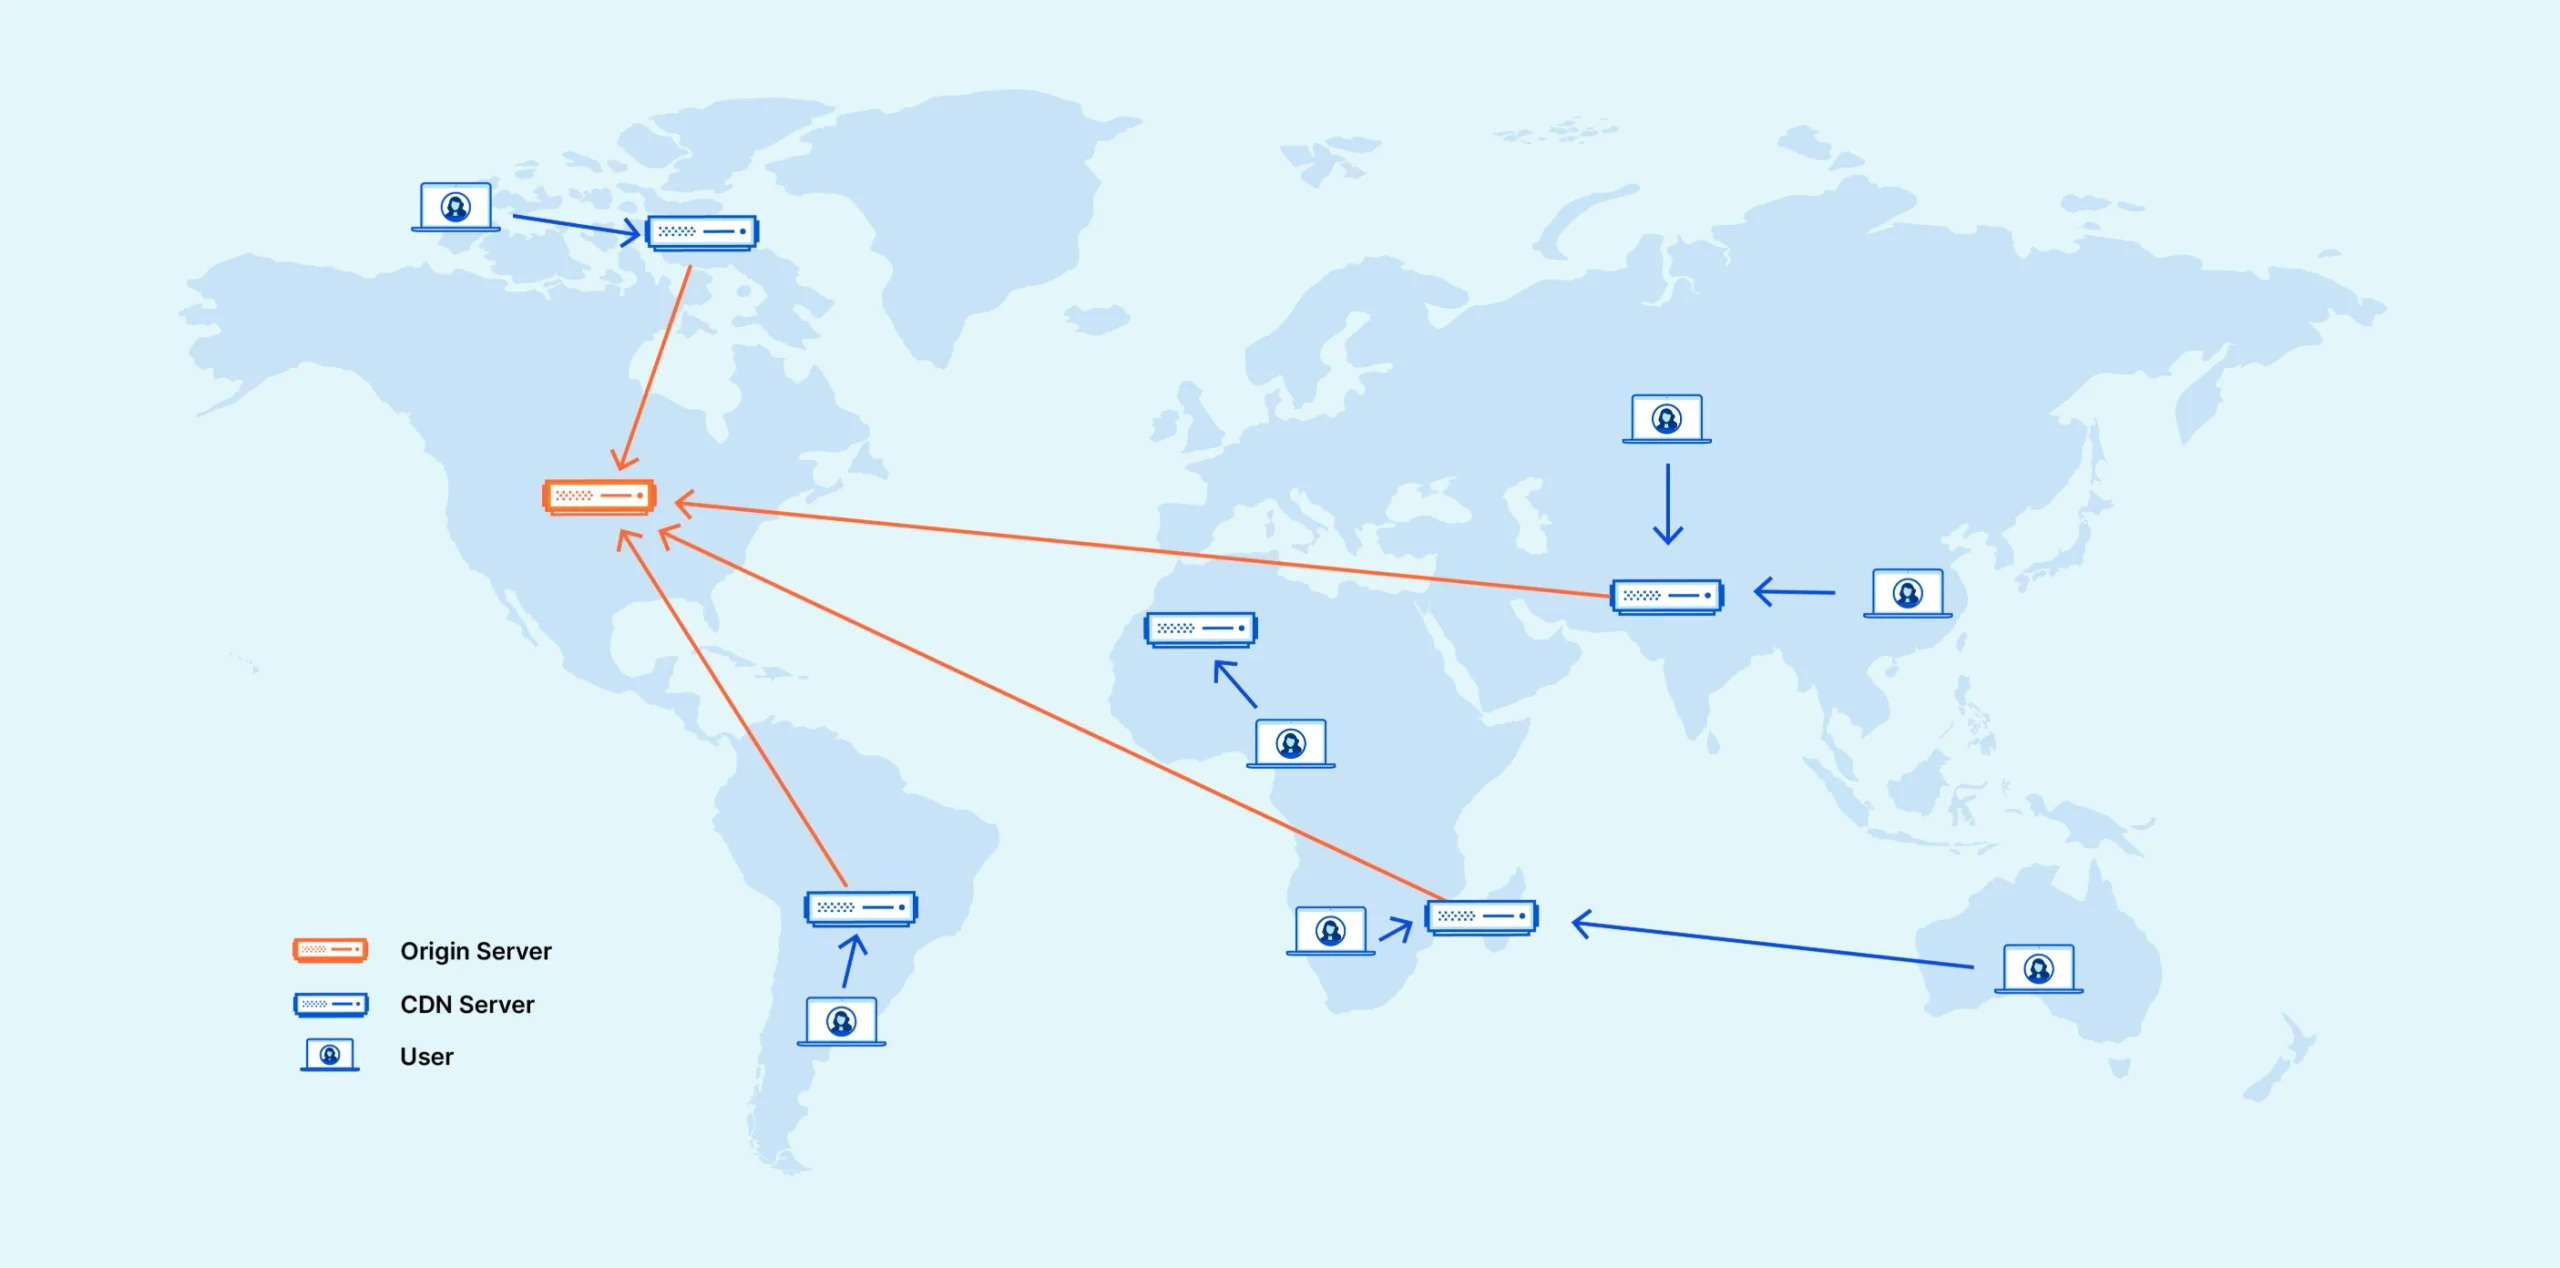
The security payoff is DDoS protection. A Distributed Denial of Service attack floods your server with traffic until it collapses. A CDN absorbs that flood across its global network before it ever reaches your actual server.
Cloudflare’s free tier handles this for most sites and takes about five minutes to set up.
15) Set Correct File Permissions
Every file and folder on your server has a permission setting that controls who can read, write, or execute it. If these are set too loosely, an attacker who manages to plant a malicious file can actually run it.
The safe defaults:
- Files – 644 (owner can read and write; everyone else can only read)
- Folders – 755 (owner has full access; others can read and navigate)
If this is unfamiliar territory, ask our Truehost support team to check your permissions. It’s a quick review that closes a real vulnerability.
16) Disable Directory Browsing
If a visitor navigates to a folder on your site that doesn’t have an index file, some servers will display a full list of every file inside it. That’s your internal file structure, visible to anyone who knows to look.
One line in your .htaccess file fixes this:
Options -IndexesNow, instead of seeing your file list, anyone who navigates to an empty folder gets a 403 Forbidden message. Simple, but effective.
17) Vet Every Plugin and Third-Party Script
Not every plugin in the WordPress directory is safe to install. And that “premium theme” someone shared for free on a forum almost certainly has something extra baked in.
Before adding anything to your site, check:
- When was it last updated? (Anything over 12 months without an update is a risk.)
- How many active installs does it have?
- Does the developer respond to support questions?
Keep a list of every plugin, theme, and third-party script running on your site. Review it quarterly and remove anything you’re not using or can’t verify.
For scripts loaded from external CDNs, use Subresource Integrity (SRI), a small attribute that tells the browser to verify the script hasn’t been tampered with before running it.
18) Implement a Content Security Policy (CSP)
A Content Security Policy tells a browser which sources are allowed to provide scripts, images, styles, and other resources to your website. This can limit what an injected script is able to load or execute, reducing the potential impact of certain cross-site scripting attacks.
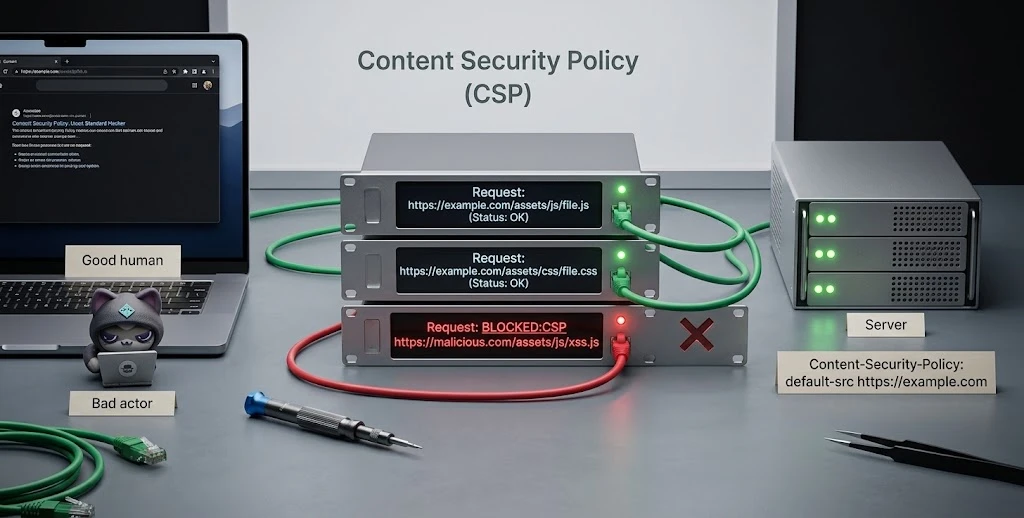
CSP policies need to match the resources your website legitimately uses. A policy that is too restrictive can break parts of your site, so test changes before applying them broadly.
Start with a policy that reflects your current setup, monitor violations, and tighten it as you become more familiar with the resources your website needs.
19) Watch for Post-Quantum Threats (Future-Proofing)
Post-quantum security is not a reason to panic about your website today.
The concern is longer term. Powerful quantum computers could eventually challenge some of the public-key cryptography used by today’s security systems.
There is also a concept known as “harvest now, decrypt later,” where encrypted information is collected today with the possibility of decrypting it in the future if the technology becomes capable of doing so.
For most small websites, there is no immediate configuration change required here.
It is still worth asking your hosting provider and other technology vendors how they plan to adopt post-quantum cryptographic standards as those standards become available.
Who’s Responsible for What? (The Shared Security Model)
Website security is shared between you and your hosting provider. Knowing where each responsibility sits prevents important tasks from being left undone.
| Your Responsibility | Truehost.pk Handles |
|---|---|
| SSL installation and renewal | Server-level firewall and DDoS protection |
| CMS, plugin and theme updates | Kernel isolation between accounts |
| Password and 2FA management | PHP version management and OS hardening |
| User access audits | Automated backups on select plans |
| Application-level malware scanning | Infrastructure and uptime monitoring |
Your website still needs attention even when the hosting environment has strong server-level protections.
For example, Truehost can protect the infrastructure, but you still need to keep your WordPress installation and plugins updated. Your hosting provider can offer backup systems, but you should still know what your plan backs up and how long those backups are retained.
The goal is to make sure there are no gaps between the two sides.
Start Here Today
Eighteen items can feel like a lot. So don’t start at the top. Start with the three that will protect you fast.
You can start by getting your SSL certificate. Especially if your site still shows “Not Secure,” this is your very critical Step 1. Go to our Truehost SSL certificates page, and choose the certificate that fits your website.
Next, turn on 2FA on every admin account linked to your website, including your CMS, hosting panel, and domain registrar.
Then hit “Update All” on your CMS dashboard and delete plugins or themes you haven’t used in the past six months.
Once those three tasks are done, continue through the rest of the checklist.
Website security isn’t something you buy once and forget. It is a series of layers that you maintain over time. The more of those layers you put in place, the fewer easy opportunities you leave exposed.
Start with the one thing that protects every page of your website: an SSL certificate.