Domain SearchInstantly check and register your perfect .pk or international domain
 Web HostingGet a .pk domain for as low as PKR 467
 cPanel HostingUser-friendly hosting powered by cPanel
 Reseller HostingLaunch your own hosting business with minimal technical requirements
 Windows HostingOptimized for Windows-based applications and websites
 Affiliate ProgramEarn referral commissions by promoting our services
 WordPress HostingFast & Reliable WordPress Hosting
 Domain TransferMigrate your existing domain seamlessly with zero downtime.
 All DomainsAccess 324+ top-level domains (TLDs) worldwide from a single platform
 Whois LookupIdentify the owner of any domain using our whois and rdap lookup tool
 Managed VPS Hosting
 AI Website BuilderCreate beautiful websites effortlessly using intuitive drag-and-drop features
 Online ShopLaunch a professional online shop with no technical skills required
 BlogDiscover expert guides on hosting, websites, SEO, and digital growth strategies
 ContactGet instant assistance via live chat or email
 SupportAccess help articles, tutorials, and service documentation
 SSL CertificatesEncrypt data, build trust, and boost SEO.
You have a business idea and a name in mind, but you’re not sure where to start. This is exactly where. With a domain.
A domain name gives your business a place on the internet. Once you register it, you can connect it to your website, create a professional email address, and build your online presence around the name.
The process of buying a domain name in Pakistan is fairly simple.
You choose a name, check if it’s available, configure your domain, review your order, make the payment, and that’s all. Now you can then manage it from your account.
Let’s go through each step.
Steps to Buy a Domain Name in Pakistan
Step 1: Choose the Right Domain Name
Start by choosing the name you want to register. It could be your business name, personal name, brand, project, or the name of a new online store.
Keep the name simple and easy to type. Domain names can contain letters, numbers, and hyphens, but they cannot contain spaces. Capital letters don’t create a separate domain, so MyBusiness.pk and mybusiness.pk are the same domain.
Avoid a name that is difficult to spell or easy to mistype. If someone hears your domain name and has to ask how to spell it, consider a simpler option.
The length is worth considering too. A short domain is usually easier to remember and type, although a slightly longer name can still work if it’s clear and easy to spell.
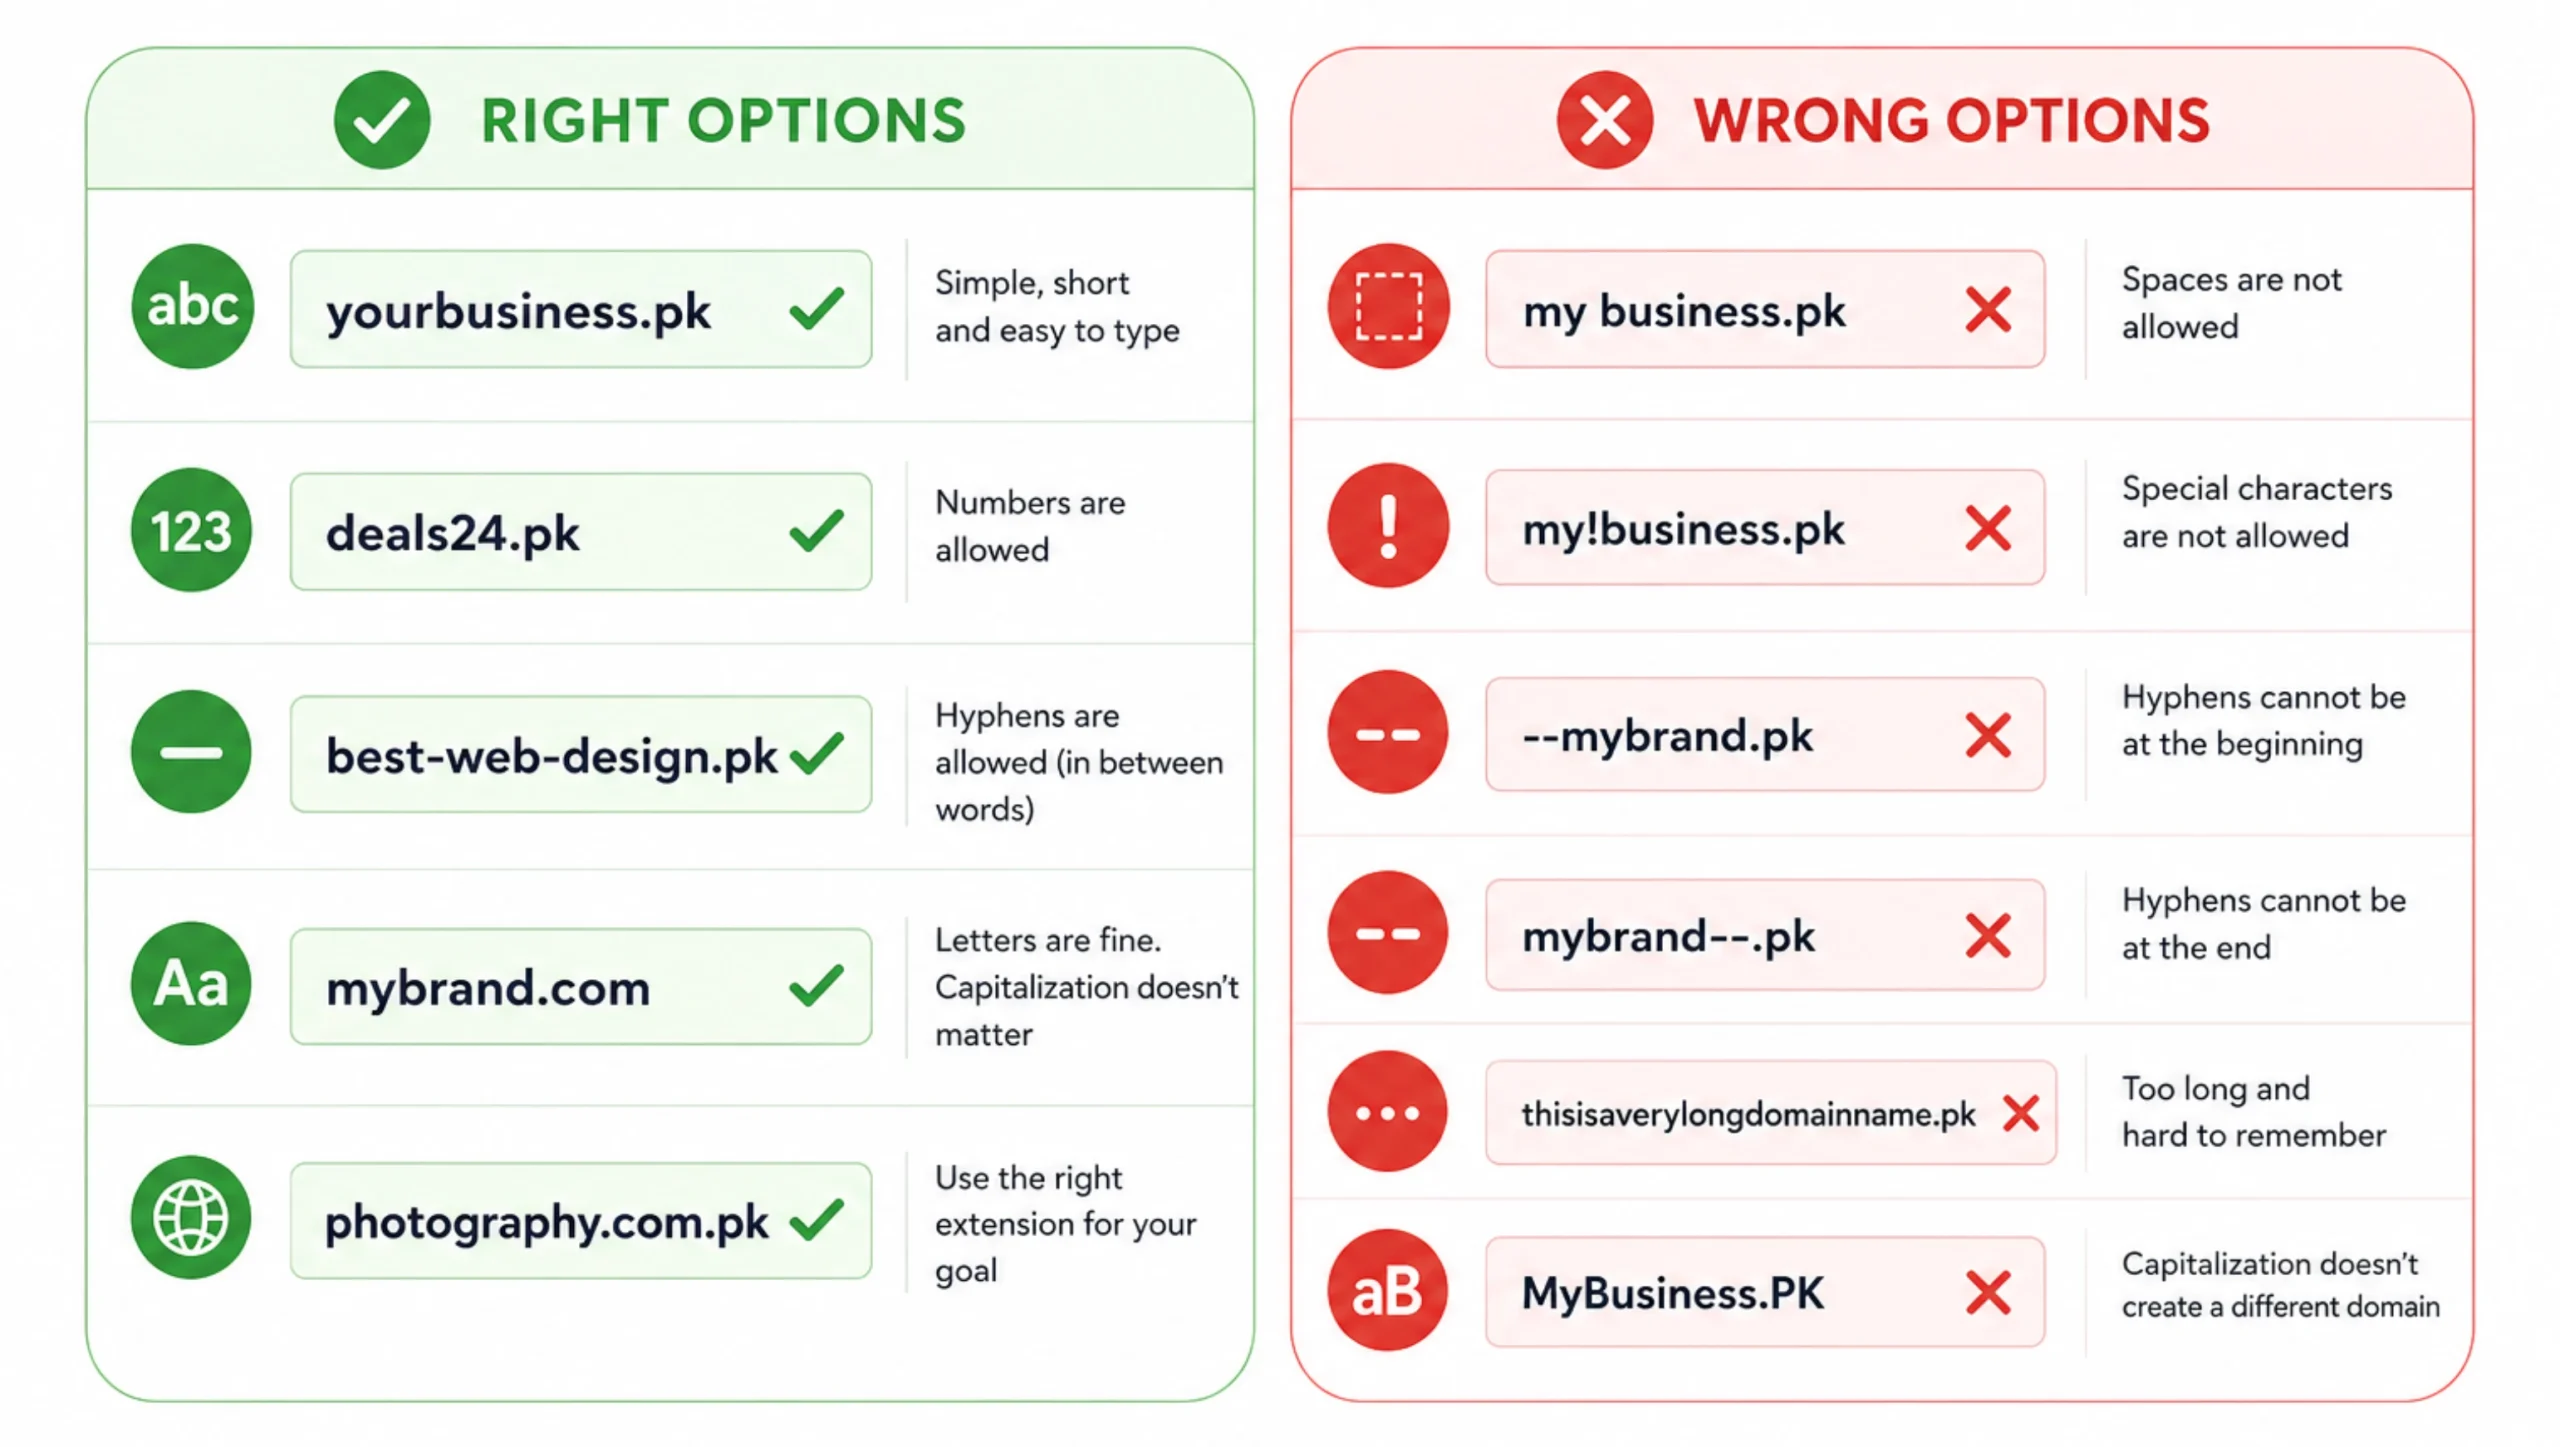
The domain extension is also important. A .pk domain is associated with Pakistan and can be a good fit for a business serving the local market.
.com.pk is another option for commercial businesses in Pakistan, while .com can work well if you’re targeting an international audience.
Your choice should match your audience and the purpose of the website. You don’t need to choose an extension simply because it’s popular.
It also helps to use the three-second test. Say your domain name out loud and ask yourself:
- Is it easy to say?
- Is it easy to remember?
- Can someone spell it correctly after hearing it once?
If the answer is yes, you have a strong candidate.
Finally, have a backup name ready. Your first choice may already be registered, so having two or three alternatives can save you time. You can also try another suitable extension rather than adding unnecessary numbers, hyphens, or complicated spellings.
Step 2: Search and Confirm Availability
Once you have a name, check if you can register it.
Go to the Truehost domain search page and enter the domain name you want. Select or search for the extension you’re interested in, then submit the search.
The results will show you if the domain is available for registration.
If your first choice is already taken, don’t force an awkward variation just to keep the exact name. Try another extension, use one of the alternative names you prepared, or look through the suggested alternatives.
If you don’t have a name yet, Truehost also provides an AI Suggest option. You can describe your business or idea, and the tool can generate domain-name suggestions for you. Pick the names that fit your brand, then check their availability.
Before clicking “Buy Now,” take a final look at the domain shown on the screen.
Make sure you have:
- The correct spelling
- The correct extension
- The domain name you intended to buy
- The correct price displayed for that domain
Once you’re satisfied, click “Buy Now.”
Step 3: Configure Your Domain
After selecting your domain, you’ll reach the Domains Configuration page.
This is where you can review the available domain settings and add-ons before continuing to checkout.
You’ll see options such as DNS Management, ID Protection, Email Forwarding, and Custom Nameservers. Some options may be free, while others may have a charge, so check what is displayed before continuing.
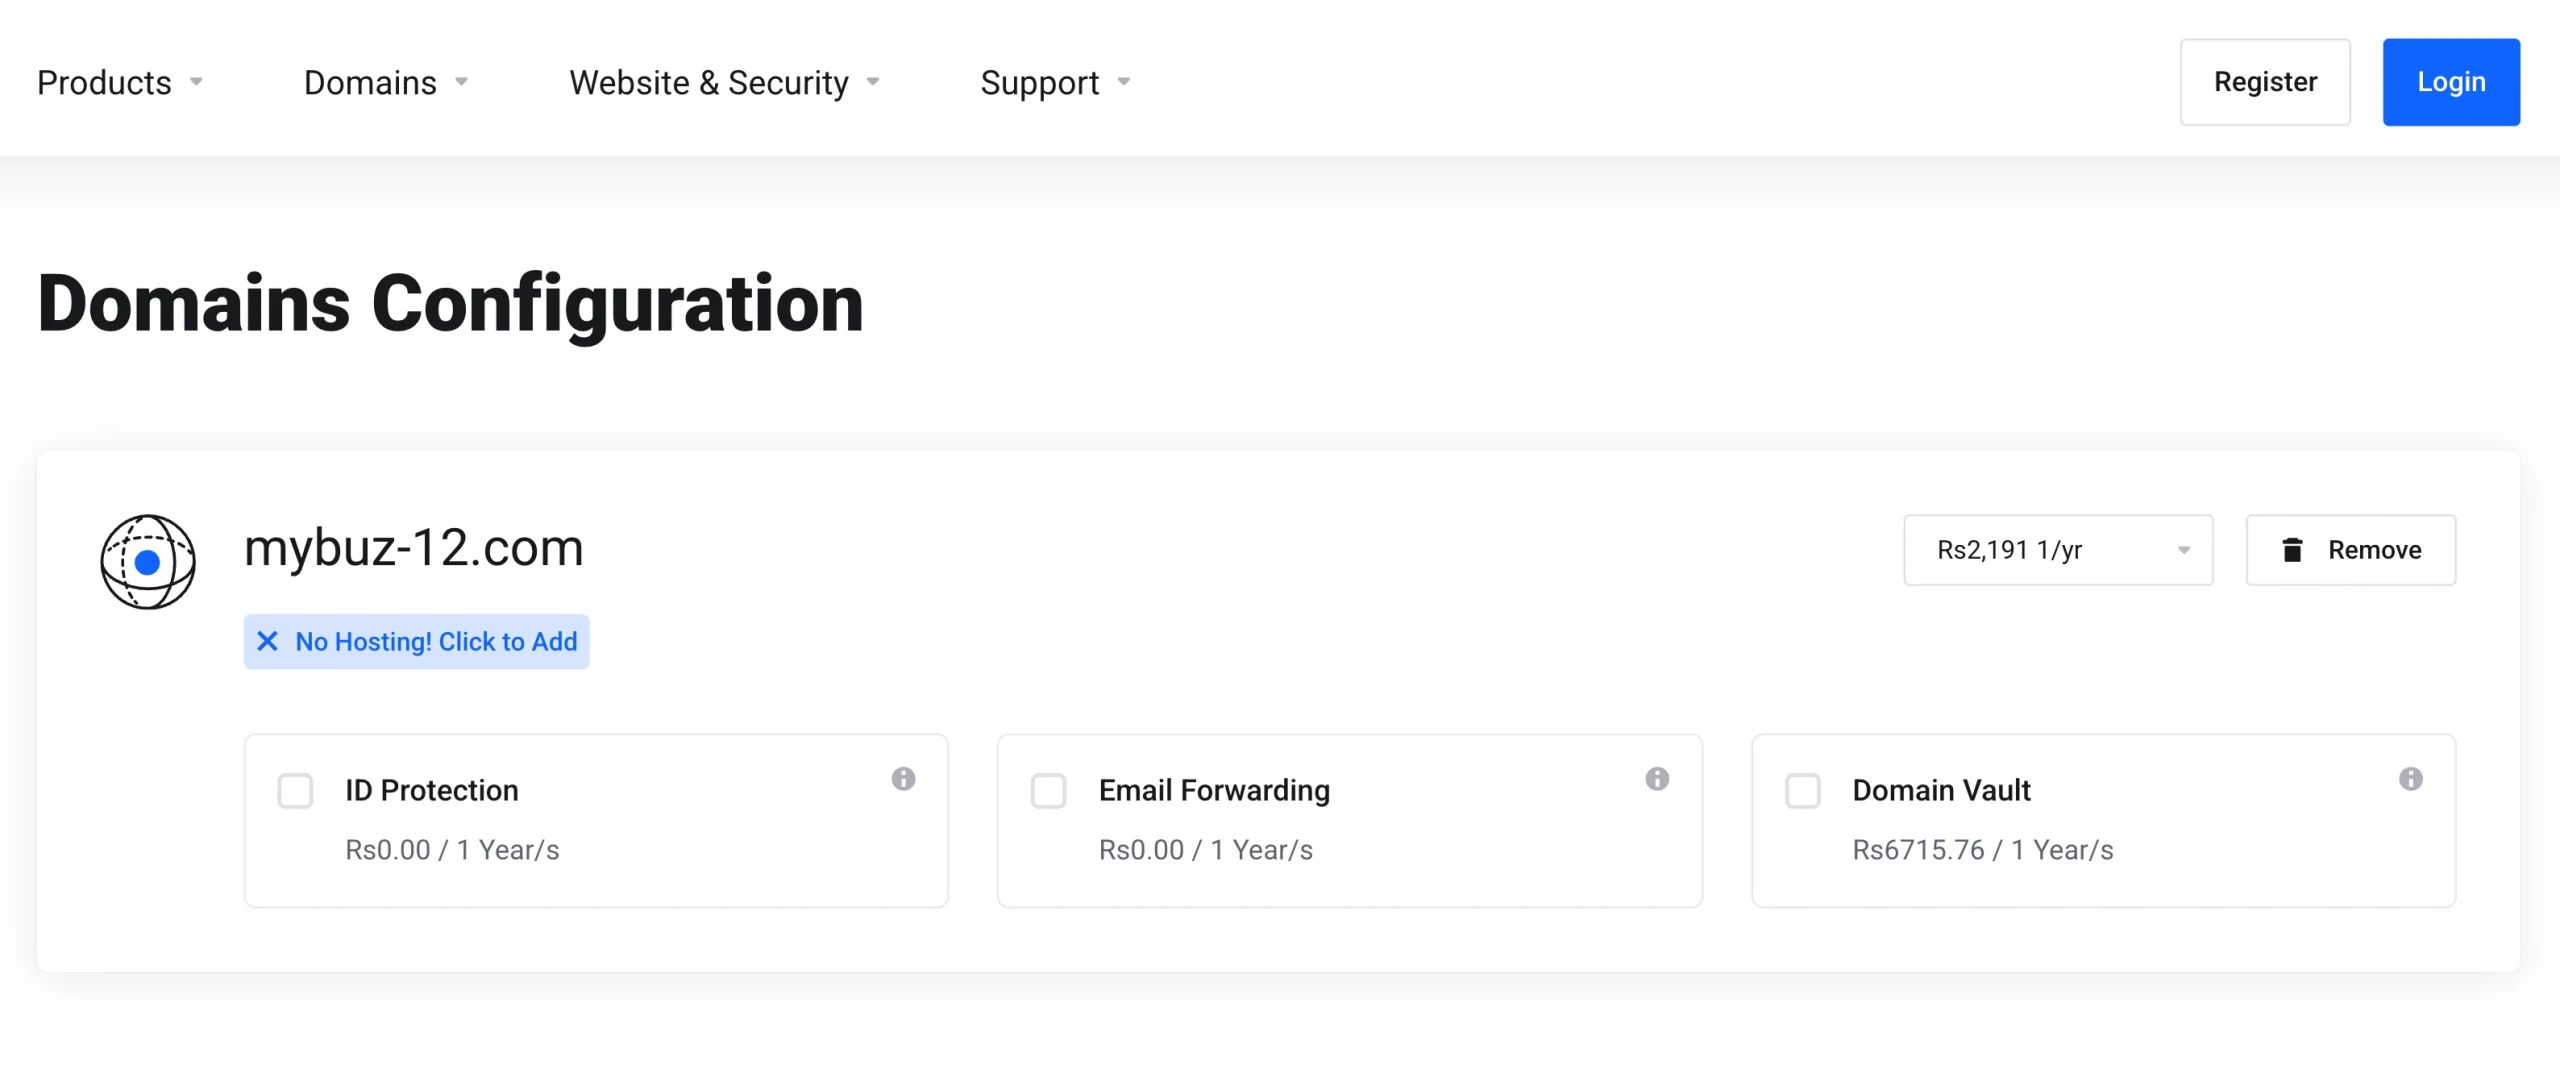
1. DNS Management controls where your domain points. You’ll use DNS settings when connecting your domain to a website, email service, hosting account, or another online service.
2. ID Protection helps keep your personal registration information from being publicly exposed through WHOIS records, where applicable. If it’s available as a free option for your domain, it’s worth enabling.
3. Email Forwarding lets messages sent to an address using your domain be forwarded to another email inbox. For example, you could use [email protected] and have incoming messages forwarded to an existing mailbox.
4. Custom Nameservers are useful if you already have nameservers provided by another hosting company or service. If you’re buying your first domain and don’t have custom nameservers, you can leave this option alone and update it later.
Review the options, select the ones you need, and click Continue.
Step 4: Review Your Order and Check Out
You’re now at the point where it’s worth slowing down for a minute.
Your order summary should show the domain you’re buying, its extension, registration period, any additional services you’ve selected, and the total price in PKR.
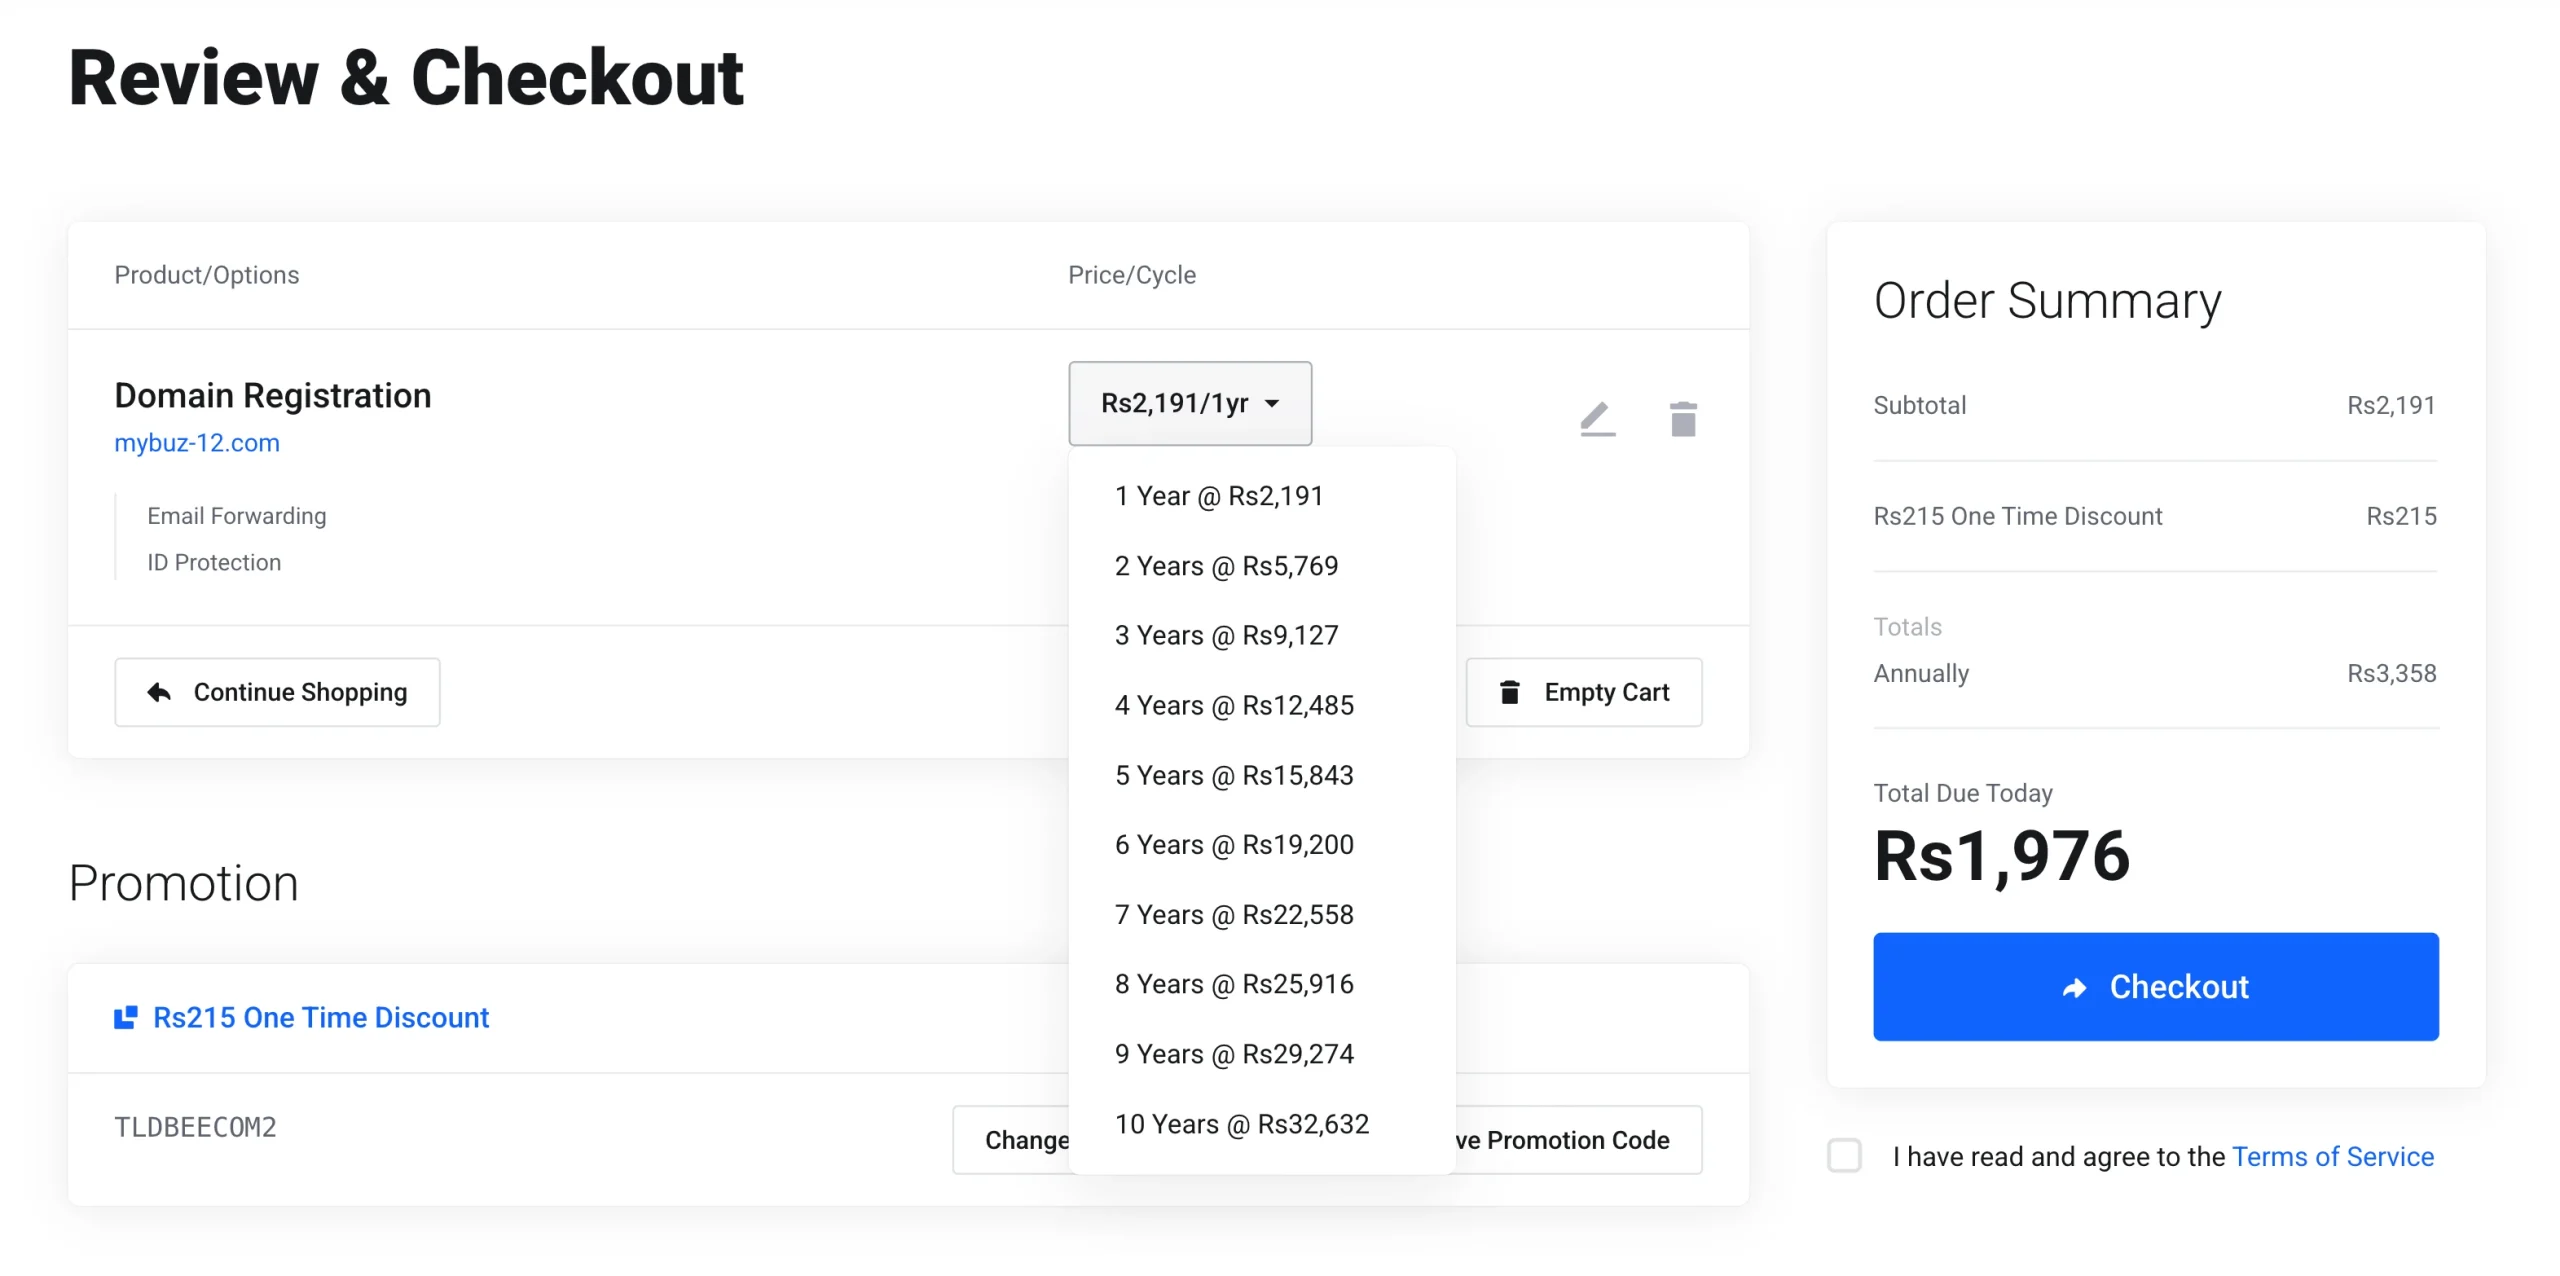
Check each item before paying. Confirm that the domain name and extension are correct and that you understand the registration period and total cost.
Next, provide your billing details, including your personal information, billing address, email address, and account password as requested.
If you’re buying the domain for a client, pay particular attention to the domain registrant details. These details identify who the domain is registered to, so use the intended owner’s information.
You’ll also need to choose your payment method. The available options are displayed under the “Payment Method” section.
Select the option you want to use, then provide any payment details required for that method. For example, the checkout page may display options such as card/mobile payments through Stripe or PayPal.
Before proceeding, check the Terms of Service. Read the renewal terms carefully, particularly if the introductory registration price differs from the price you’ll pay when the domain renews.
Once everything looks right, accept the terms and click Checkout to proceed.
Step 5: Complete Your Payment
On the payment page, you’ll see the payment method you selected for your order.
Follow the payment instructions shown on the screen, complete the transaction, and wait for the payment status to update.
After a successful transaction, you’ll receive a confirmation message. Keep the confirmation for your records and check your email for the order details.
If the payment doesn’t go through, first check if the amount was deducted from your bank account, card, or chosen payment method. If the transaction status is unclear, avoid immediately paying again. Check your Truehost account and order status first.
If your payment was deducted but the order or domain registration isn’t reflected correctly, contact Truehost support with your payment details so the transaction can be checked.
Step 6: Log In and Manage Your Domain
After buying your domain, log in to the Truehost client area using the account credentials you created during the purchase.
From your account, you can manage the domain and make changes as your website grows.
Depending on your domain and account, you can use the client area to:
- Manage DNS records
- Change nameservers
- Manage Add-ons
- Renew your domain
- Check your domain status
- Manage domain-related settings
- Prepare for or initiate a domain transfer when necessary
You don’t have to connect the domain to a website immediately. The important thing is that the domain is registered and under your control. You can then connect it to your hosting later.
What Should You Do After Buying the Domain?
What you do next depends on what you’re building.
If you already have web hosting, connect your new domain to your hosting account. This usually involves updating the domain’s nameservers or DNS records according to your hosting provider’s instructions.
If you don’t have hosting yet, you can leave the domain registered in your account and connect it once your website is ready.
If you’re setting up professional email, you’ll need to add the DNS records provided by your email service. Follow that provider’s instructions carefully so your email works correctly.
It’s also a good time to protect the domain itself.
Keep your Truehost account credentials private and use a strong, unique password. Make sure you can still access the email address connected to your account because important domain and billing notifications may be sent there.
Check your account’s available security features and enable the relevant ones. You should also keep an eye on your auto-renewal settings so the domain doesn’t expire simply because a renewal date was missed.
You now have the complete path from choosing a domain name to registering it and managing it afterward.
If you already have a domain name in mind, start by checking its availability through our Truehost domain search, then choose an available extension, review the price, and complete your registration.