Domain SearchInstantly check and register your perfect .pk or international domain
 Web HostingGet a .pk domain for as low as PKR 467
 cPanel HostingUser-friendly hosting powered by cPanel
 Reseller HostingLaunch your own hosting business with minimal technical requirements
 Windows HostingOptimized for Windows-based applications and websites
 Affiliate ProgramEarn referral commissions by promoting our services
 WordPress HostingFast & Reliable WordPress Hosting
 Domain TransferMigrate your existing domain seamlessly with zero downtime.
 All DomainsAccess 324+ top-level domains (TLDs) worldwide from a single platform
 Whois LookupIdentify the owner of any domain using our whois and rdap lookup tool
 Managed VPS Hosting
 AI Website BuilderCreate beautiful websites effortlessly using intuitive drag-and-drop features
 Online ShopLaunch a professional online shop with no technical skills required
 BlogDiscover expert guides on hosting, websites, SEO, and digital growth strategies
 ContactGet instant assistance via live chat or email
 SupportAccess help articles, tutorials, and service documentation
 SSL CertificatesEncrypt data, build trust, and boost SEO.
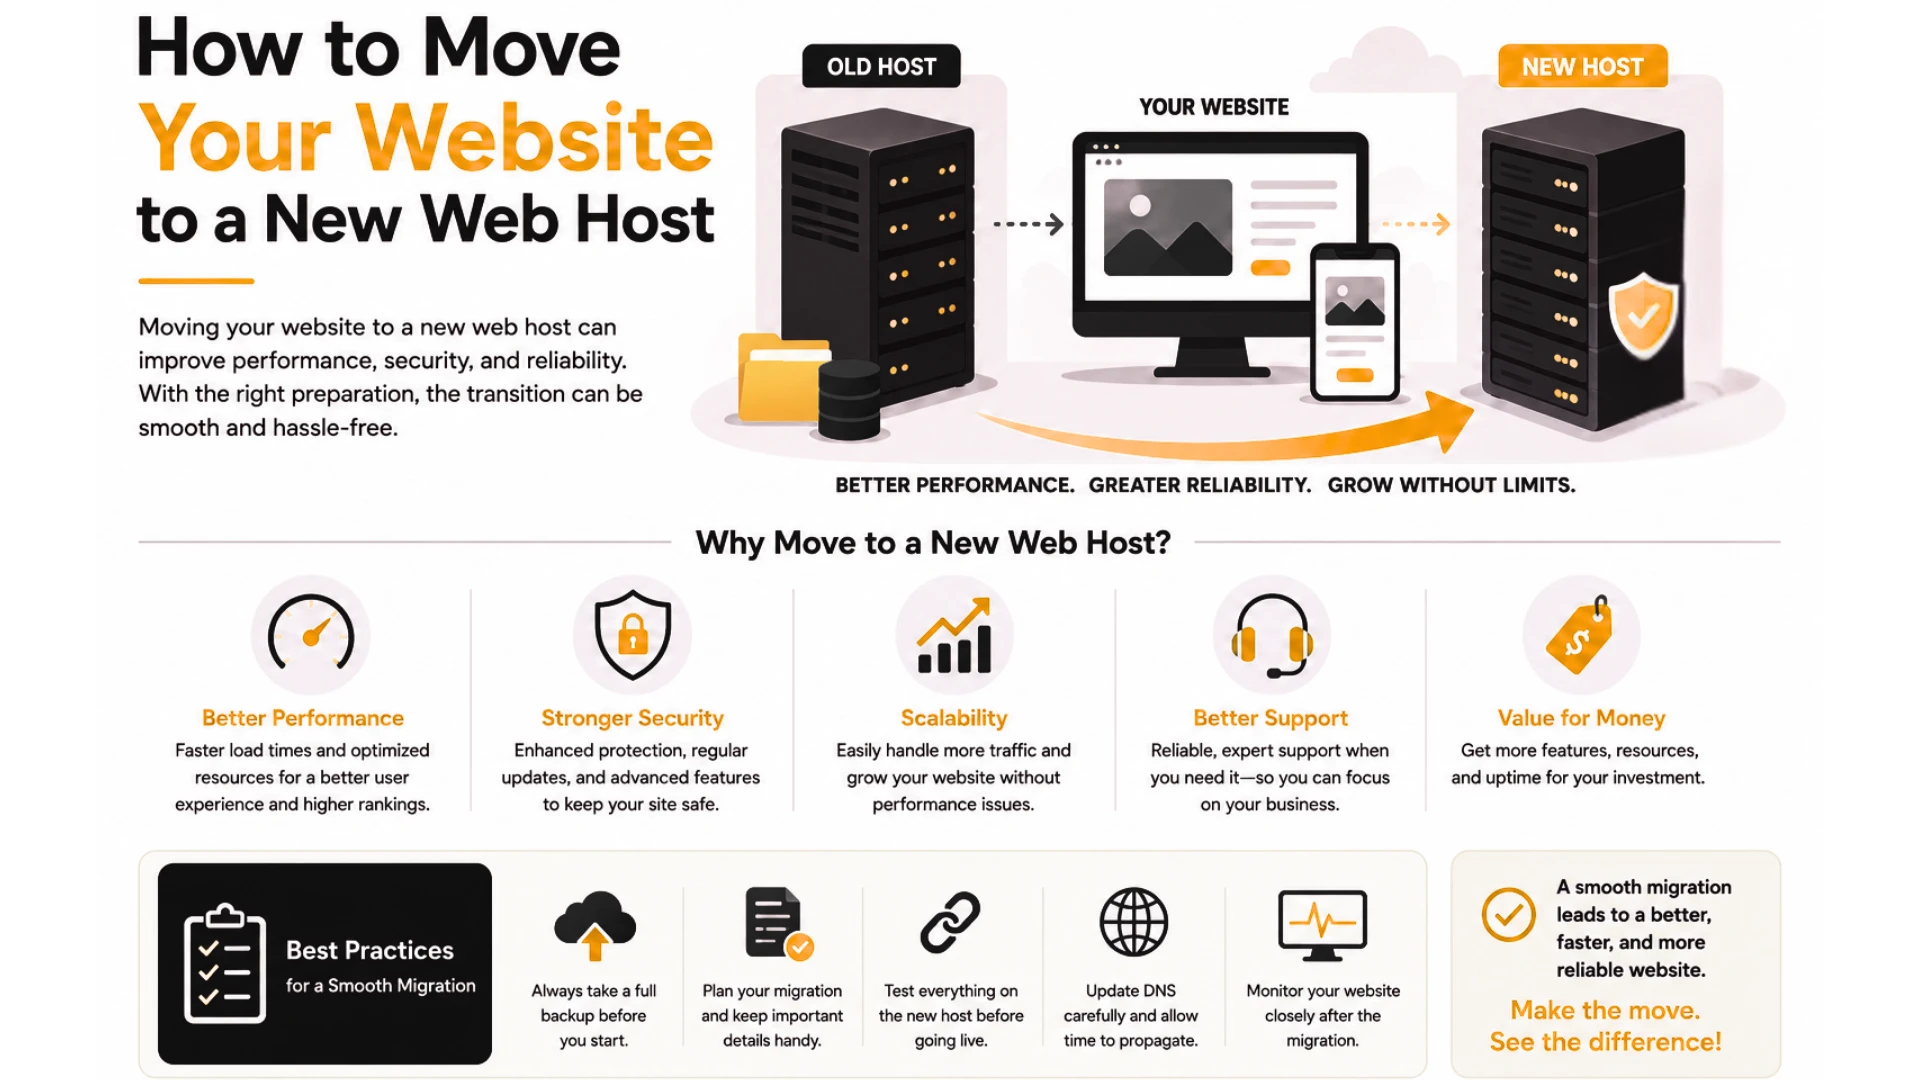
Moving your website to a new web host can sound complicated, especially when your website is already live and bringing in visitors, leads, orders, or enquiries.
There are a handful of common reasons website owners decide to switch. Your website may be loading slowly, experiencing frequent downtime, running out of server resources, or getting poor customer support. Rising renewal costs, limited scalability, security concerns, limited backup options, or outdated hosting technology can also make it worth looking for a better option. You may also need better WordPress hosting or more resources through VPS or dedicated hosting.
For example, a small business may have started out with basic hosting. As traffic picks up and the website grows, it may need more CPU, RAM, storage, or general performance than the original plan can offer.
Moving to a new host can solve problems like these, but picking the right plan matters just as much as completing the migration correctly. A faster server won’t help much if the migration itself is rushed or incomplete.
The good news is that you don’t have to rebuild your website from scratch. Website migration means moving your website files, database, email accounts where applicable, and other settings from your old hosting provider over to the new one. Done properly, your visitors barely notice anything changed.
This article walks you through moving your website to a new host while reducing downtime, avoiding data loss, and making sure everything works correctly once the move is complete. The exact steps can shift slightly depending on your website platform, hosting environment, and the type of website you run.
Already know your current host isn’t cutting it? Compare Truehost’s web hosting plans before you start, so you’re moving toward something better rather than just moving.
Prerequisites Before Moving Your Website to a New Host
Before you start moving your website, make sure you have these things in place:
- Your new hosting account is ready: Set up the new hosting account before cancelling or changing anything on your current host. Confirm that WordPress is supported and that you have the login details and access needed to upload your files, import your database, and configure the website.
- A suitable hosting plan: Choose a plan with enough CPU, RAM, storage, and bandwidth for your current traffic and expected growth. Also check that it includes SSL, backups, security features, a suitable control panel, WordPress compatibility, customer support, and easy upgrade options.
- A complete website backup: Back up your website files, database, media files, configuration files, and email data where applicable. Keep a copy somewhere separate from your current hosting account so you have a reliable fallback if something goes wrong.
- A record of your current website: Check your important pages, forms, plugins, themes, images, contact information, email accounts, SSL certificate, database, DNS records, and existing redirects. This gives you a baseline for checking that everything still works after the migration.
- Access to your domain and DNS settings: Make sure you can log in to the account that manages your domain and DNS records. You will usually need this access to point your domain to the new hosting server after the migration. ICANN’s registrant resources can help you understand how domain registration and DNS management work.
Note: changing your web host doesn’t mean you have to change your domain name. If you also need a new domain, that’s a separate step handled through domain registration, not part of the hosting migration itself.
Step-by-Step: Moving Your Website to a New Host
Step 1: Sign Up for Your New Hosting Account
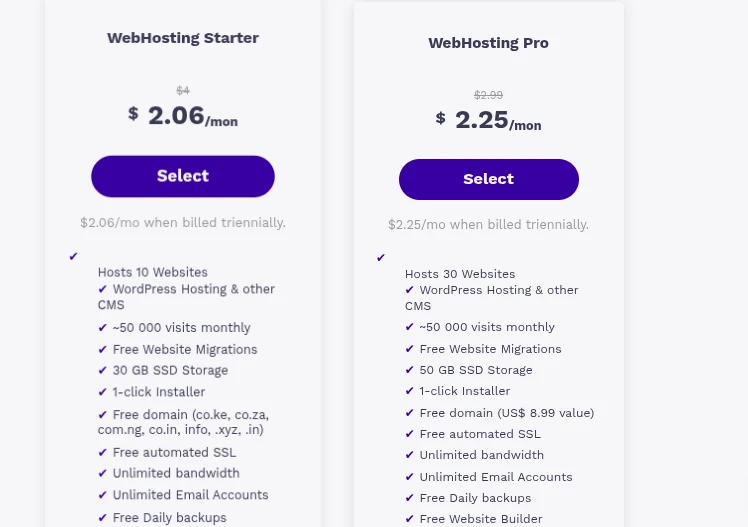
Purchase a hosting plan that can actually support your website, and get the account fully set up before making any changes to your old one. That means:
- Selecting the hosting plan
- Creating the hosting account
- Connecting or adding the domain
- Accessing the control panel
- Setting up SSL
- Preparing the server
Don’t cancel your old hosting account yet. You’ll still need it while the new one gets tested.
Not sure which plan fits your site? See Truehost’s hosting options and pick one sized for where your website is headed, not just where it is today.
Step 2: Back Up and Download Your Website Files
Depending on your setup, you can transfer files using File Manager, FTP, SFTP, a hosting migration tool, or a straightforward backup file.
A typical WordPress website includes themes, plugins, uploads, and configuration files, all of which need to make the trip to the new server intact. WordPress’s own hosting requirements documentation is worth a glance if you want to double check what your new server needs to support.
Step 3: Export Your Website Database
Most websites, WordPress included, rely on a database to store pages, posts, user information, settings, product details, comments, and other core data.
Moving the files without moving the database is one of the fastest ways to end up with a broken or incomplete website on the other end. Export it, and keep it alongside your file backup.
Step 4: Upload Your Website to the New Host
Once your files and database are ready, the general process looks like this:
- Upload the website files.
- Create a new database where required.
- Import the database.
- Connect the website to the database.
- Check file and folder permissions where applicable.
- Confirm that the website loads correctly.
The exact steps vary a little depending on your platform and hosting environment, but the sequence stays roughly the same.
Step 5: Set Up Your Domain on the New Host
Your domain needs to point at the new hosting environment. That means:
- Adding the domain to the new hosting account
- Checking nameservers
- Updating DNS records where necessary
- Allowing time for the DNS changes to take effect
After you change your DNS settings, it can take some time for the change to reach everyone. During this window, some visitors may still land on the old server while others reach the new one. There’s no fixed timeline you can rely on here, so give it room to settle.
Step 6: Install or Configure SSL
HTTPS needs to work correctly on the new hosting account before you send real traffic there. Check that:
- The SSL certificate is active
- The website loads over HTTPS
- HTTP requests redirect to HTTPS where appropriate
- Images and other resources aren’t loading insecurely
SSL keeps the connection between your visitor’s browser and your website secure, and browsers are quick to flag sites that get this wrong.
Step 7: Test Your Website Before Switching DNS
Testing the site on the new server before changing DNS lets you catch problems before visitors ever see them. Check:
- Homepage
- Main pages
- Blog posts
- Images
- Forms
- Navigation
- Contact forms
- Login pages
- Search
- Mobile display
- SSL
- Website speed
If you run an online store, also test product pages, the shopping cart, checkout, payment gateways, customer accounts, order notifications, and inventory. This matters even more for websites that take orders, bookings, or enquiries directly.
Step 8: Change Your DNS or Nameservers
Once you are satisfied with how the new site performs, update your domain’s DNS settings to send visitors to the new server.
Nameservers, A records, and DNS records all play slightly different roles here, but the short version is this: nameservers point your domain to a set of DNS records, and those records tell the internet exactly where your website and email actually live. Your new host will usually give you the exact settings to use, so follow their instructions directly.
Step 9: Monitor the Website After the Move
The migration isn’t finished the moment DNS changes. Keep an eye out for:
- Downtime
- Broken pages
- Missing images
- Form problems
- Email problems
- SSL errors
- Slow loading
- Database errors
- 404 errors
- DNS problems
Keep your old hosting account active for a short period after the move. That overlap gives you time to confirm everything genuinely made it across before you let the old plan go.
What About Your Business Email When Moving Web Hosts?
Website hosting and email hosting are sometimes bundled together, but they’re not always the same service. If your email currently lives with your old provider, you’ll need to check whether those accounts need to move too, or whether it’s a good time to switch to dedicated business email instead.
Look at:
- Existing email accounts
- Email passwords
- Mailboxes
- MX records
- Email forwarding
- DNS records
Changing DNS without checking your email setup first is a common way to accidentally knock out email delivery for days. Back up any important email data before you cancel the old hosting account, just in case.
Common Website Migration Mistakes to Avoid
- Cancelling your old hosting too early. Keep the old account available until you’ve fully tested the new website and confirmed email is working too.
- Moving only the website files. Database-driven websites need their databases migrated as well, not just the files sitting on top of them.
- Forgetting DNS settings. Review your DNS records before switching hosts rather than assuming they’ll carry over automatically.
- Not testing the website. A site can look like it moved successfully while forms, images, plugins, the database, or checkout are quietly broken underneath.
- Forgetting SSL. Your website should keep loading securely over HTTPS after the migration, not just before it.
- Ignoring email. Skipping email migration or missing the required DNS records can interrupt business communication for days without anyone noticing right away.
Changing too many things at once. Try to avoid changing your domain, website structure, design, and hosting all in the same move unless you have a clear reason to. Keeping everything else stable makes migration problems far easier to trace.
How Long Does It Take to Move a Website to a New Host?
There’s no single answer that applies to every website. It depends on:
- Website size
- Number of files
- Database size
- Number of email accounts
- Hosting environment
- Migration method
- DNS changes
- General website complexity
A simple brochure site usually moves faster than a large ecommerce store with heavy email and database requirements. Nobody can promise you an exact migration time, so plan for some flexibility rather than a hard deadline.
How to Know Your Website Has Successfully Moved
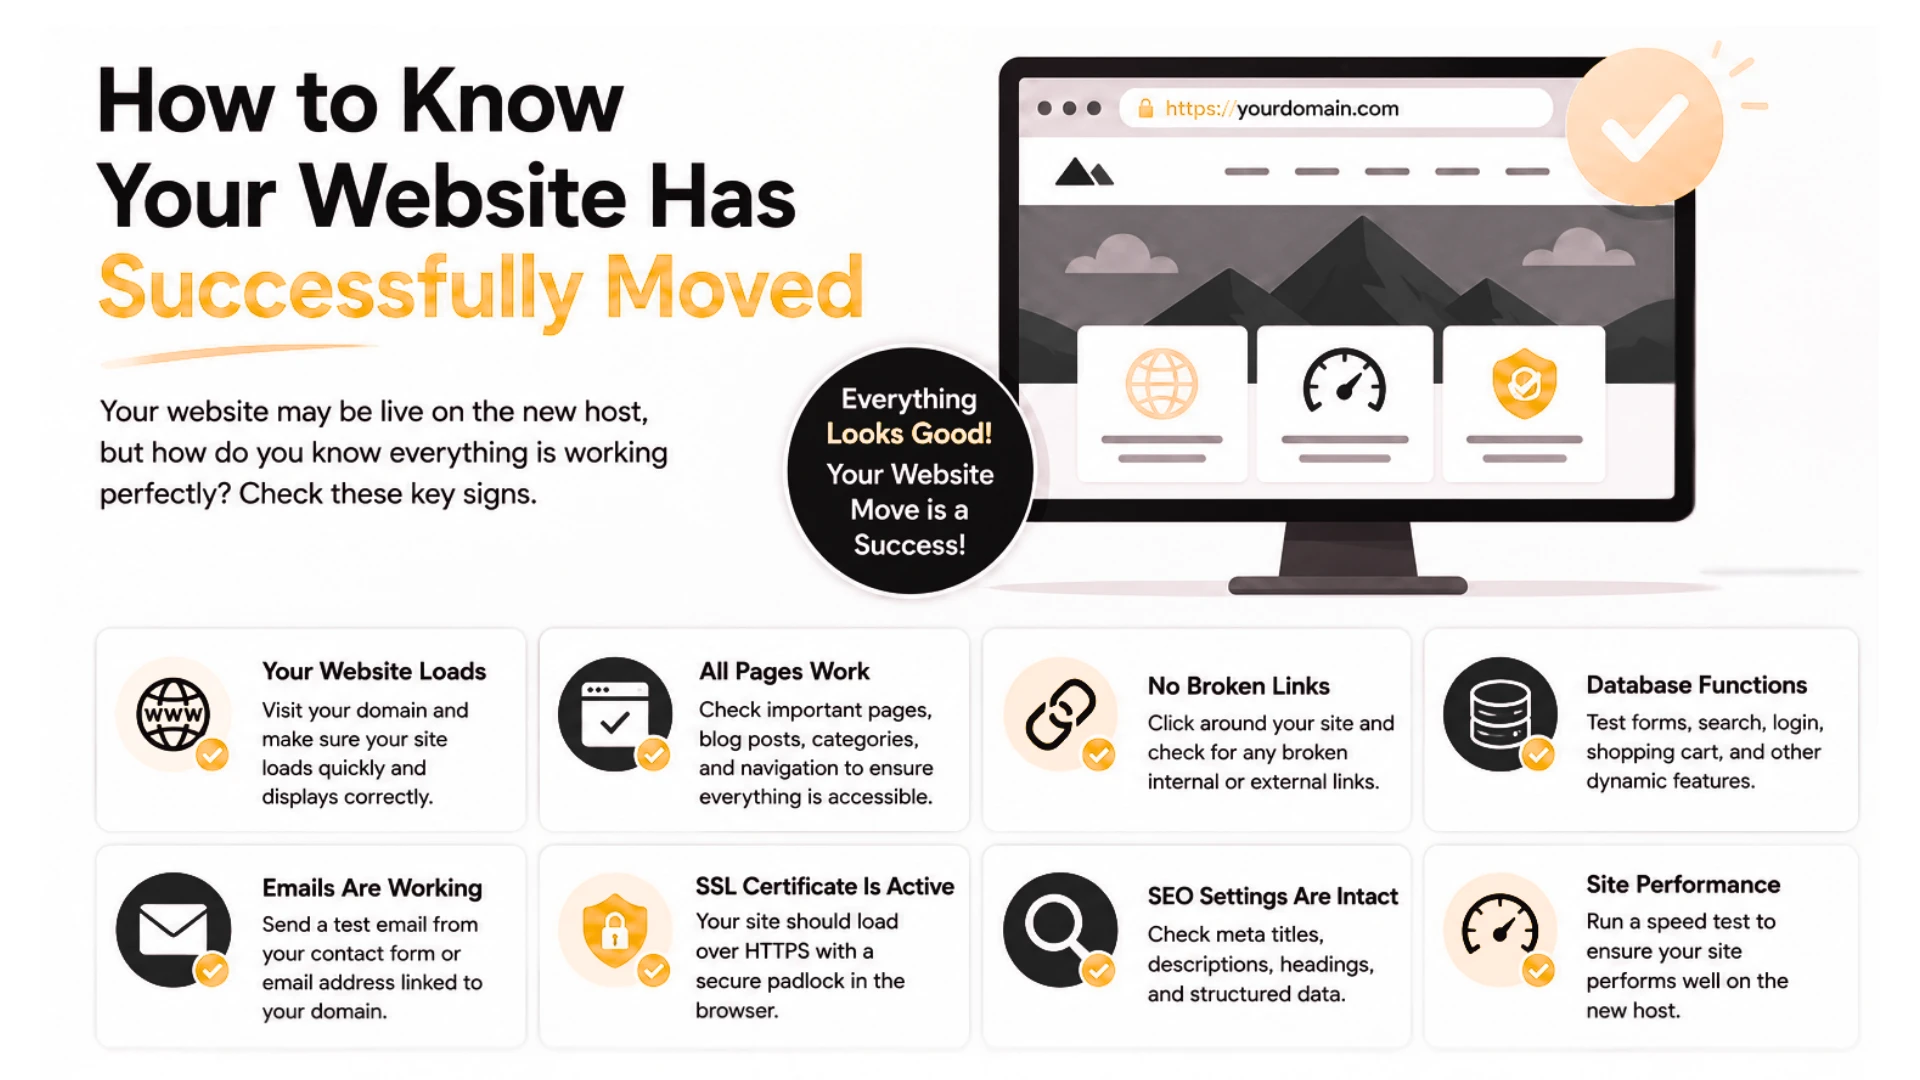
Run through this checklist once the migration is done:
- The domain opens correctly.
- HTTPS works.
- All important pages load.
- Images display correctly.
- Forms work.
- Plugins and themes work.
- The database is functioning.
- Users can log in where applicable.
- Ecommerce checkout works where applicable.
- Payment gateways work where applicable.
- Business email works.
- DNS points to the new server.
- No important pages return errors.
Keep watching the site for several days afterward. Some issues only show up once real traffic starts hitting the new server.
FAQs
Will my website go down when I change web hosts?
Some downtime is possible, but careful preparation keeps it minimal. Testing the site before you change DNS, and keeping your old hosting active during the transition, both help reduce disruption.
Will changing web hosts affect my SEO?
Changing hosting providers doesn’t automatically cause SEO problems, but technical issues during the move can. Watch out for downtime, broken URLs, missing pages, incorrect redirects, SSL problems, slow performance, an incorrect robots.txt file, and DNS issues. Careful testing before and after the move reduces these risks considerably, and Google’s own Search Central documentation covers site moves in more technical depth if you want it.
Can I move my website myself?
Simple websites can often be moved by the owner if you’re comfortable working with hosting tools. More complex sites, especially large ones or stores that can’t afford extended downtime, often benefit from professional migration assistance instead.
What should I do if my website is broken after moving hosts?
Check your DNS settings, database connection, website files, PHP version if applicable, SSL setup, file permissions, plugins and themes, DNS records, and error logs. The exact fix depends entirely on what changed during the migration, so contact your new hosting provider if you can’t pin down the cause yourself.
How much does it cost to migrate a website?
Website migration can cost nothing to a few hundred dollars, depending on how complex the website is and whether you handle the move yourself or hire someone to do it.
If your new hosting provider offers free website migration, you may not need to pay anything beyond your new hosting plan. A simple WordPress website is also relatively straightforward to move yourself if you are comfortable handling files, databases, and DNS settings.
For more complex websites, such as large ecommerce stores, websites with custom configurations, or sites with multiple email accounts, you may need to pay a developer or migration specialist. The cost will depend on the size of the website, the amount of data being moved, and how much technical work is required.
Before paying for migration, check whether your new hosting provider includes free migration support. This can save you both money and the risk of making mistakes during the move.
Ready to Move Your Website to a New Web Host?
Moving to a new web host doesn’t have to mean rebuilding your website from scratch. A well-planned migration lets you move your existing site while keeping your domain, content, and business operations fully intact.
Here’s the short version:
- Choose the right hosting plan.
- Back up your website.
- Back up important email data.
- Move your website files.
- Move your database.
- Add the domain to the new host.
- Set up SSL.
- Test the website.
- Update DNS.
- Check email.
- Monitor the website after the migration.
If your current hosting is holding your website back, it’s worth looking at what a better environment could offer as your site continues to grow.